This guide explains the Send to Shopify button, available on the Account, Product, Order, Draft Order, and Opportunity objects. This feature enables seamless synchronization of records from Salesforce to Shopify for all these objects.
The Send to Shopify button is an exclusive feature of Sync Made Easy Pro, providing enhanced integration capabilities across these objects for a smoother workflow.
SEND TO SHOPIFY- ACCOUNT
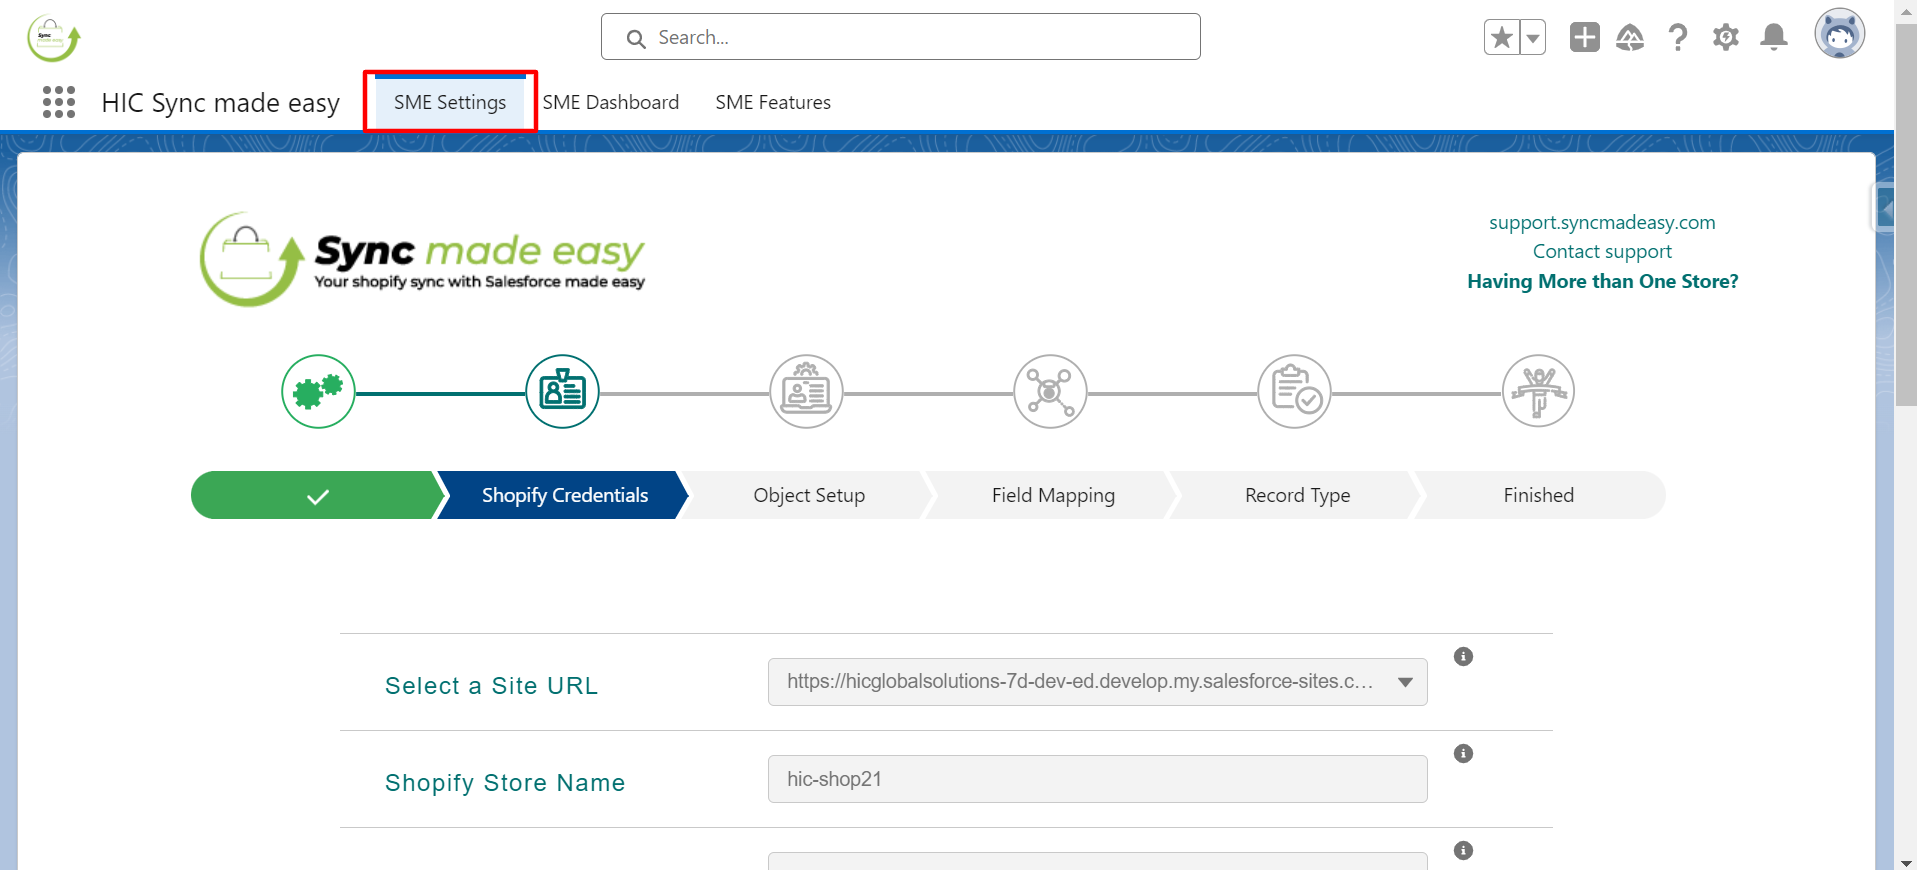
Step 1: Log in to Salesforce and navigate to “SME Settings”.
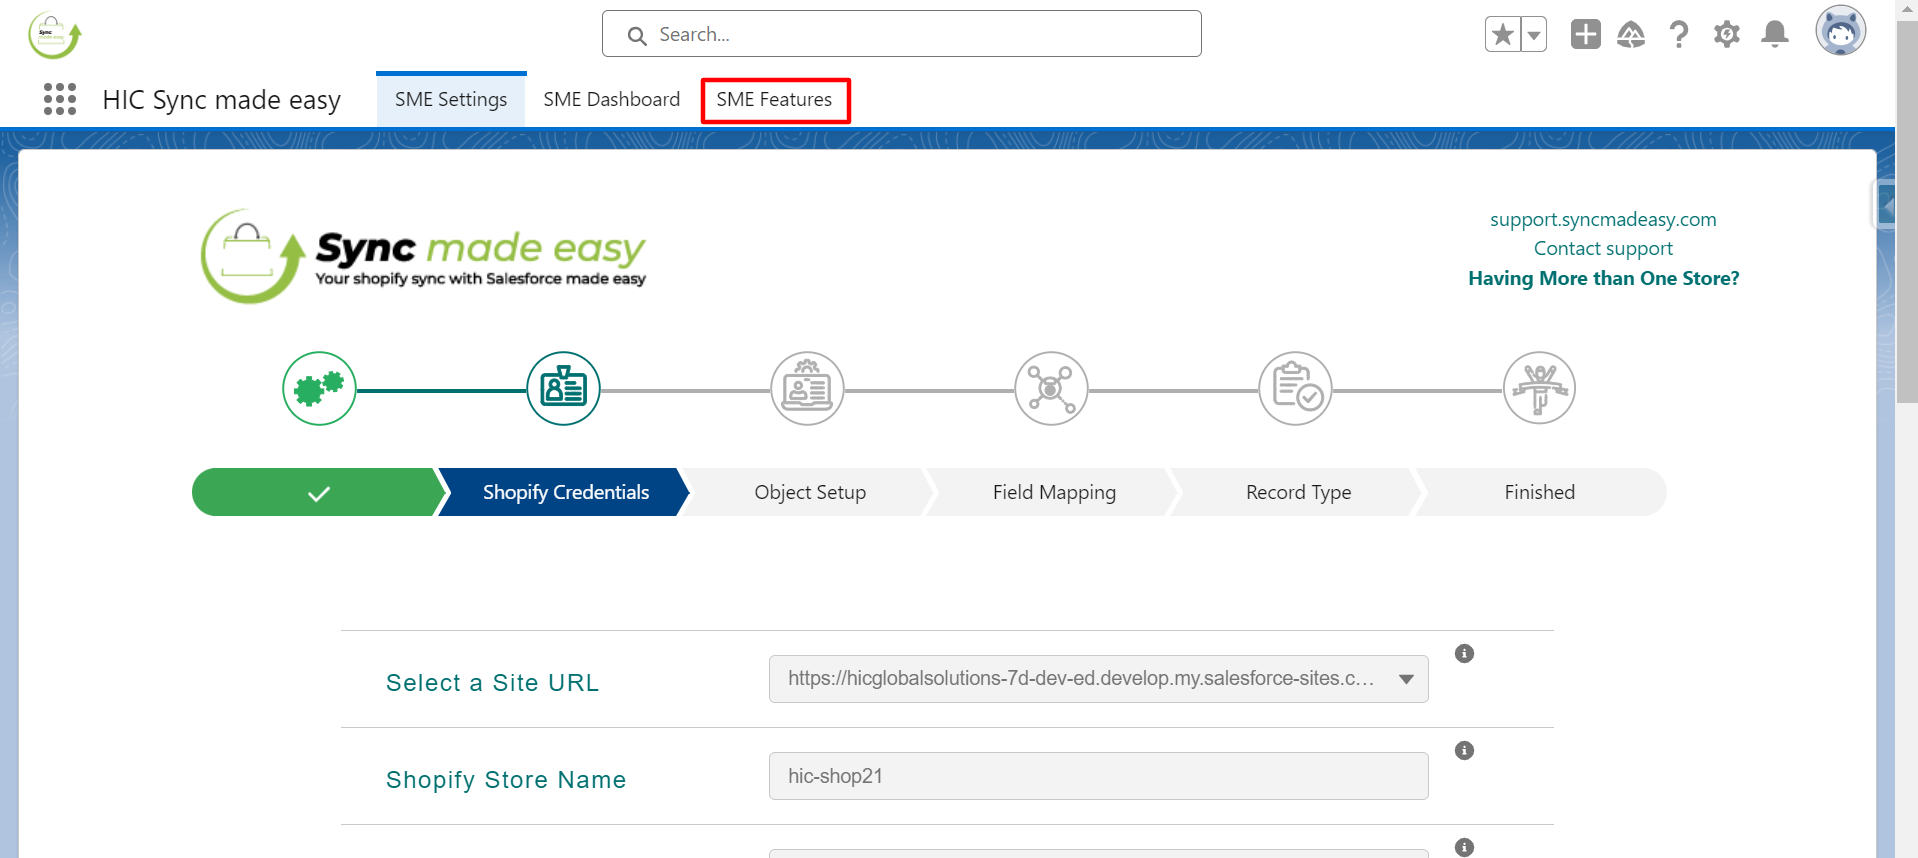
Step 2: Click on “SME Feature”.
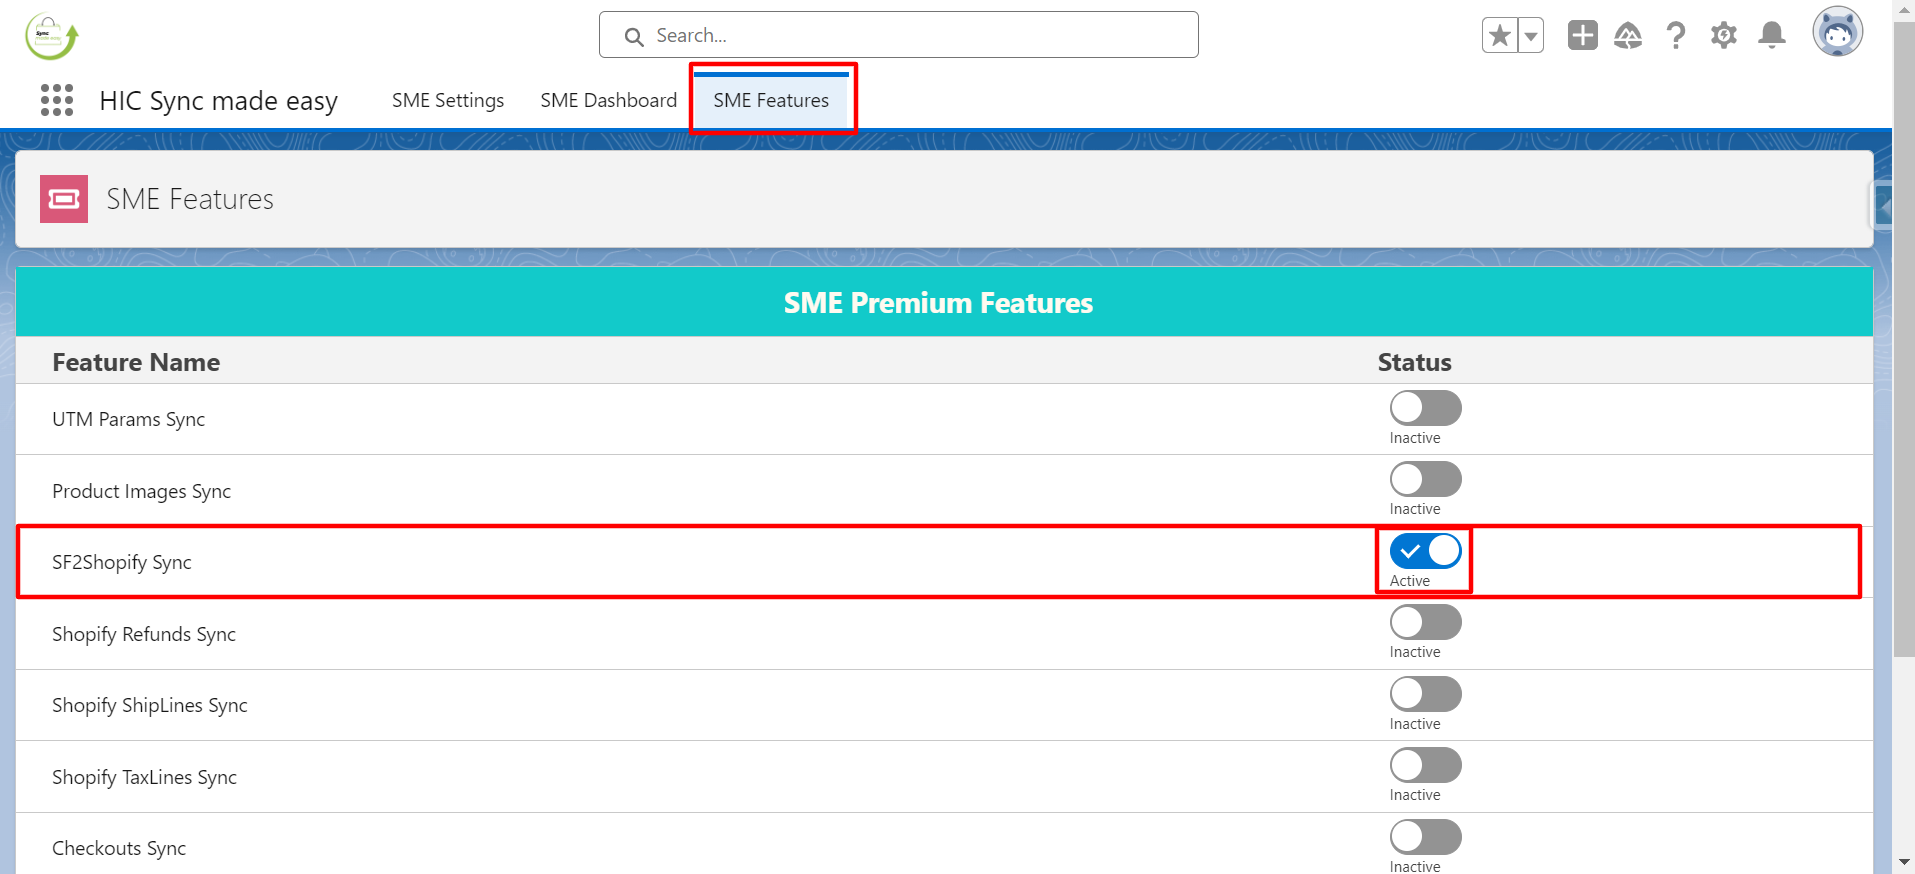
Step 3: Enable the “SF2 Shopify Sync” feature and confirm by clicking OK, I Understand.
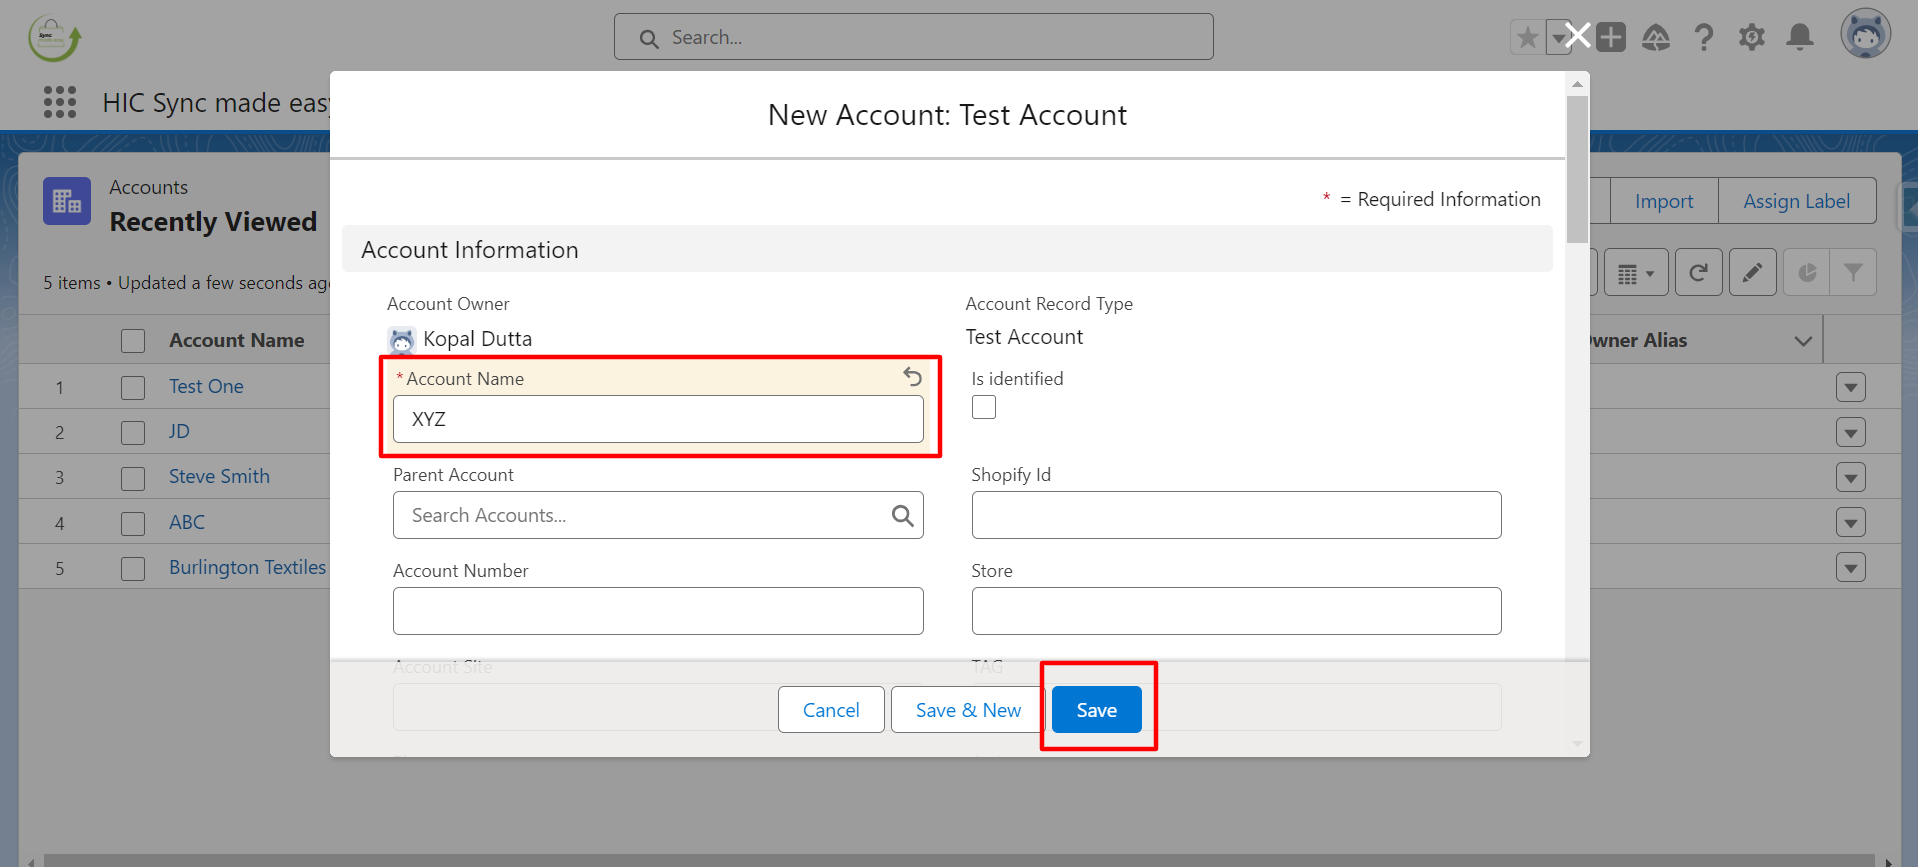
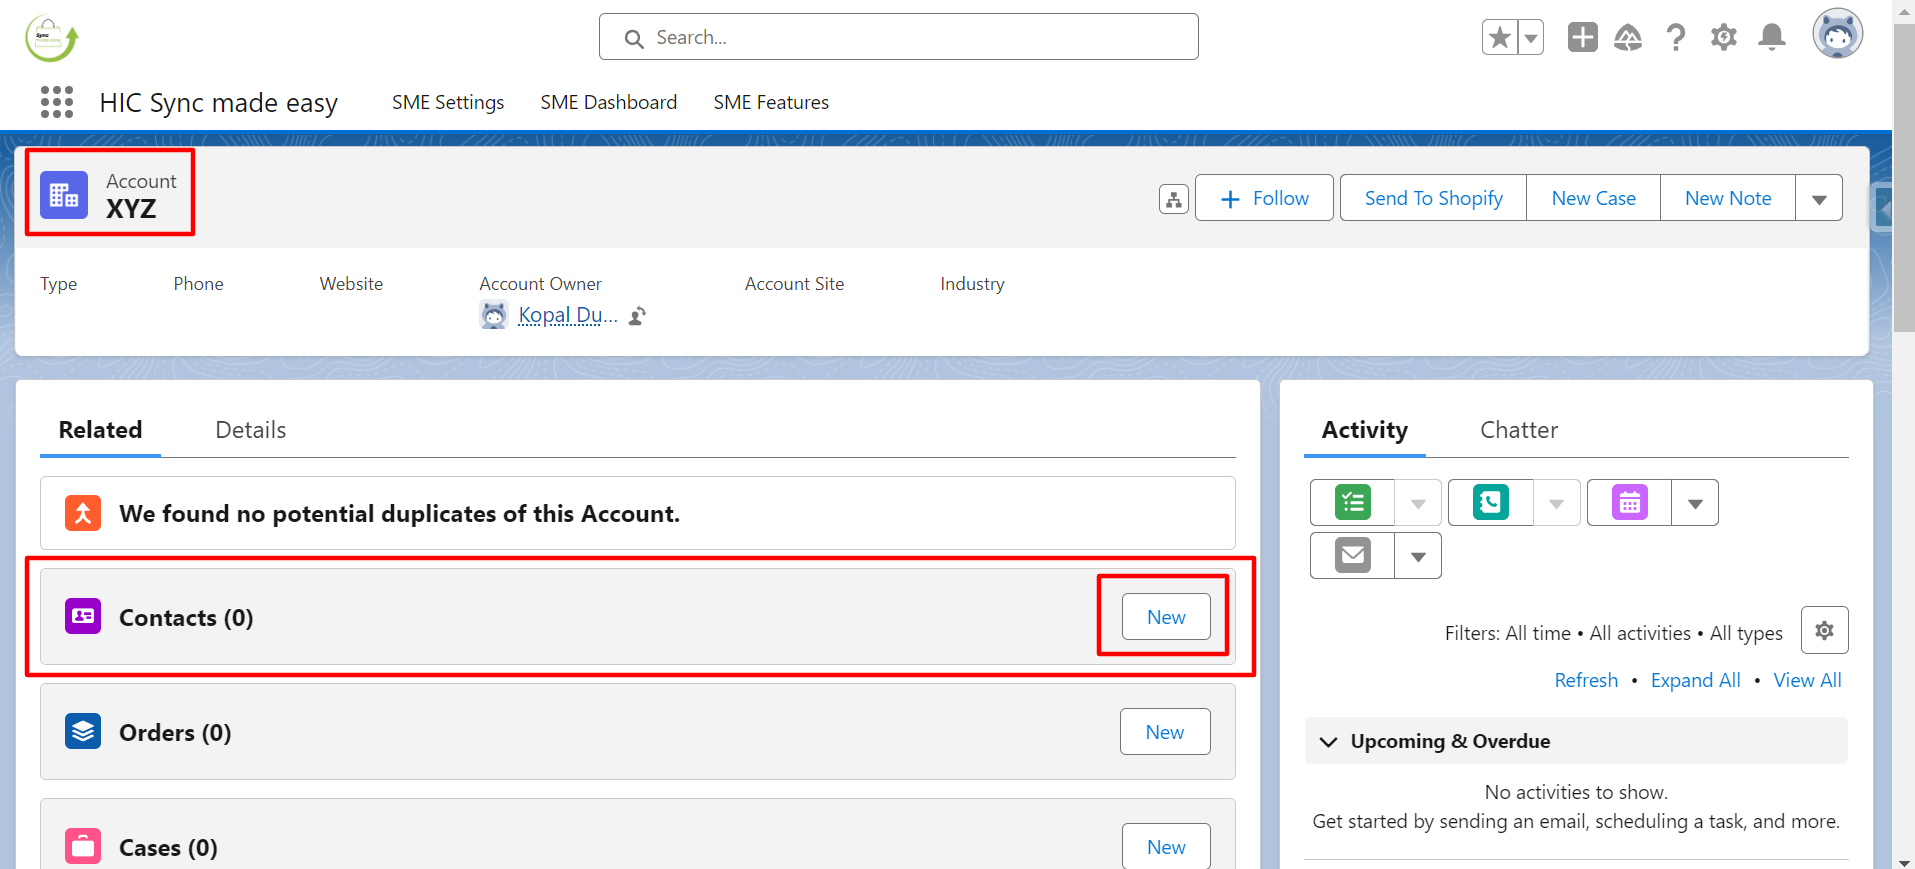
Step 4: Navigate to the Salesforce Account page and create a new account named XYZ, then click Save.
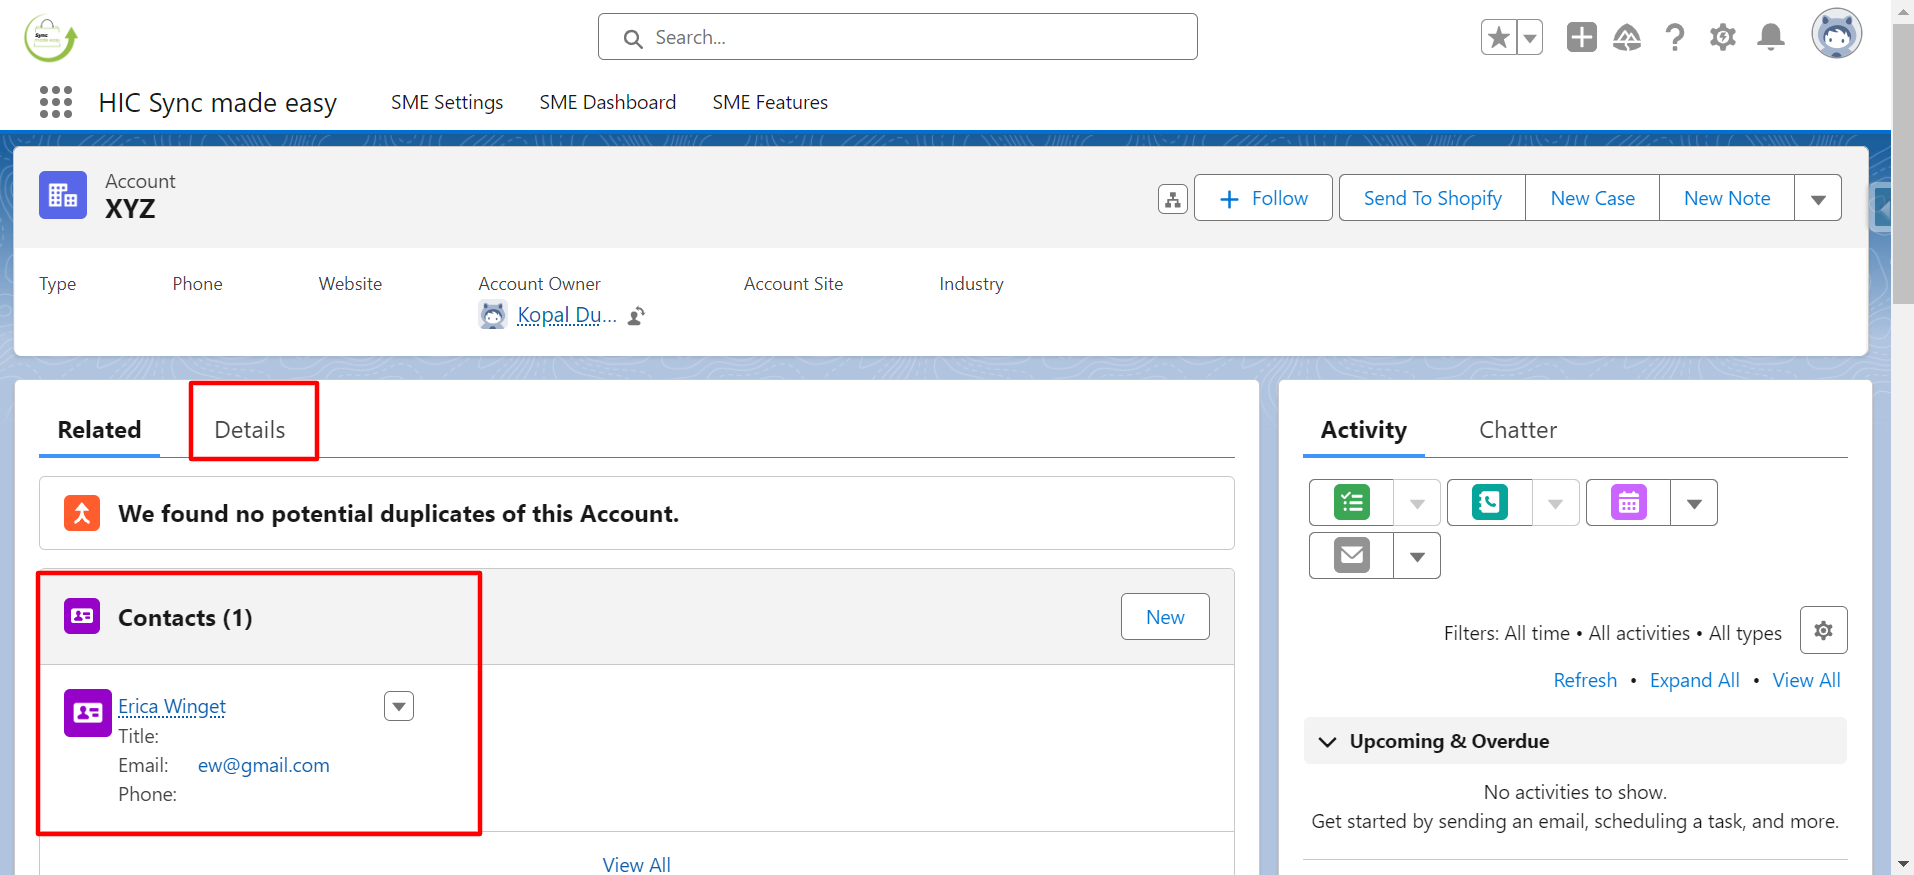
Step 5: Under this account, create a new contact by clicking the New button in the Contact section.
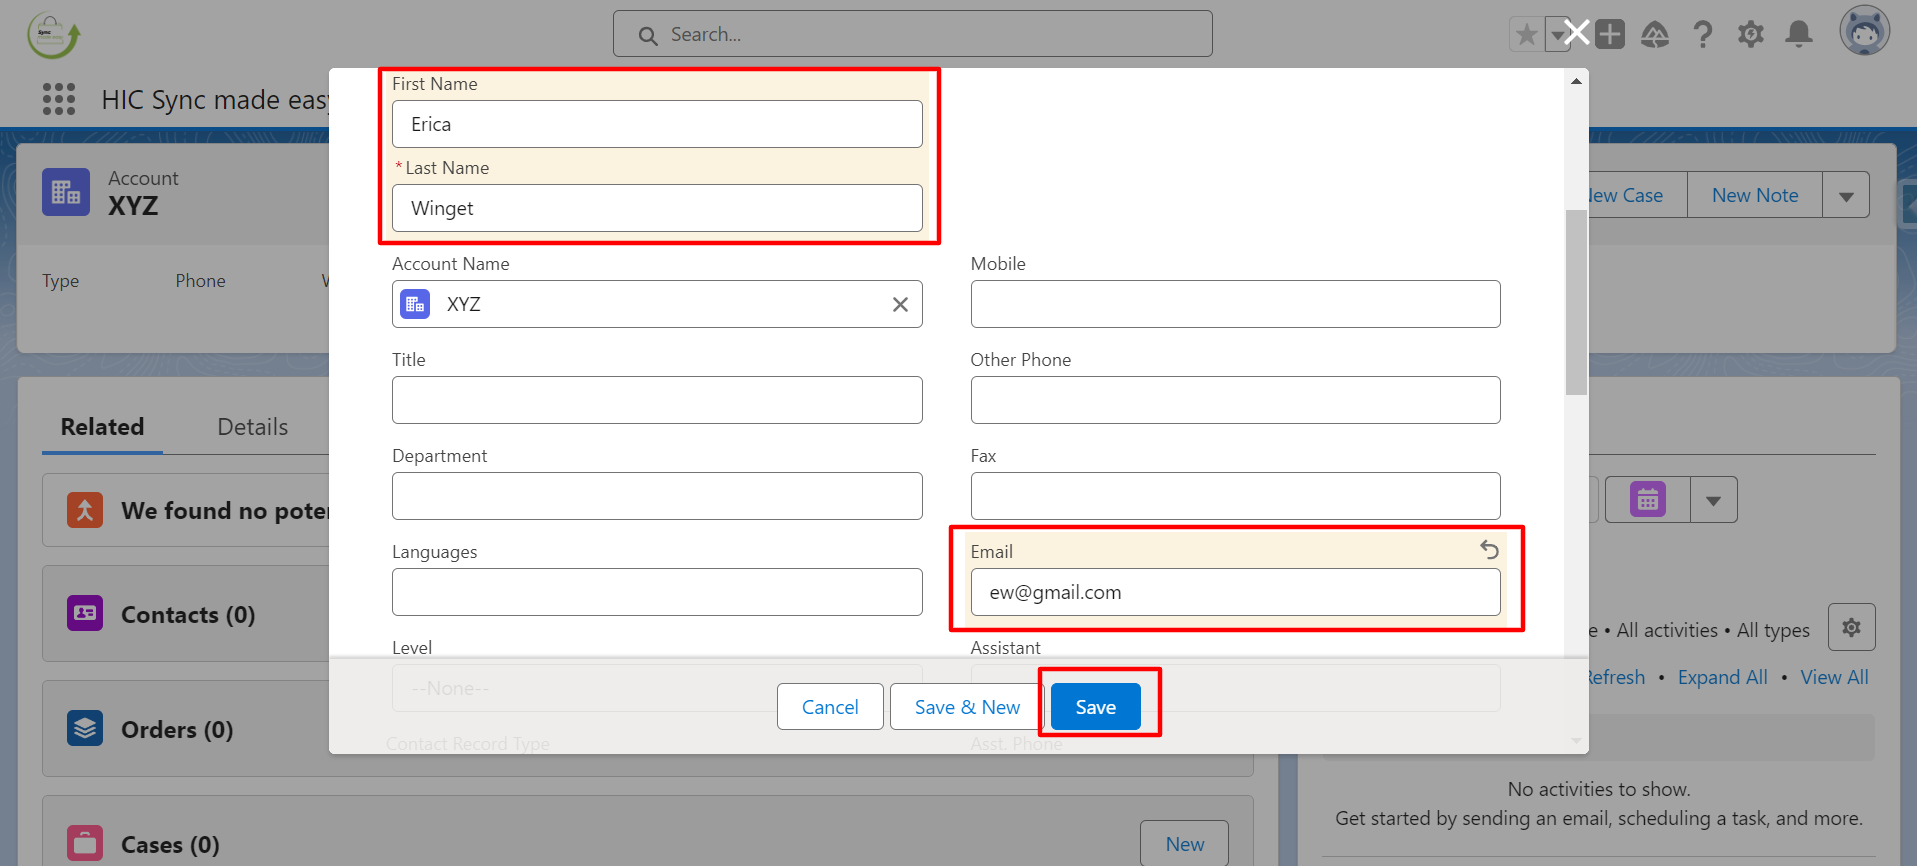
Step 6: Fill in the required details for the Contact, such as “First Name”, “Last Name”, and “Email ID”, and then click “Save”.
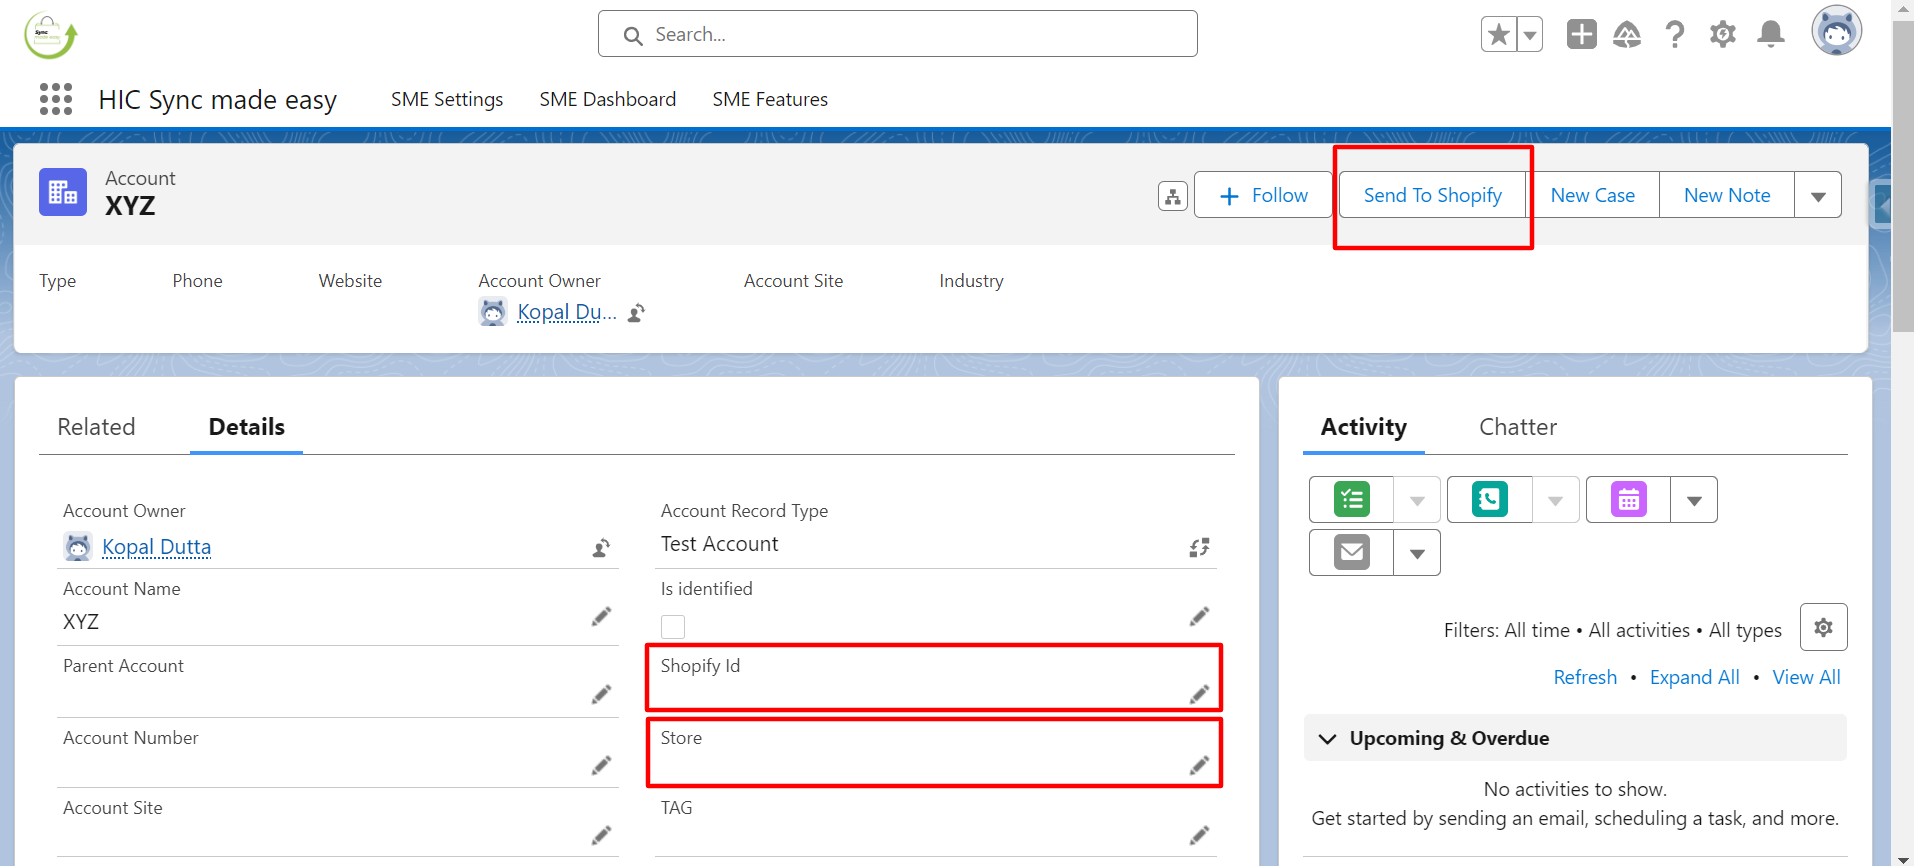
Step 7: Go to the details section of the Account.
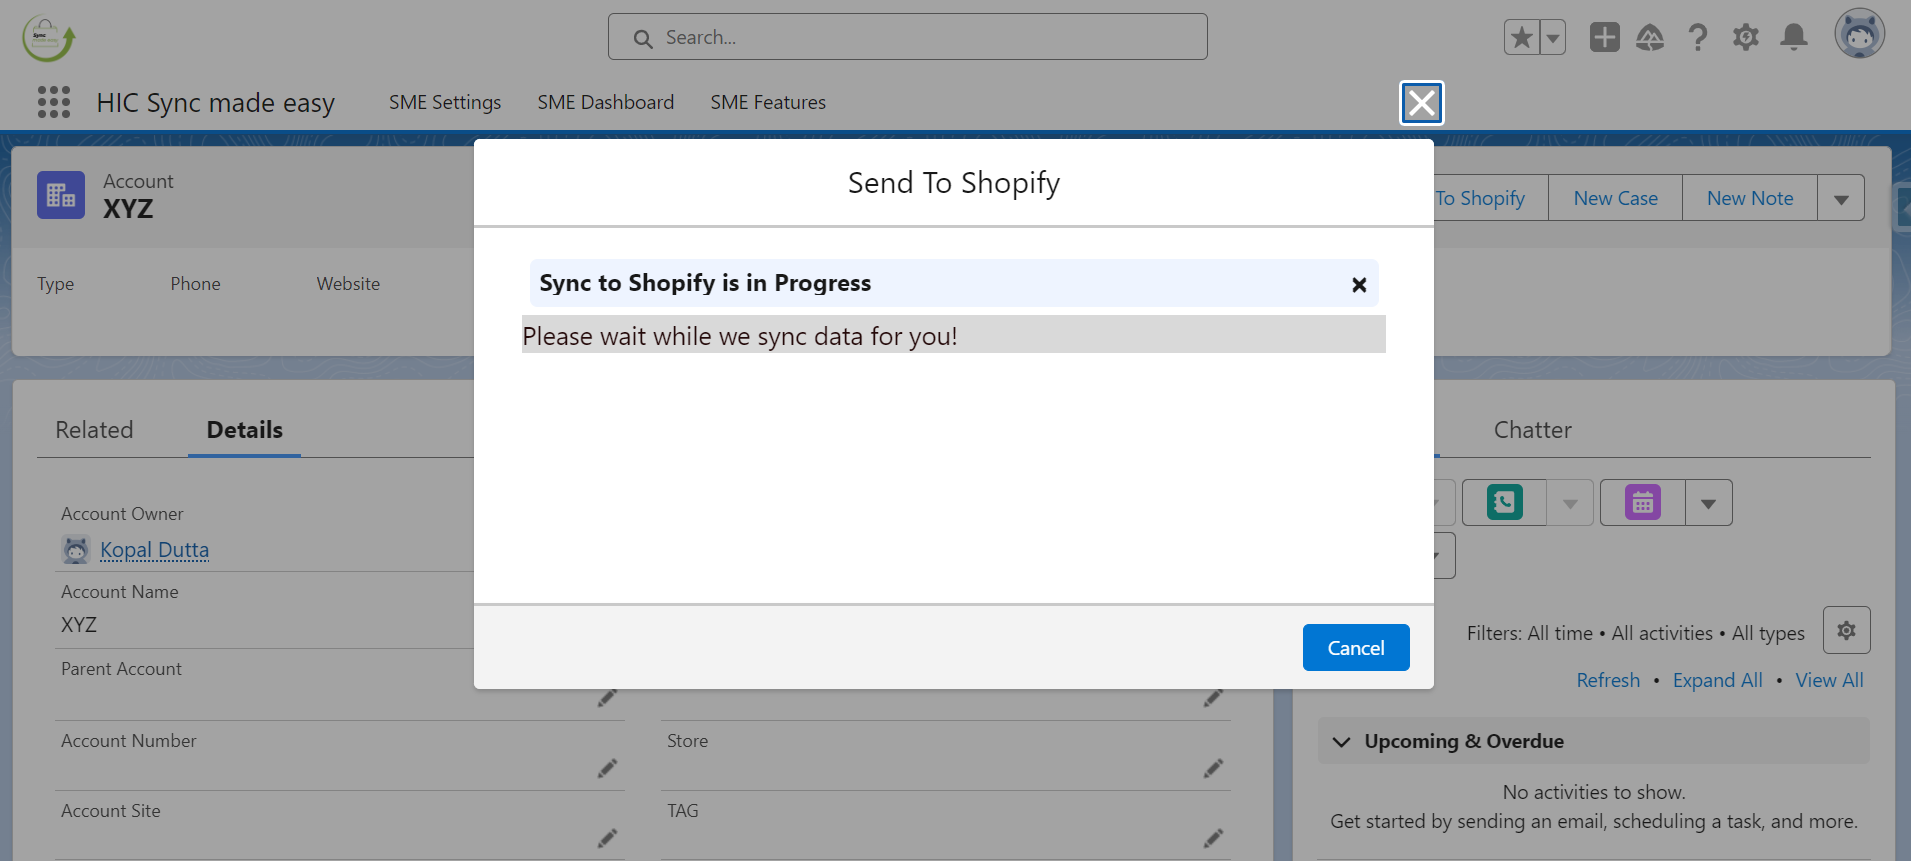
Step 8: Observe that the “Shopify ID” and “Store Name” fields are blank. Click on the “Send to Shopify” button to generate the Shopify ID and Store Name.
Step 9: Once the process is completed, the “Shopify ID” and “Store Name” will be populated.
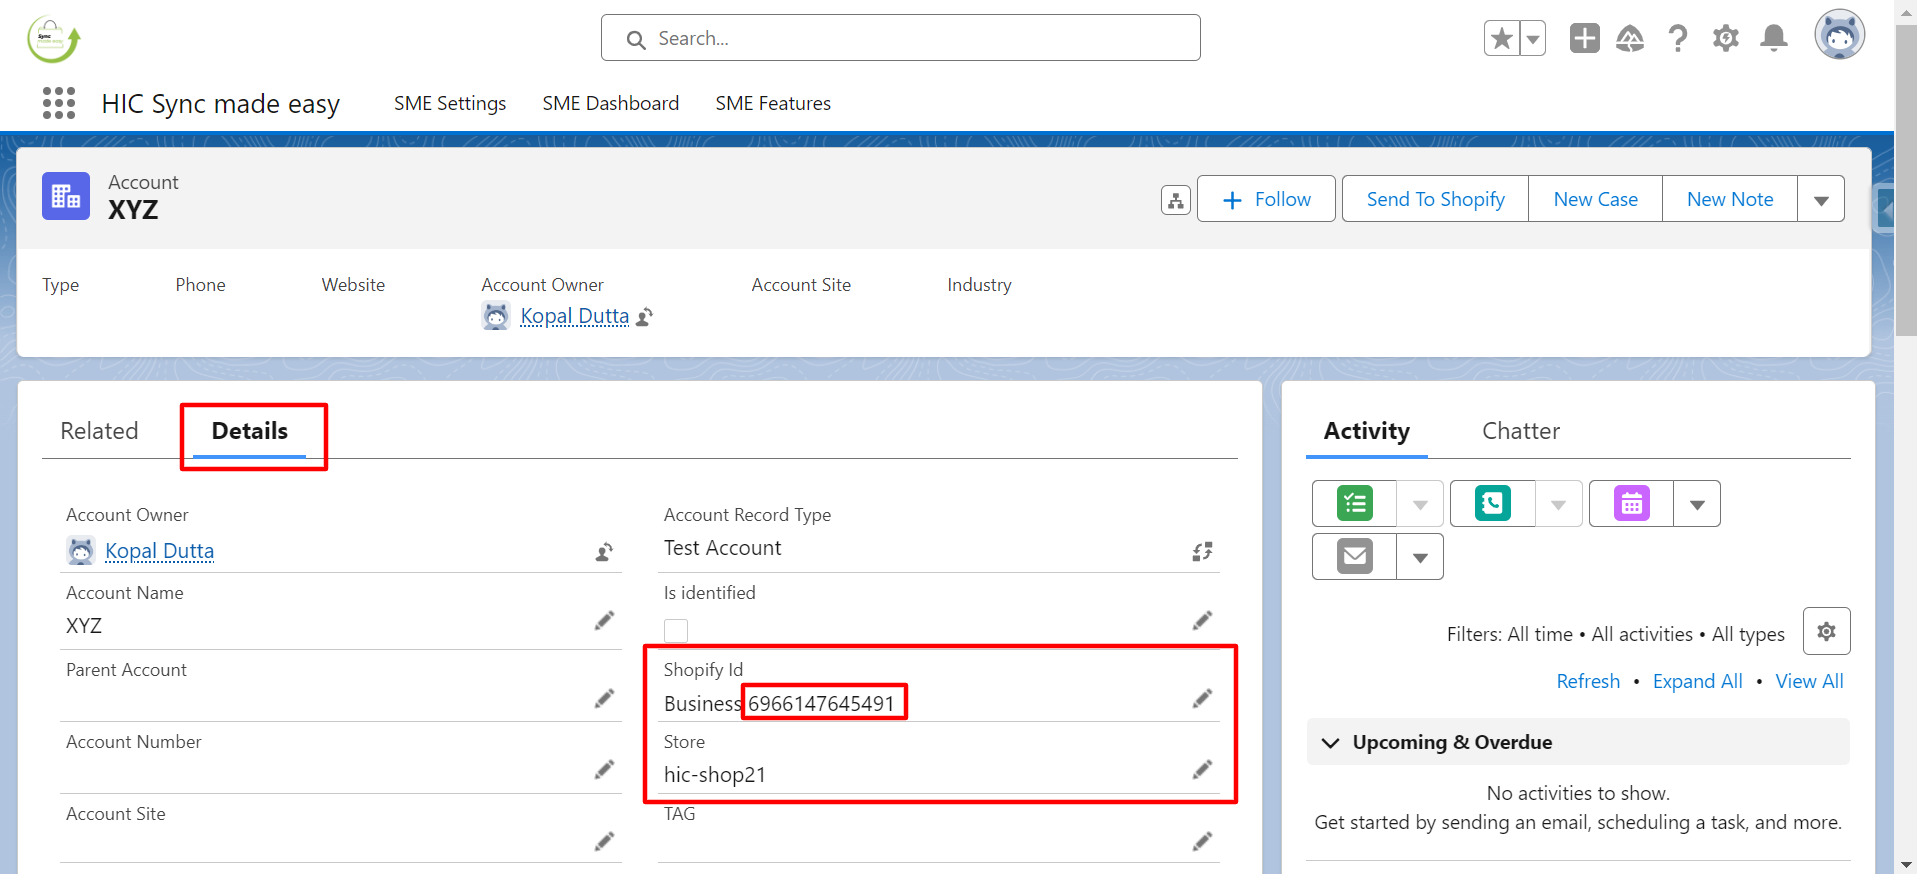
Step 10: Verify that the “Shopify ID” and “Store Name” fields are now populated.
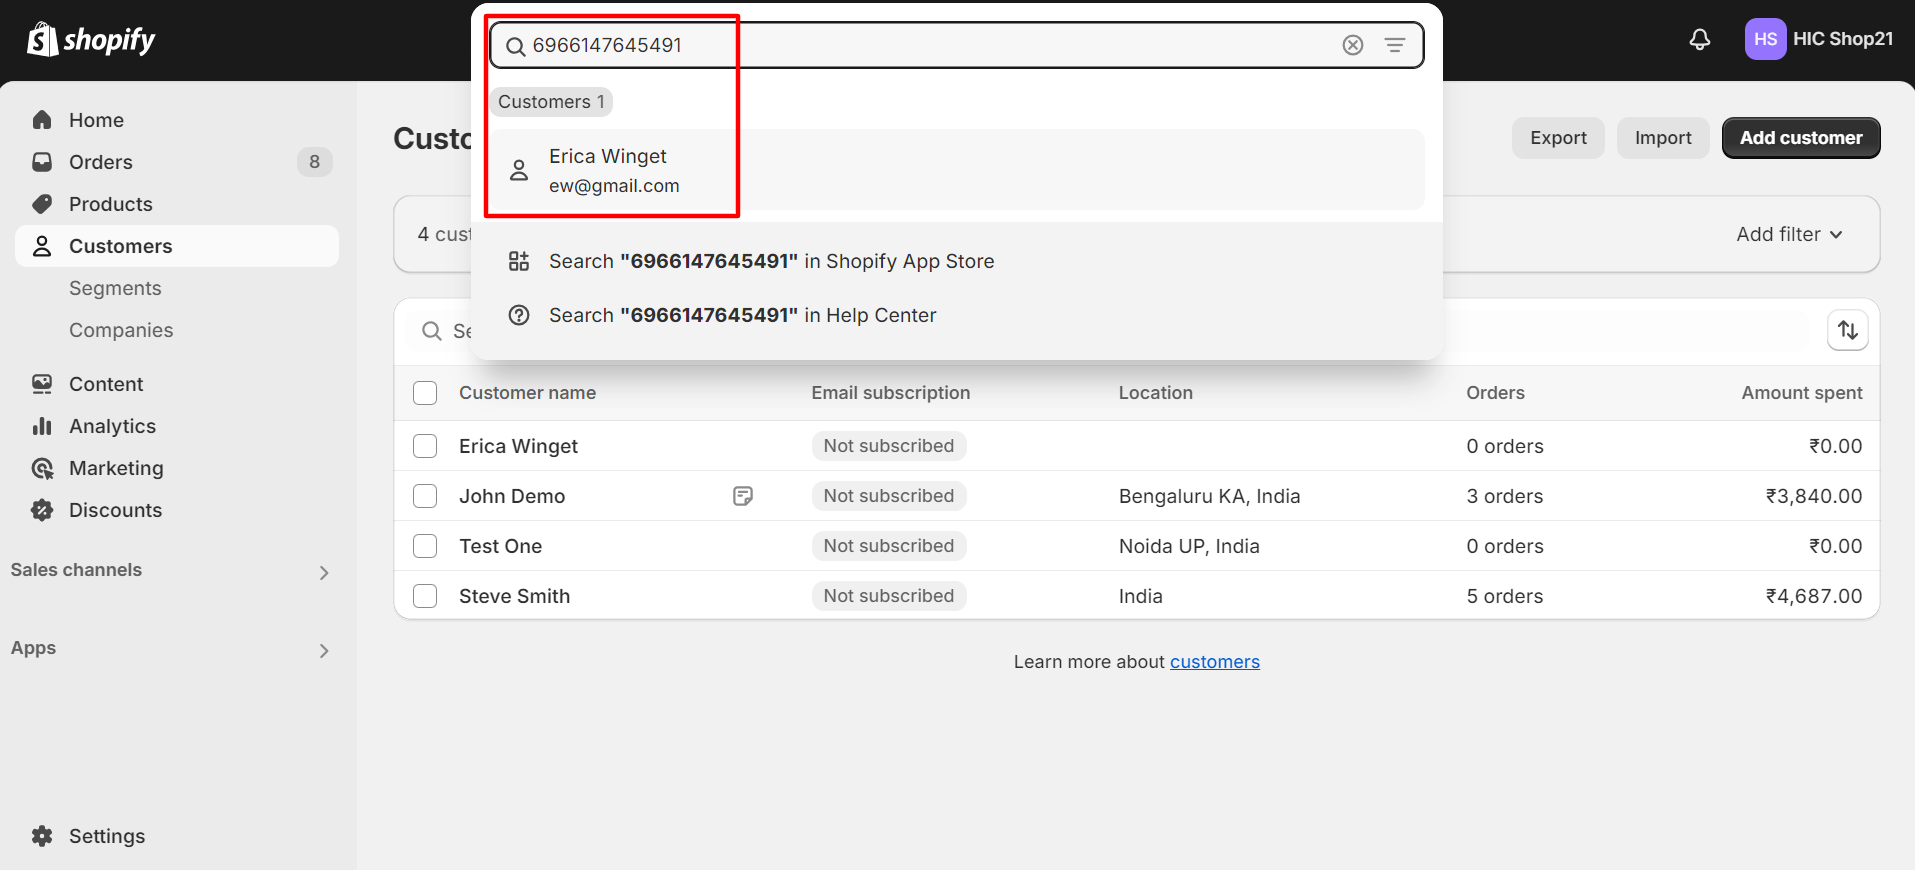
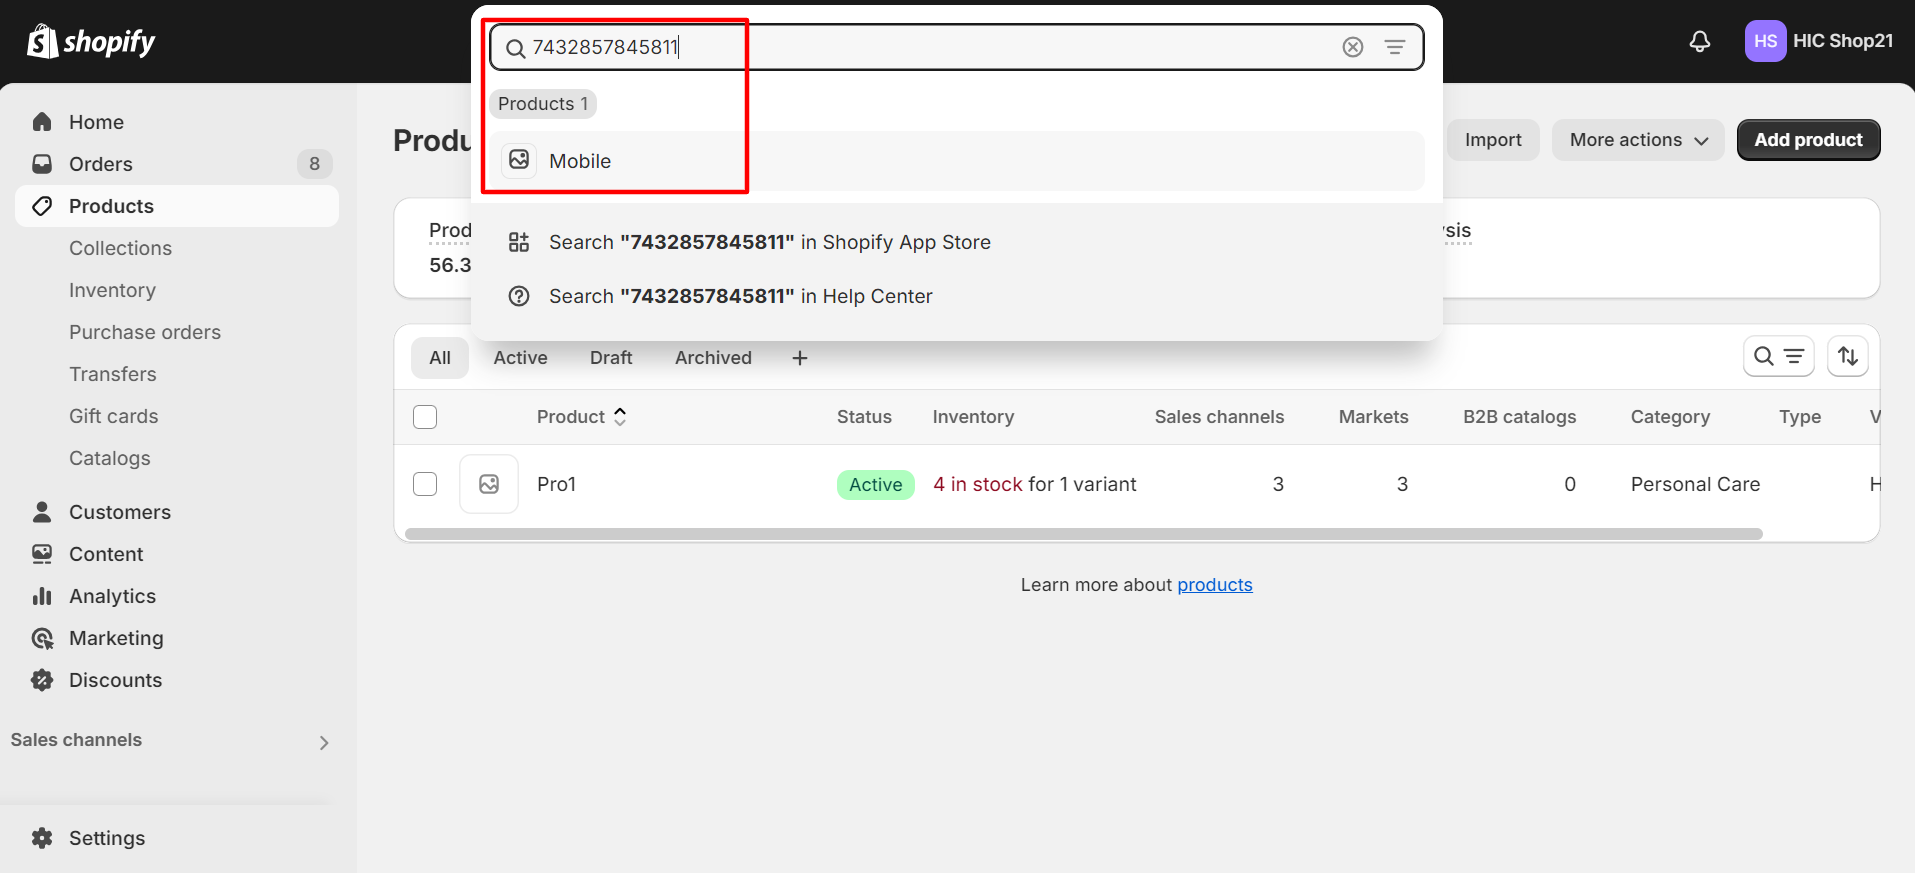
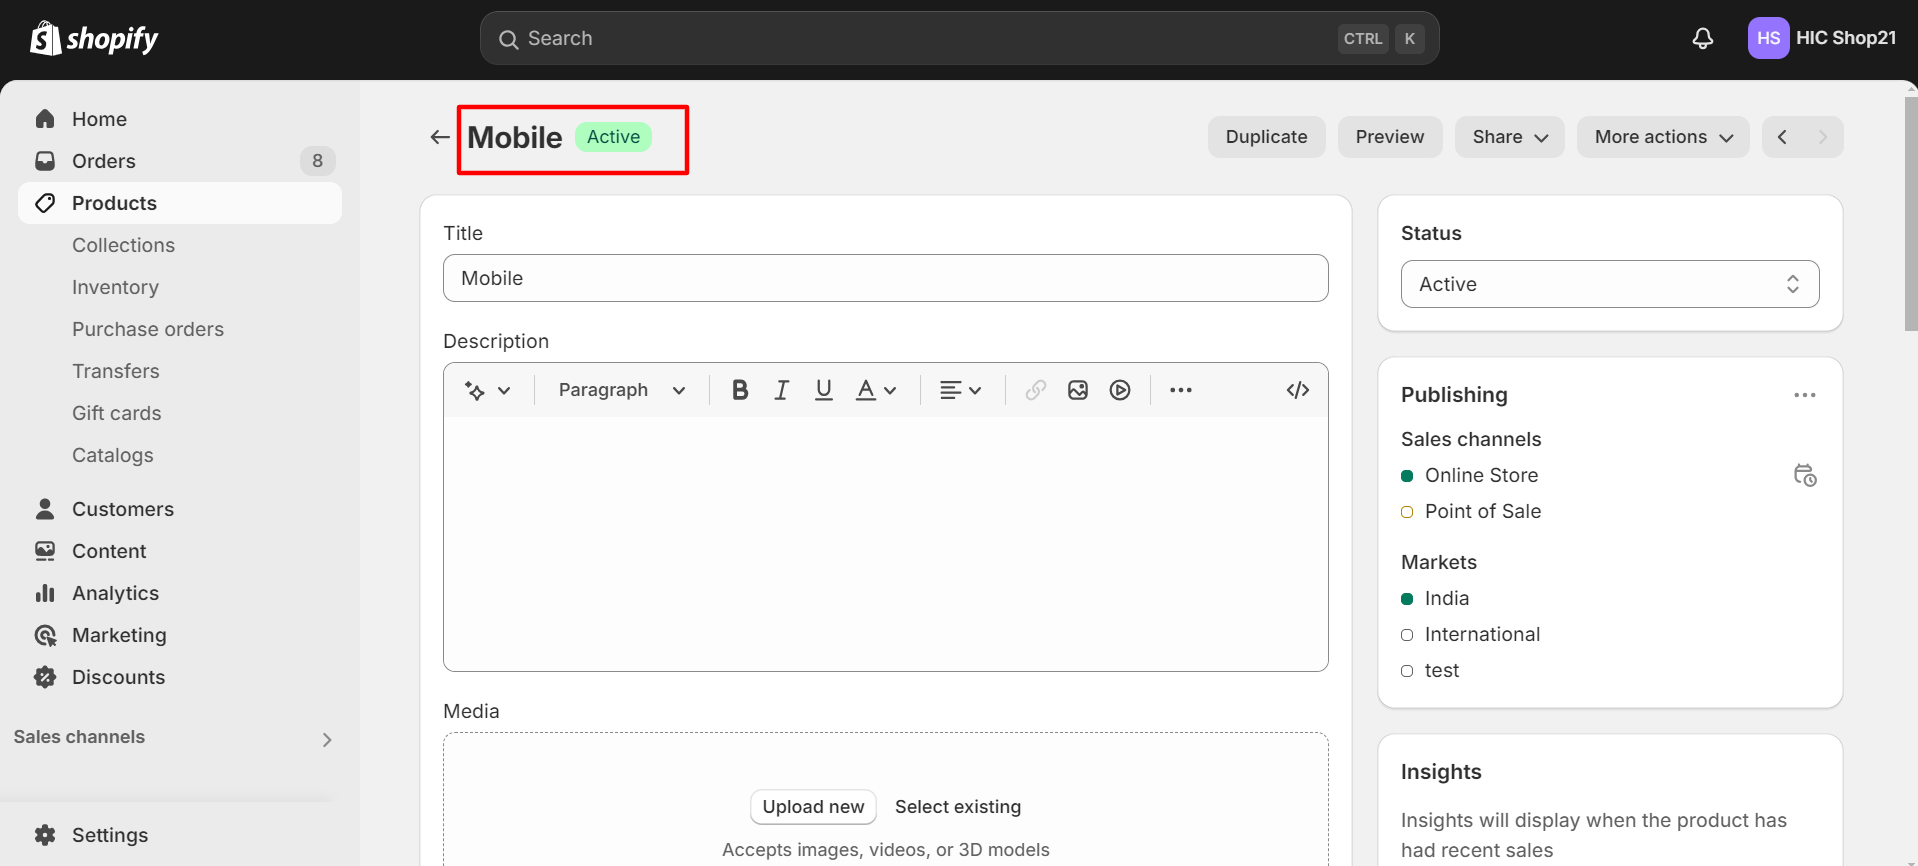
Step 11: Copy the Shopify ID and search for it in your Shopify store.
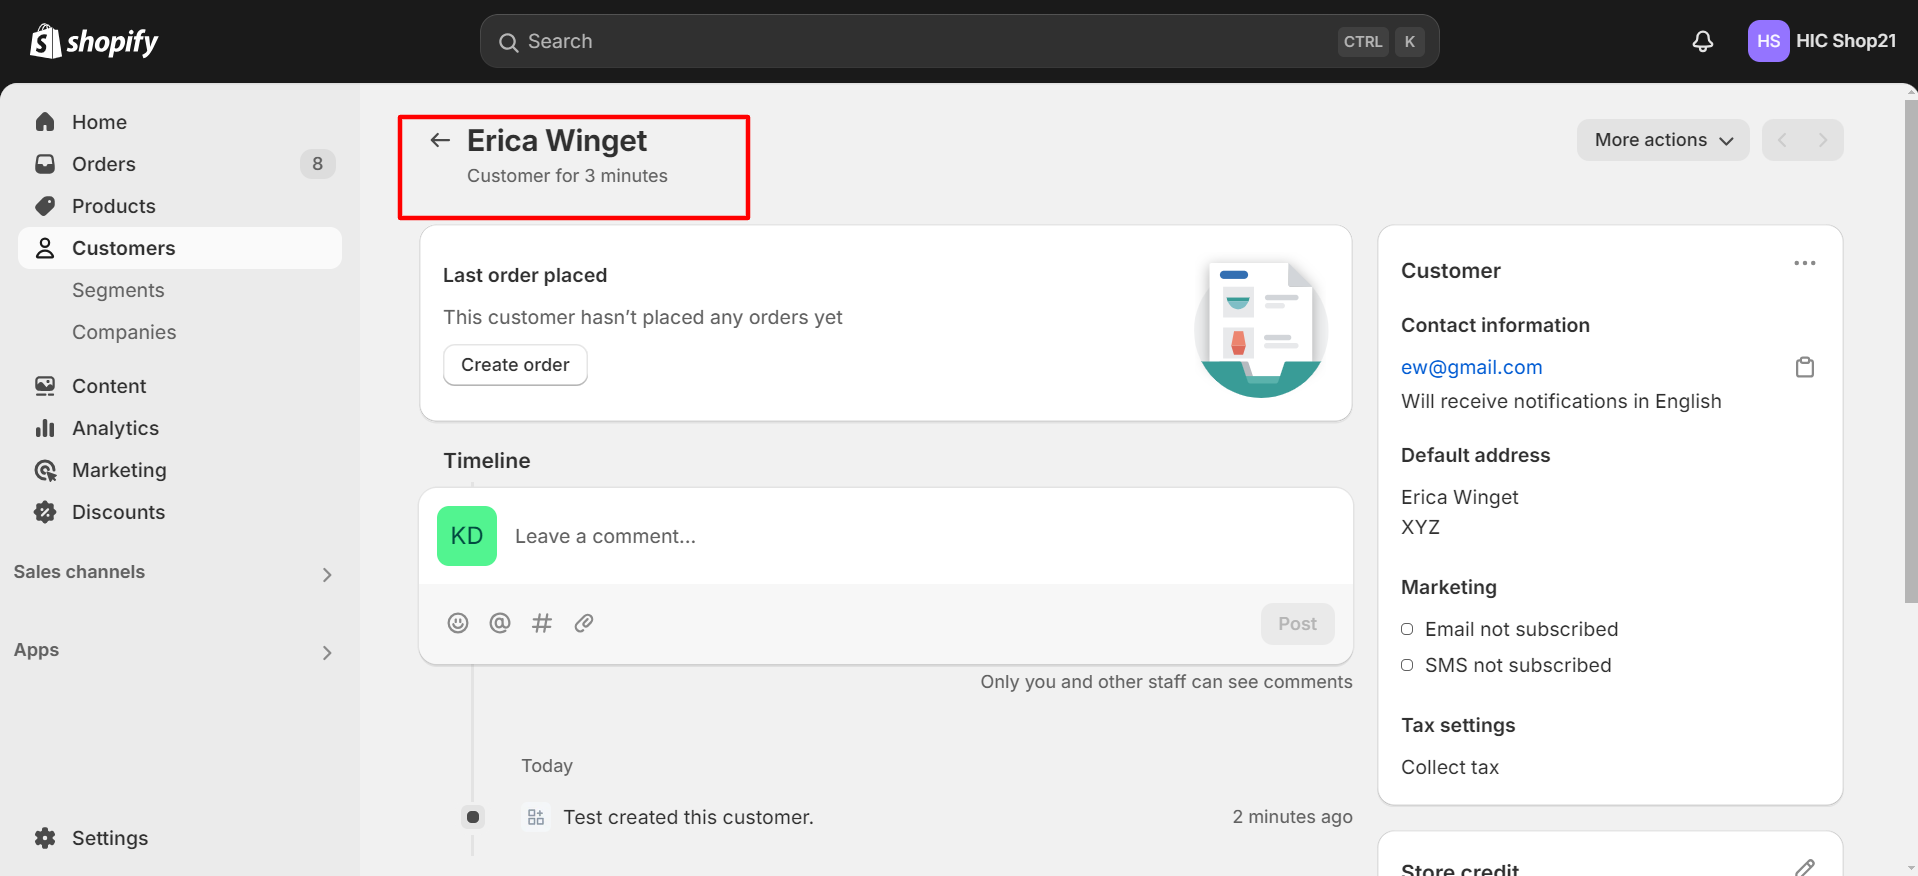
Step 12: Confirm that the account has been successfully synced to Shopify using the Send to Shopify feature.
This concludes the functionality of the Send to Shopify button on the Account object.
SEND TO SHOPIFY- PRODUCT
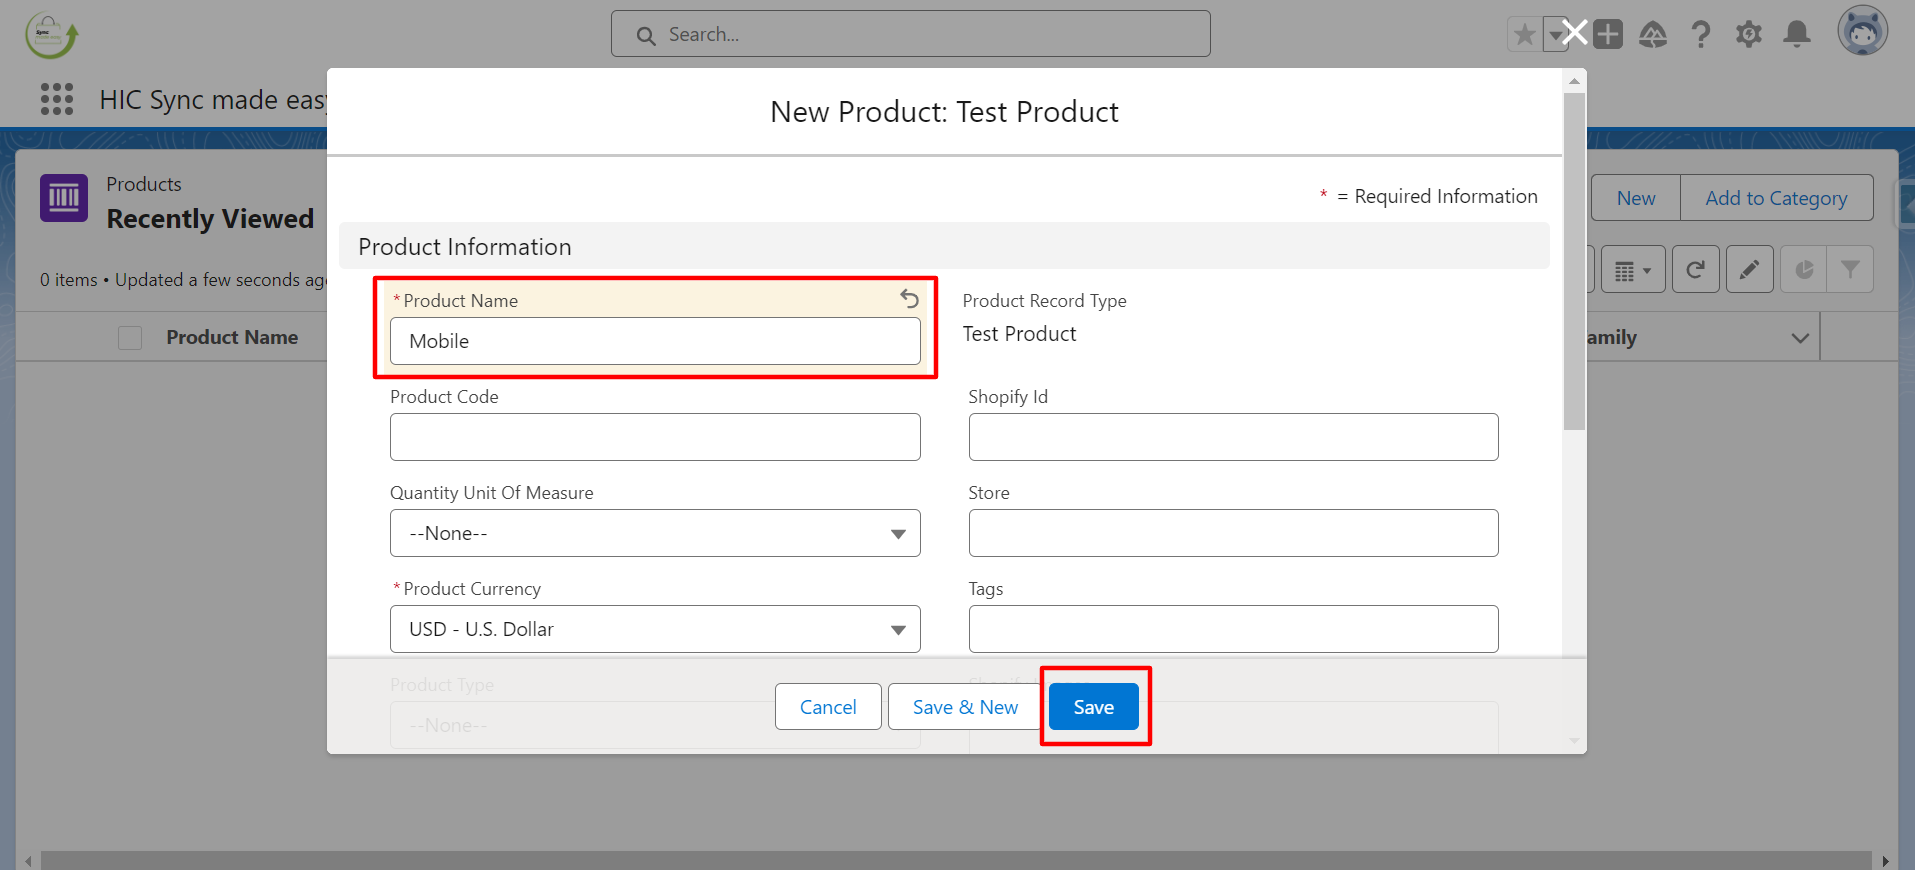
Step 1: Create a product in Salesforce.
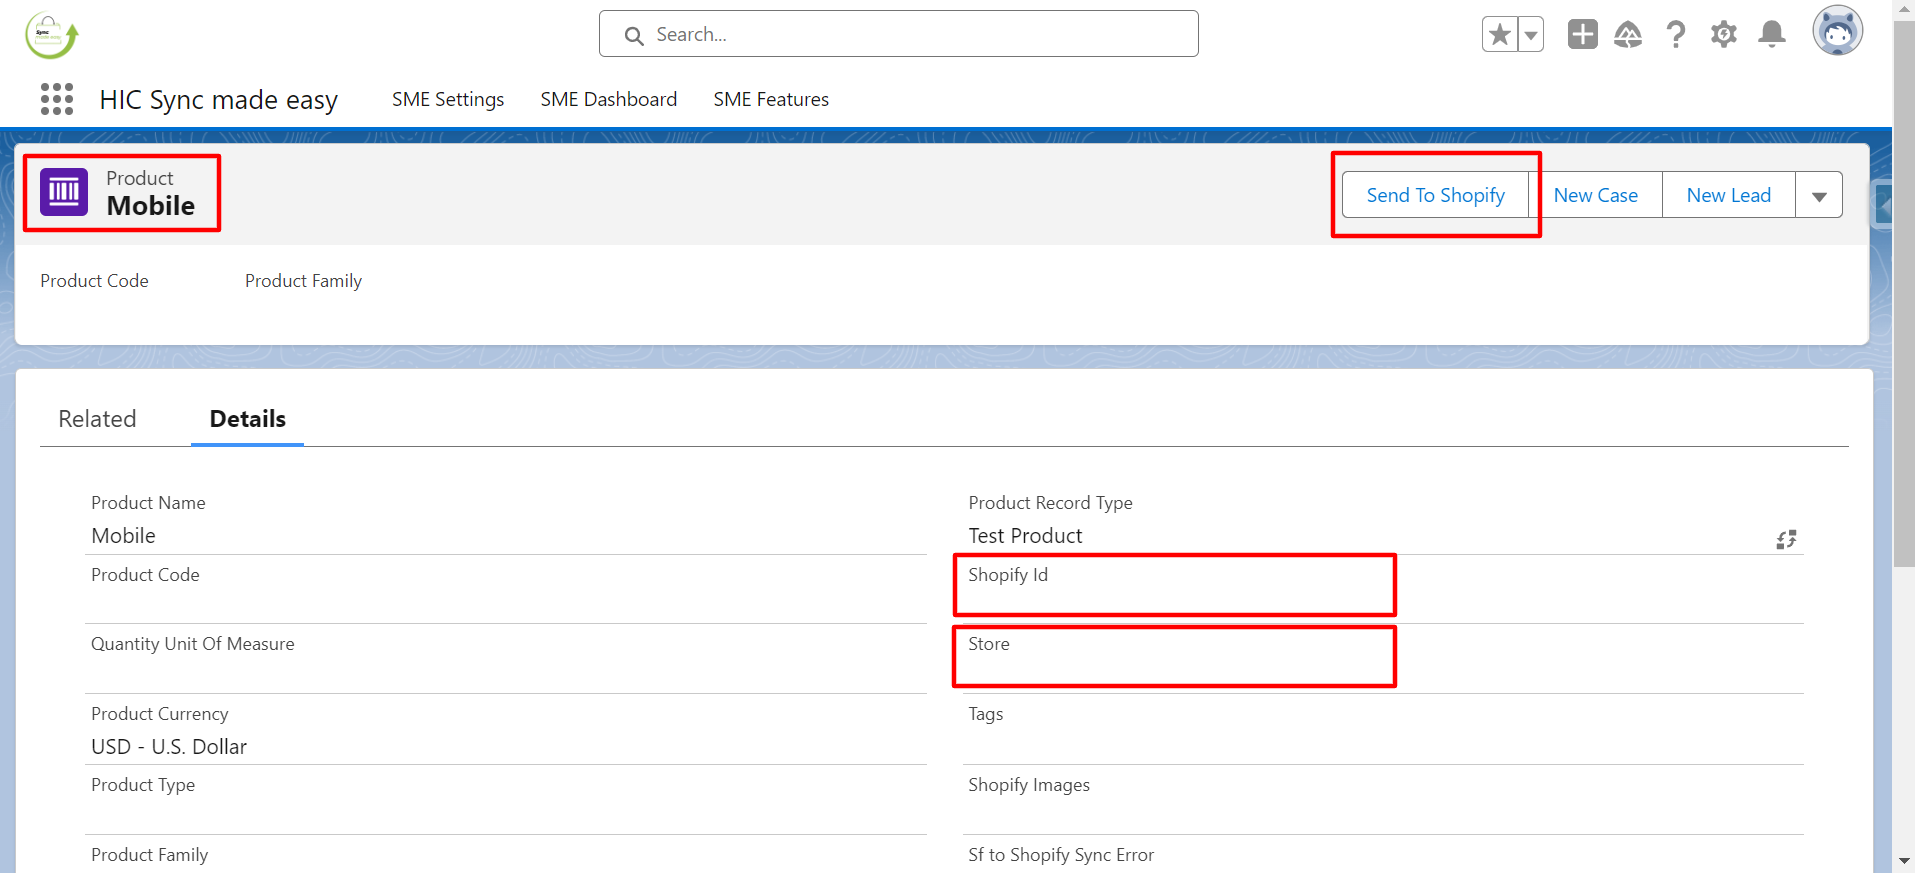
Step 2: Observe that the “Shopify ID” and “Store Name” fields are blank. Click on the “Send to Shopify” button to generate the Shopify ID and Store Name.
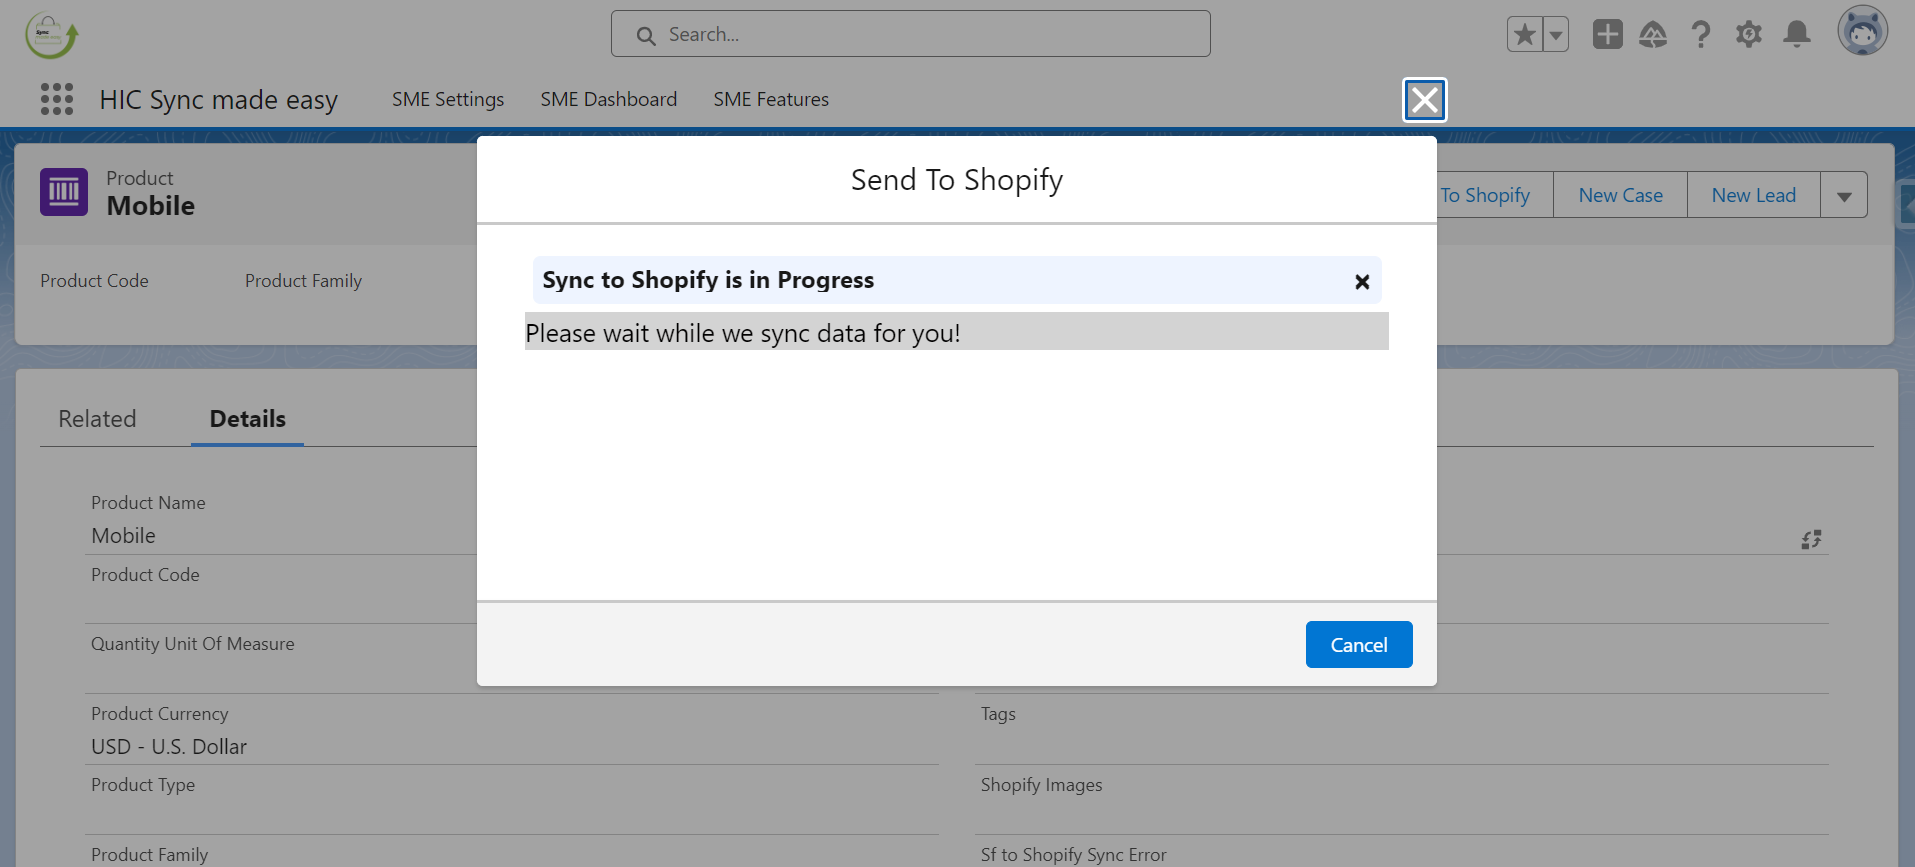
Step 3: Once the process is completed, the “Shopify ID” and “Store Name” fields will be populated.
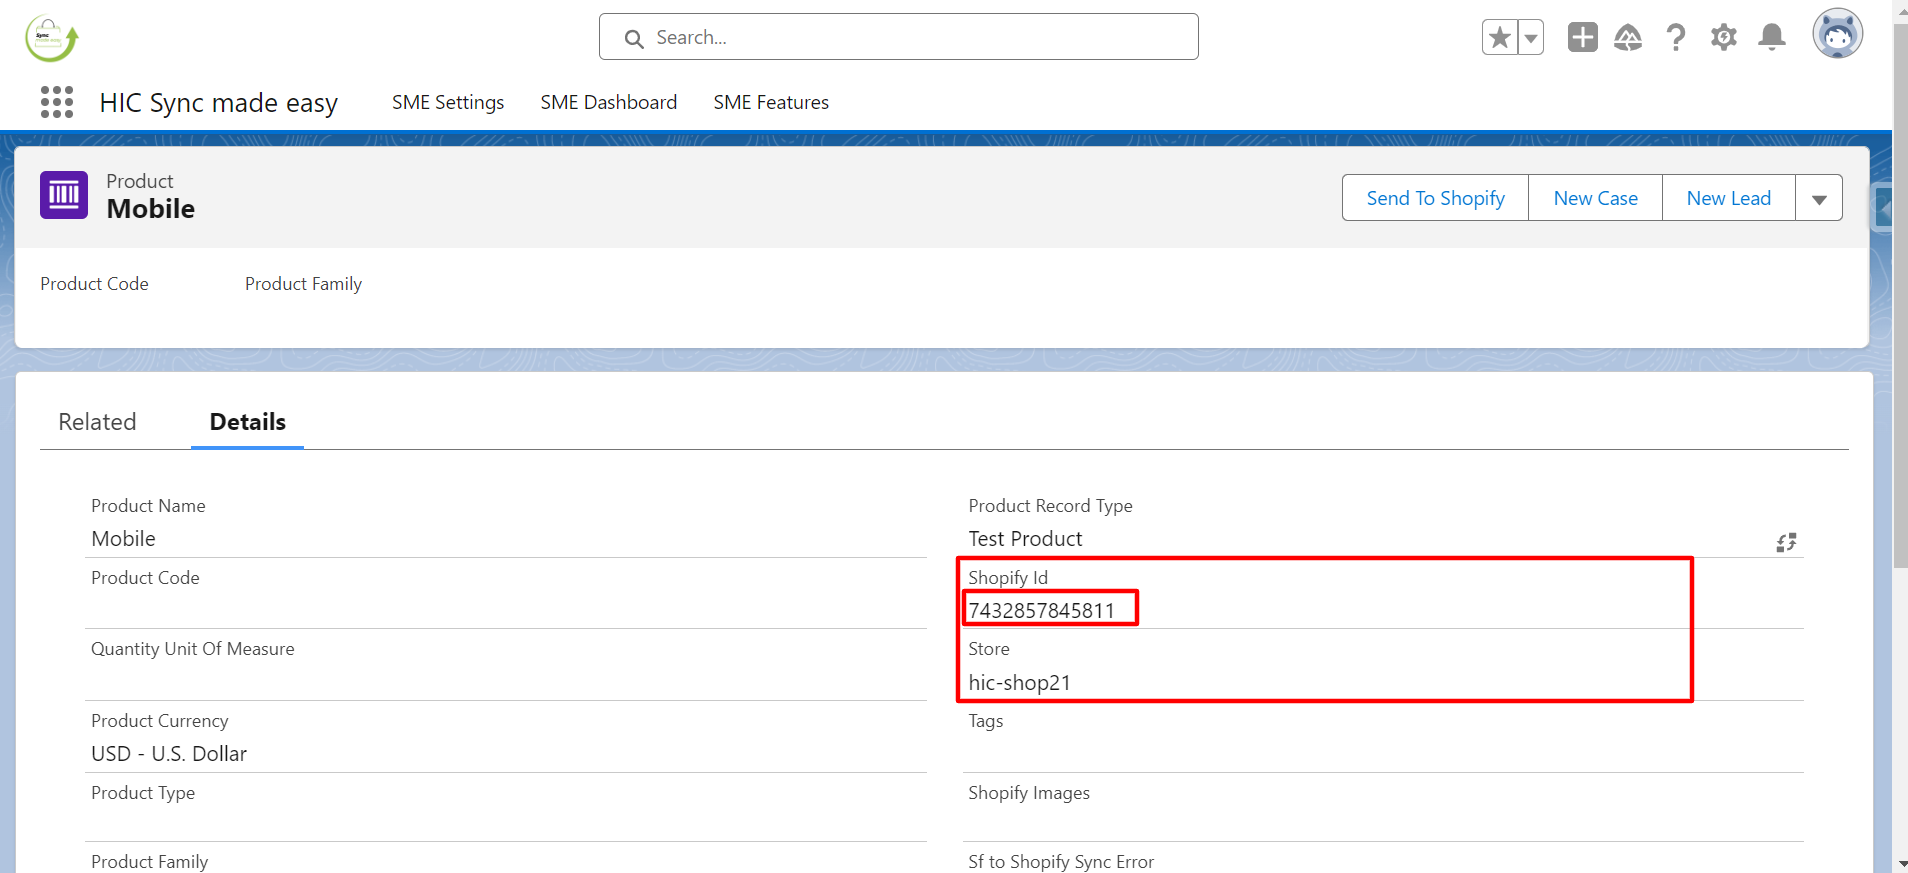
Step 4: Verify that the “Shopify ID” and “Store Name” fields are now populated.
Step 5: Copy the “Shopify ID” and search for it in your Shopify store.
Step 6: Confirm that the Product has been successfully synced to Shopify using the Send to Shopify feature.
This concludes the functionality of the Send to Shopify button for Products.
SEND TO SHOPIFY – ORDER
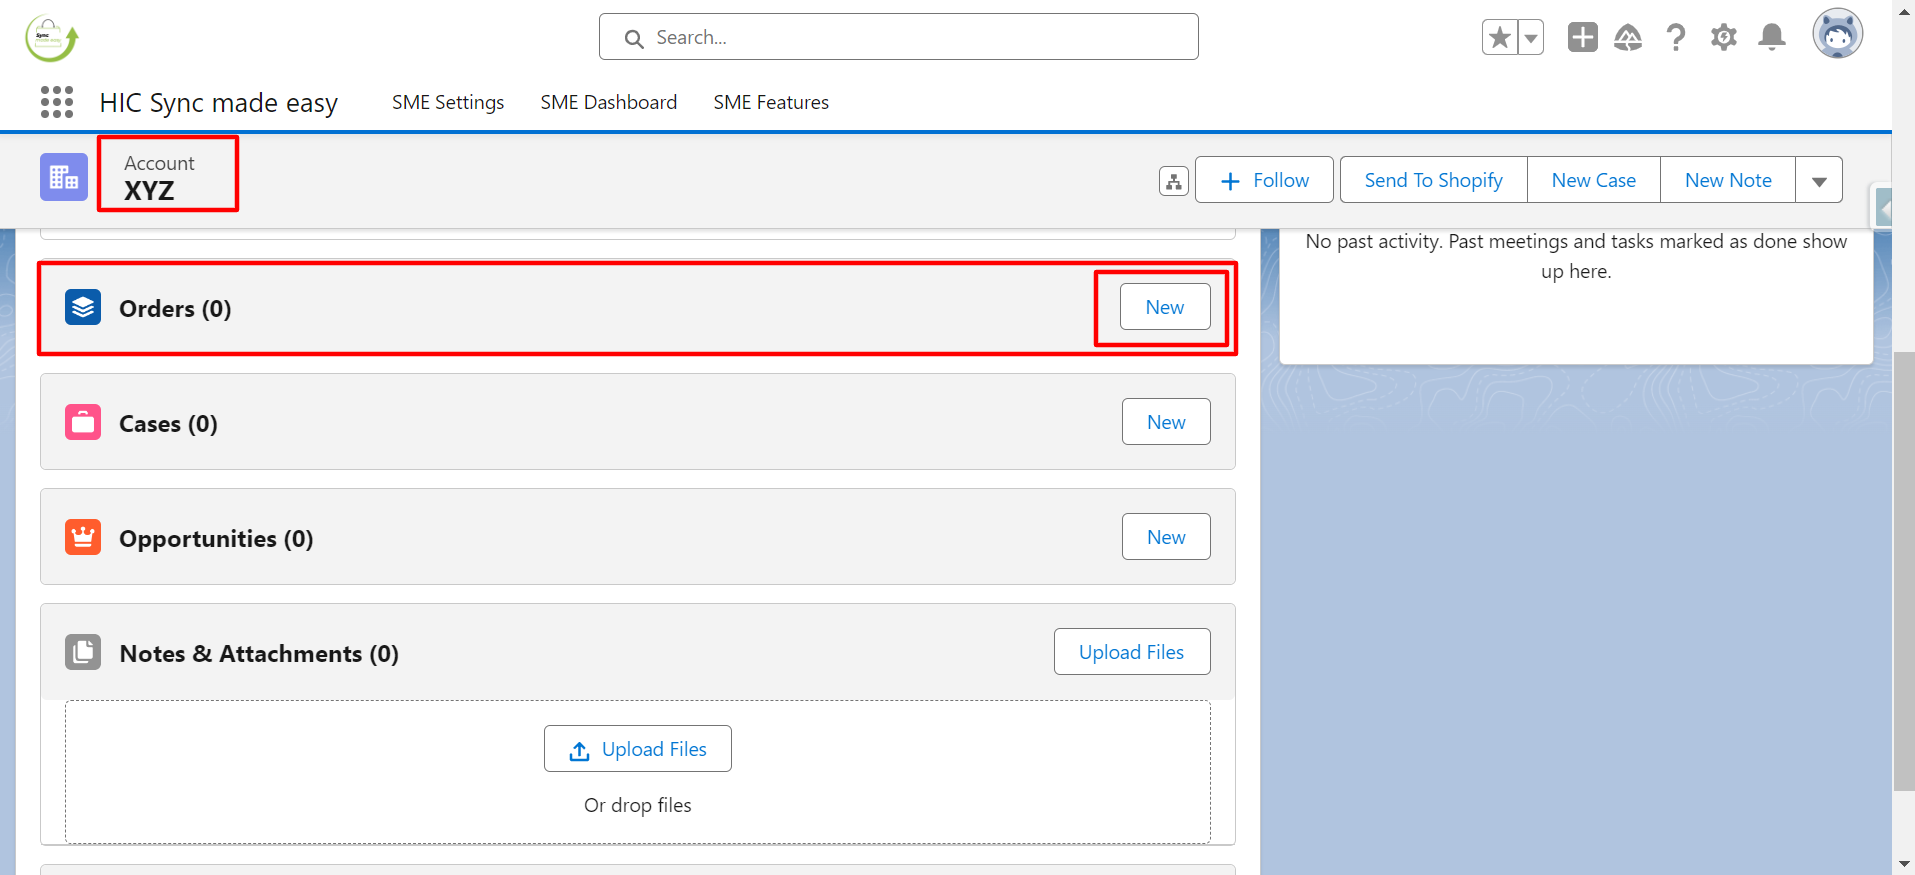
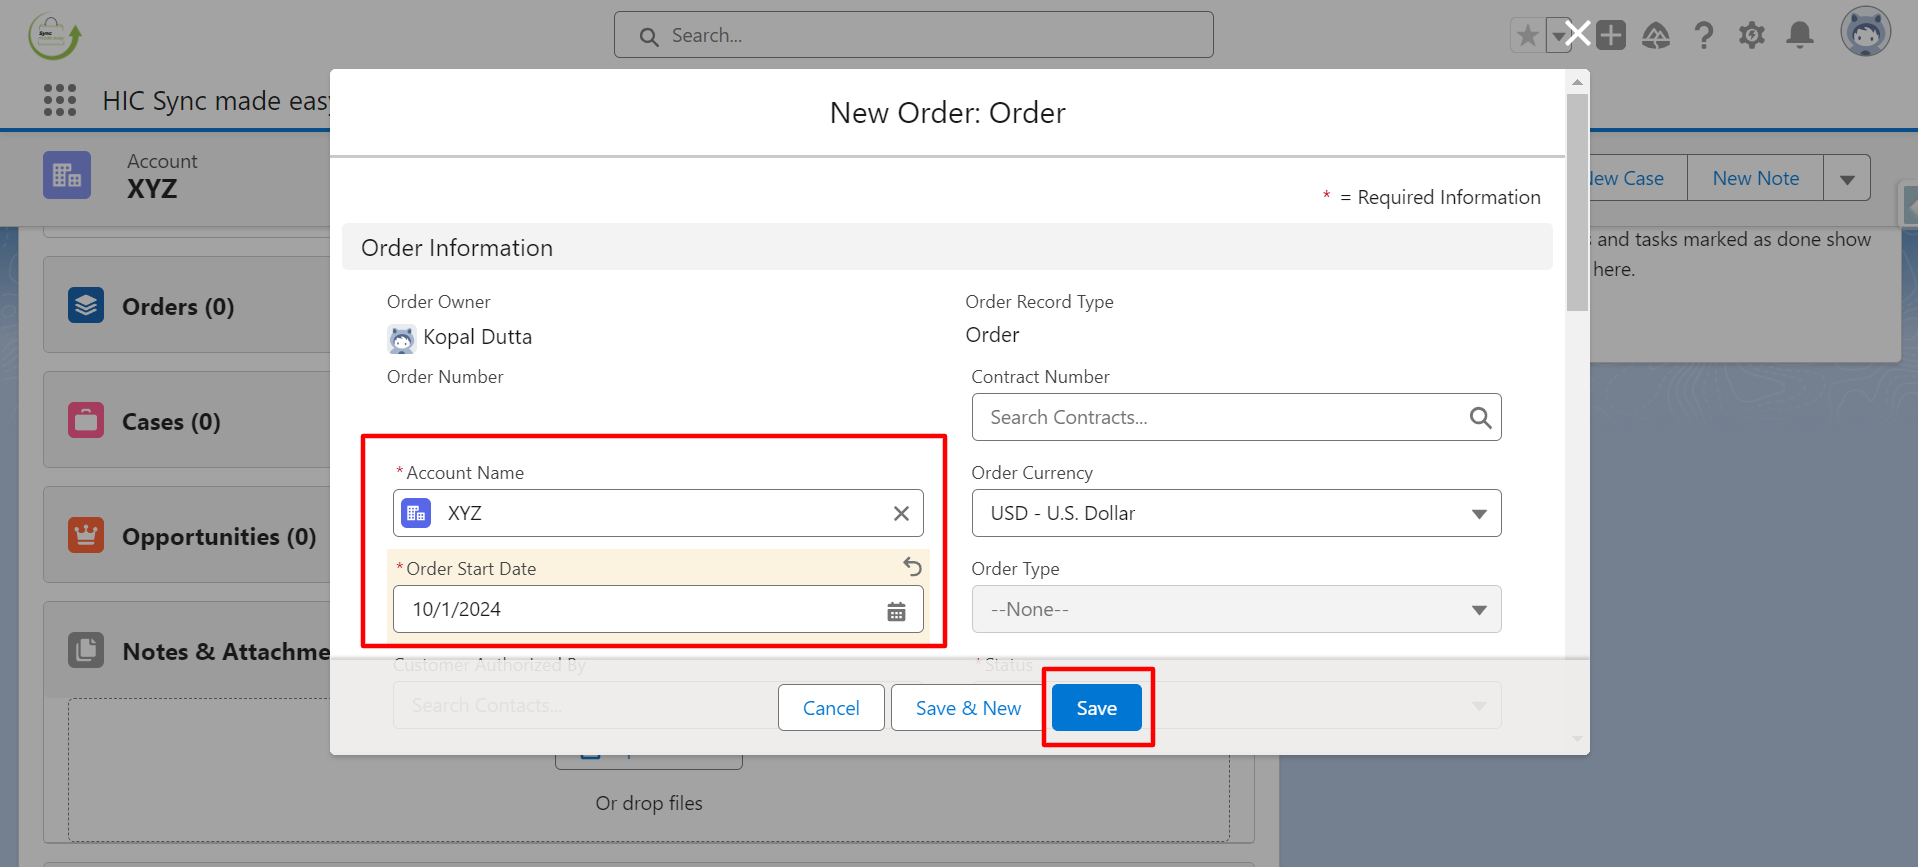
Step 1: Create an Order in Salesforce under the account XYZ by clicking on the New button.
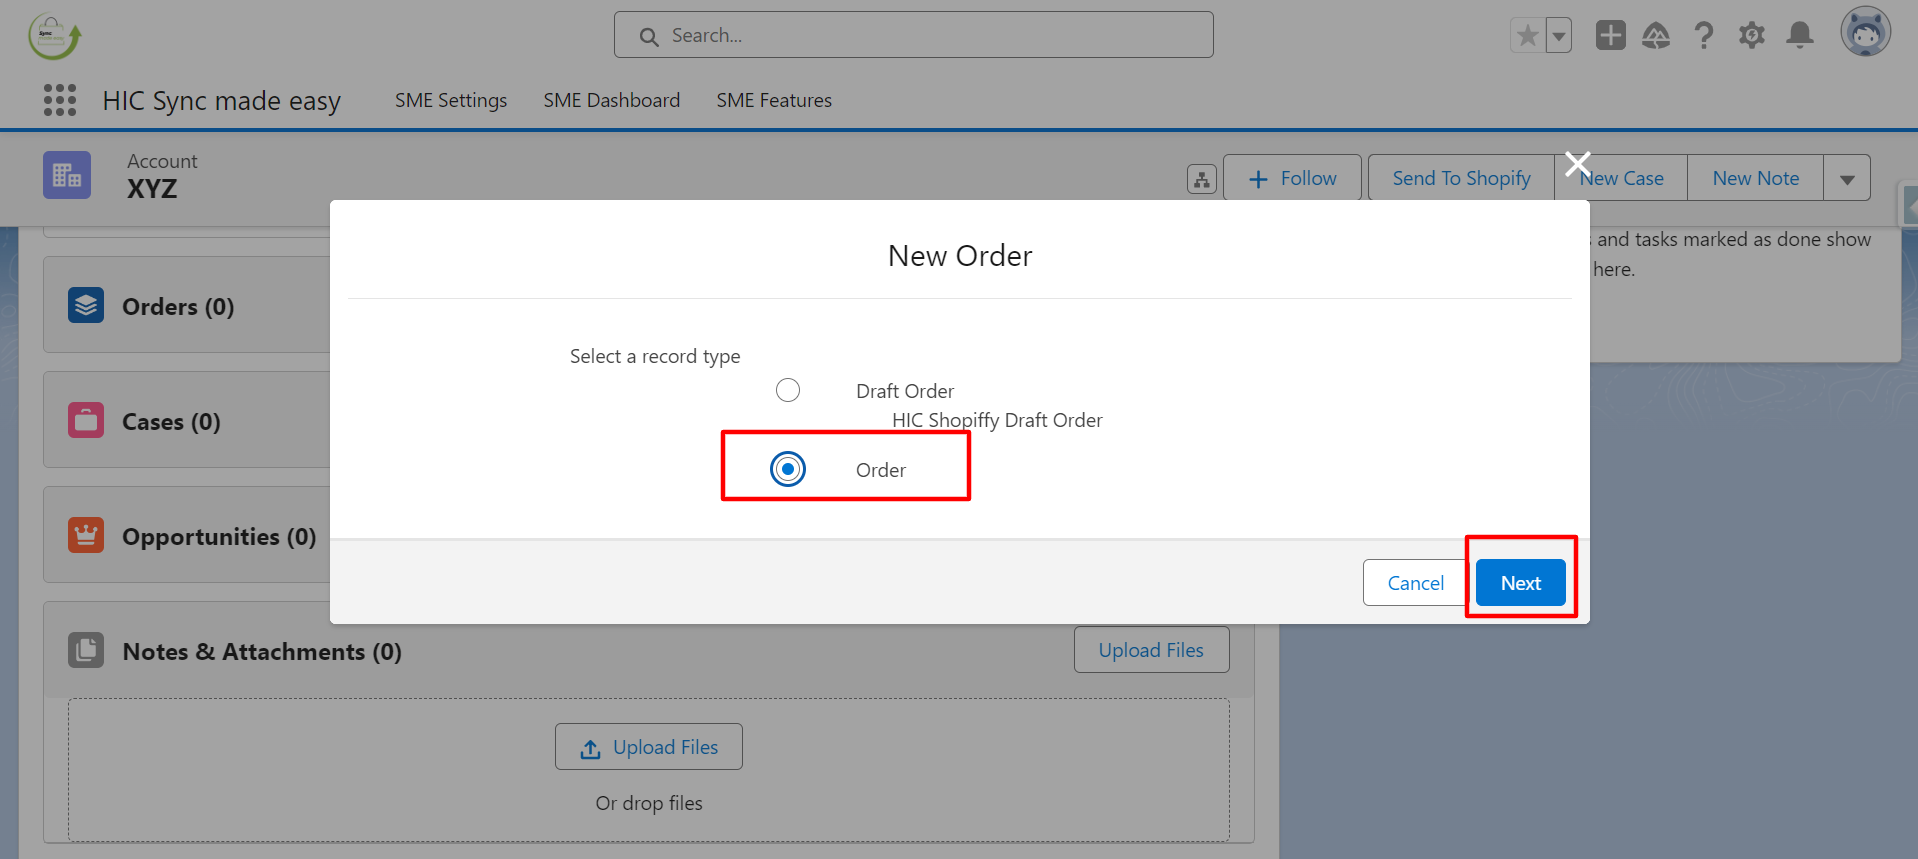
Step 2: Select the record type as “Order” and click Next.
Step 3: Fill in the required fields, such as Order Start Date, and click the Save button.
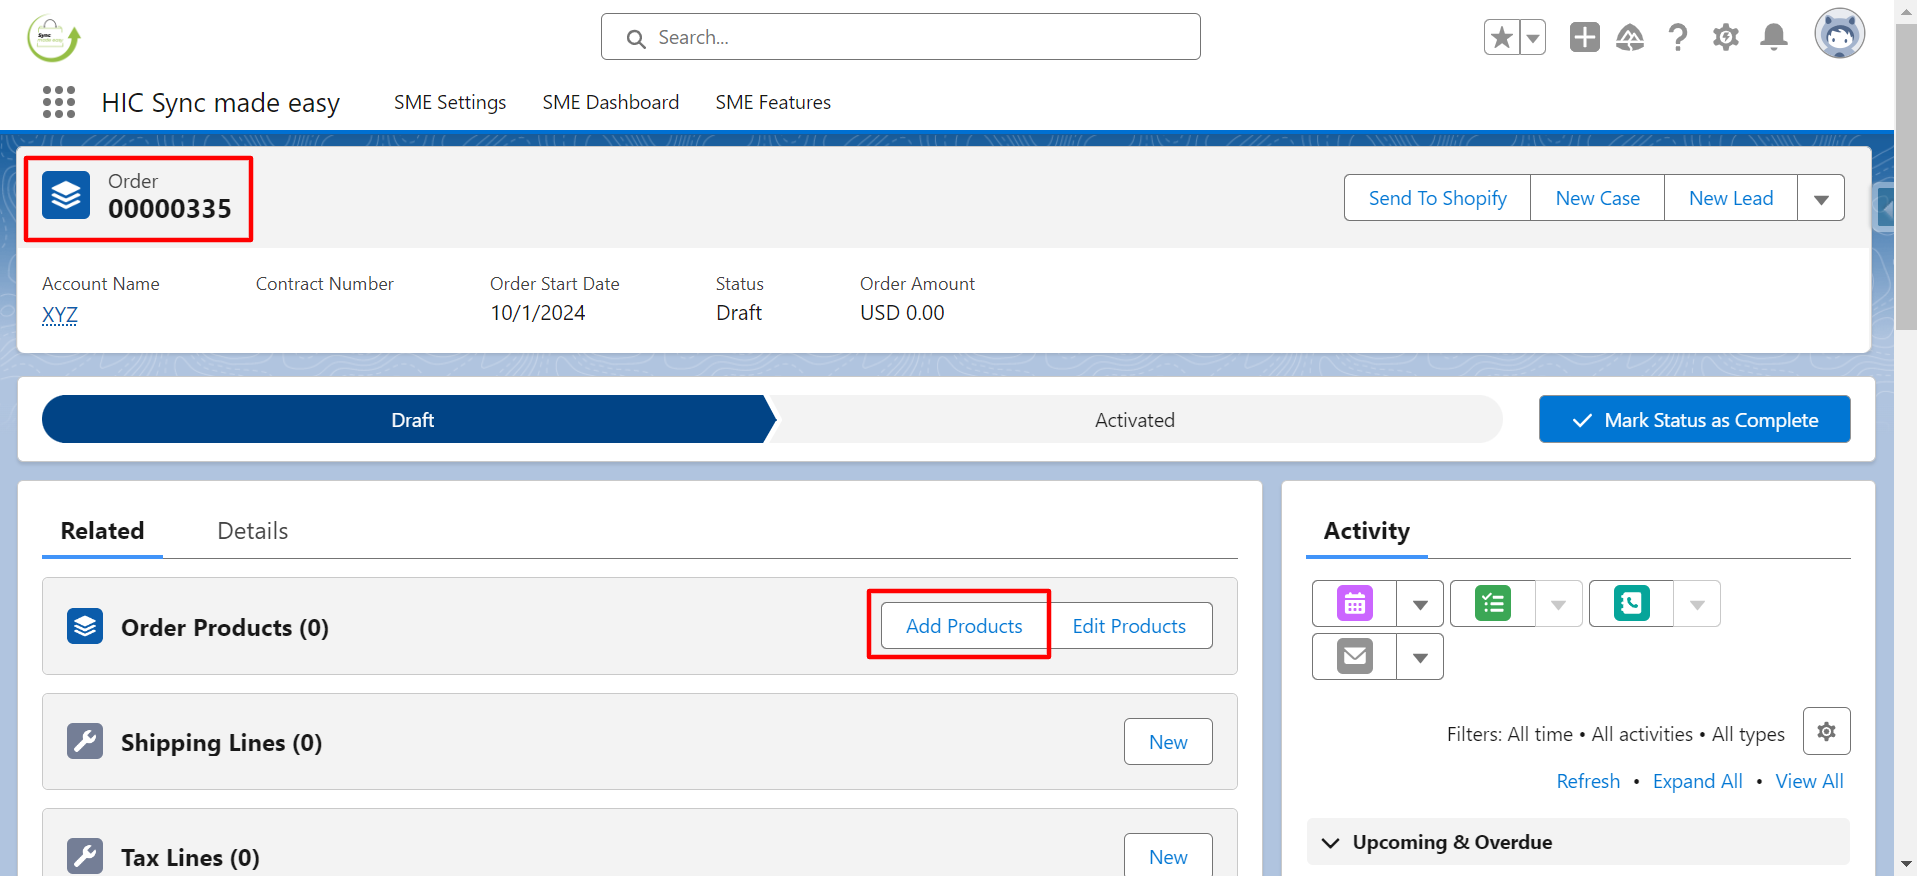
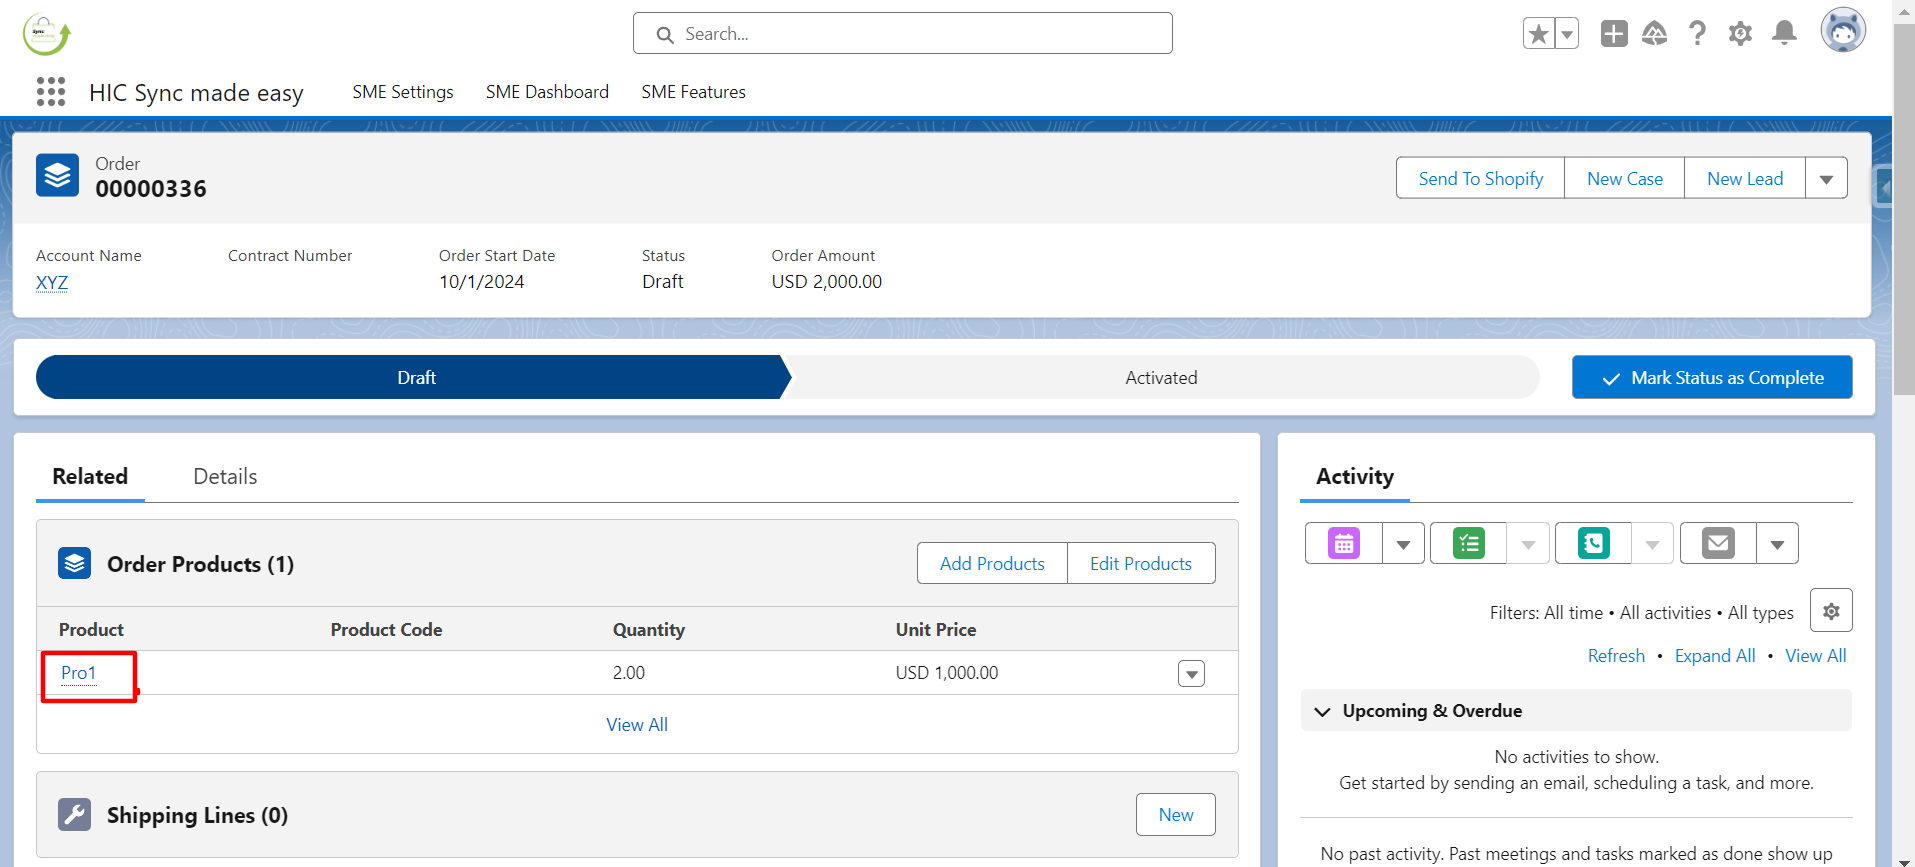
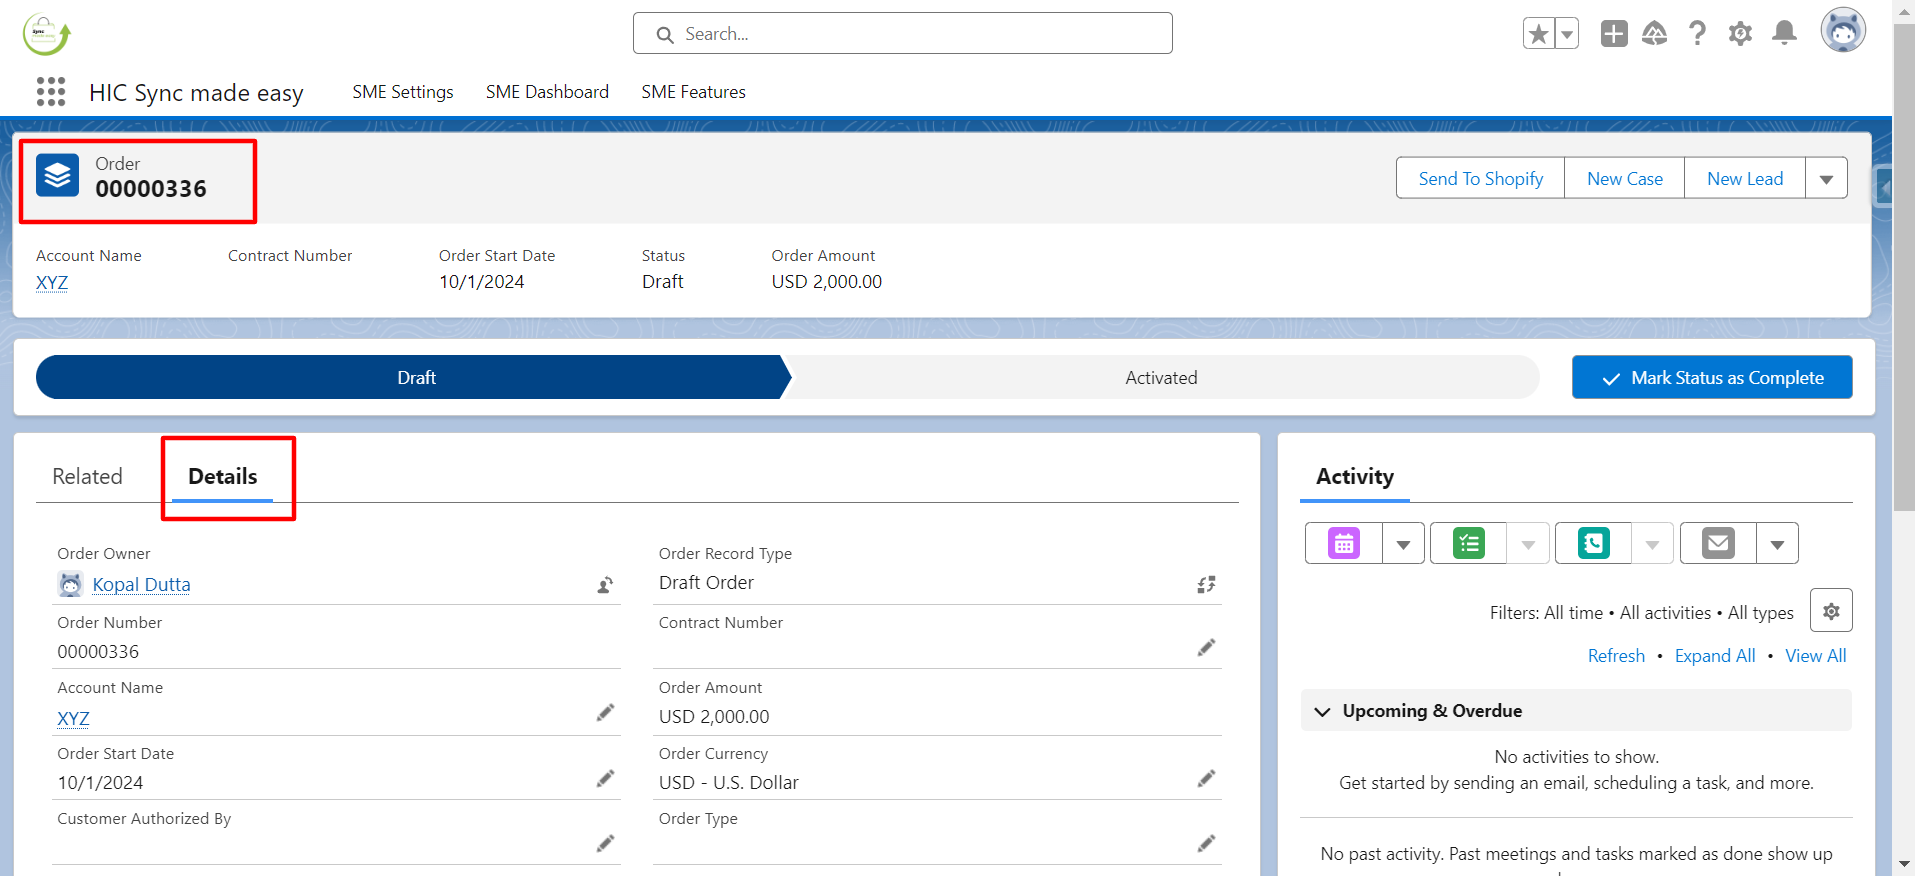
Step 4: Once the Order is created, open the Order.
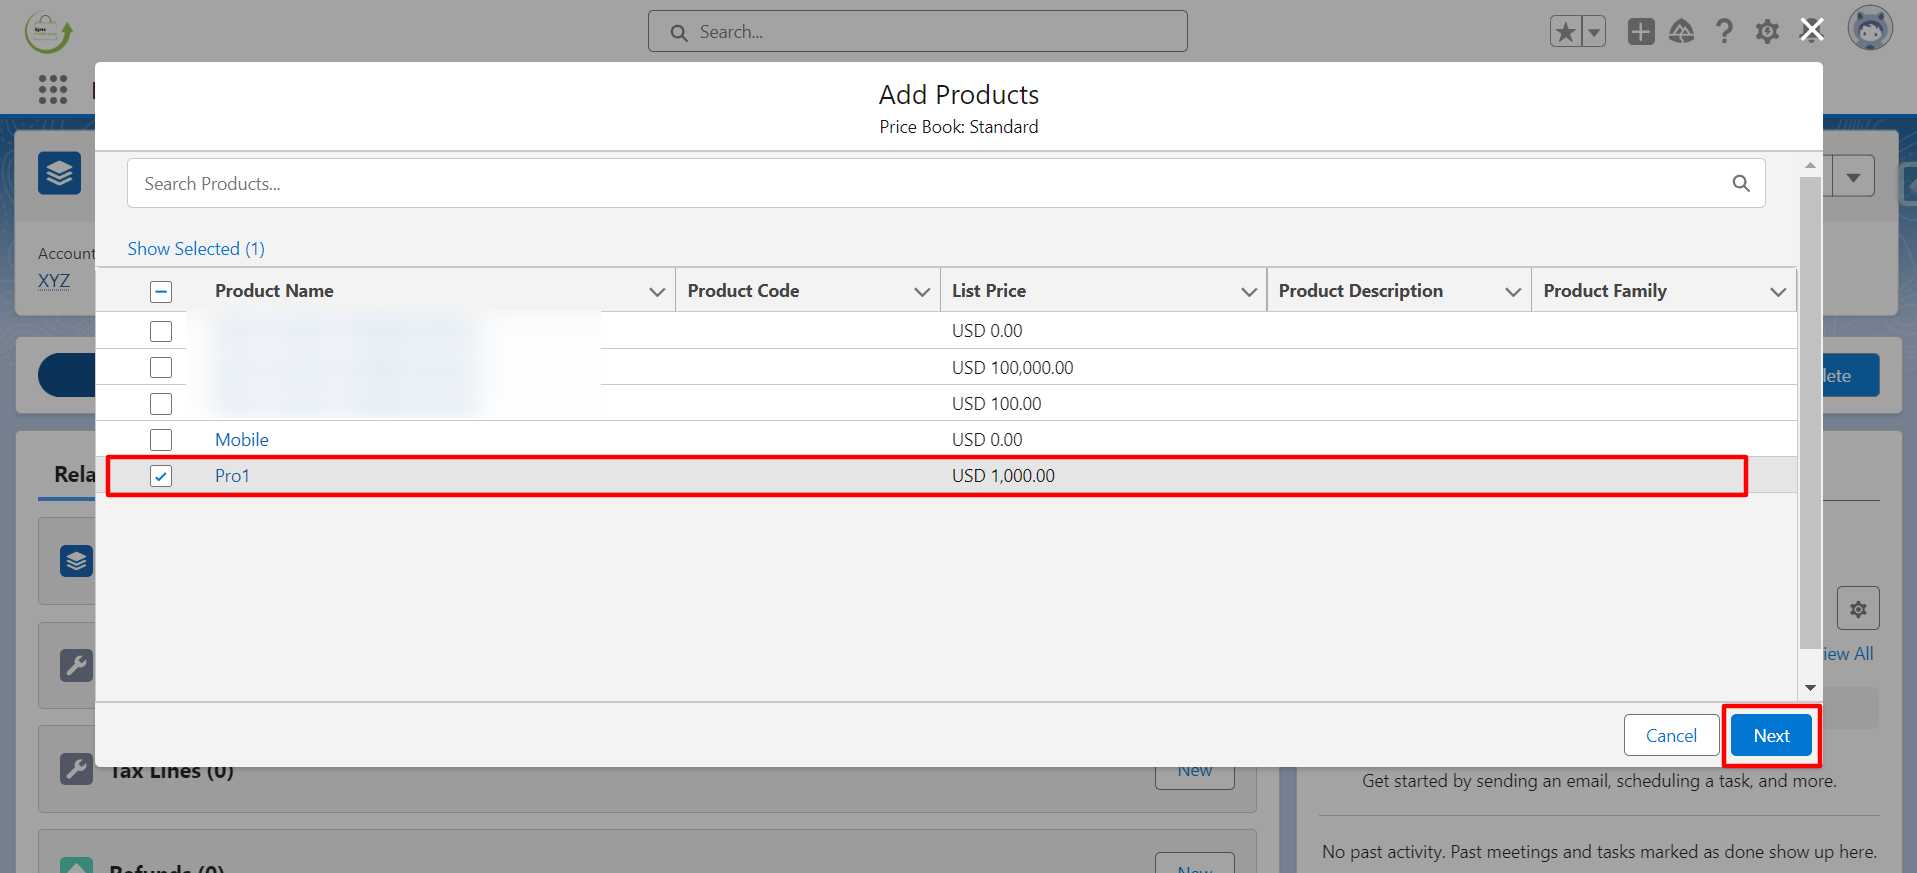
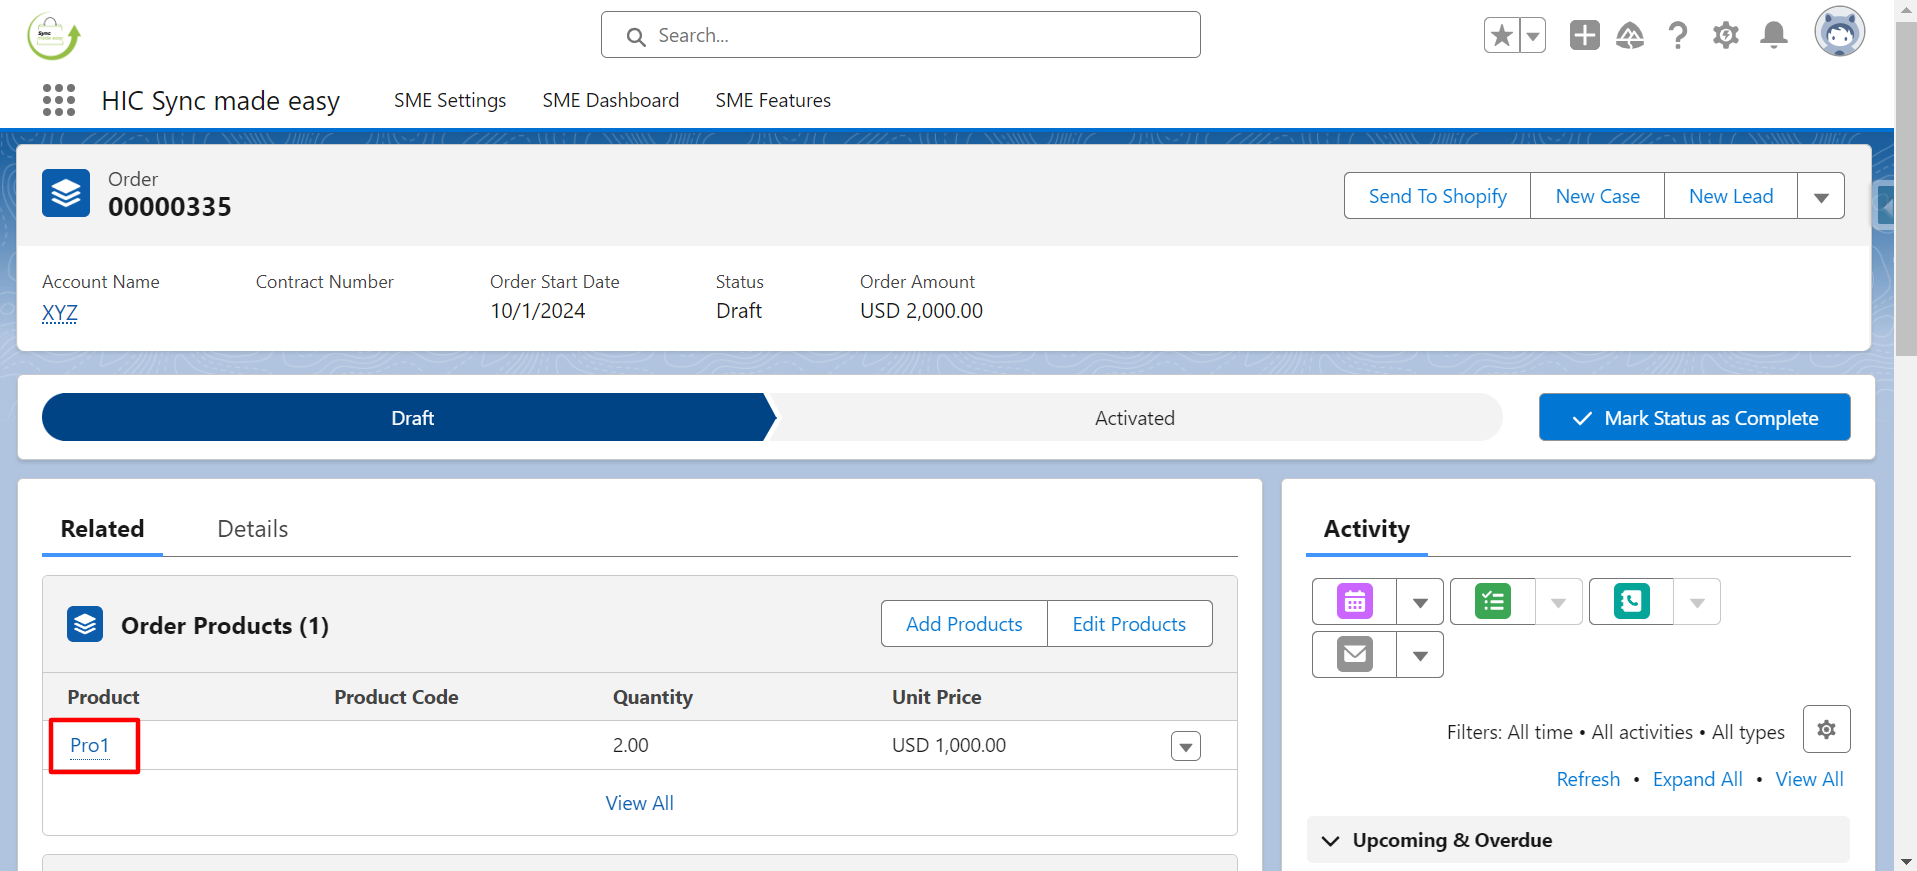
Step 5: Add an Order Product to the Order.
Step 6: Select the Product and click Next.
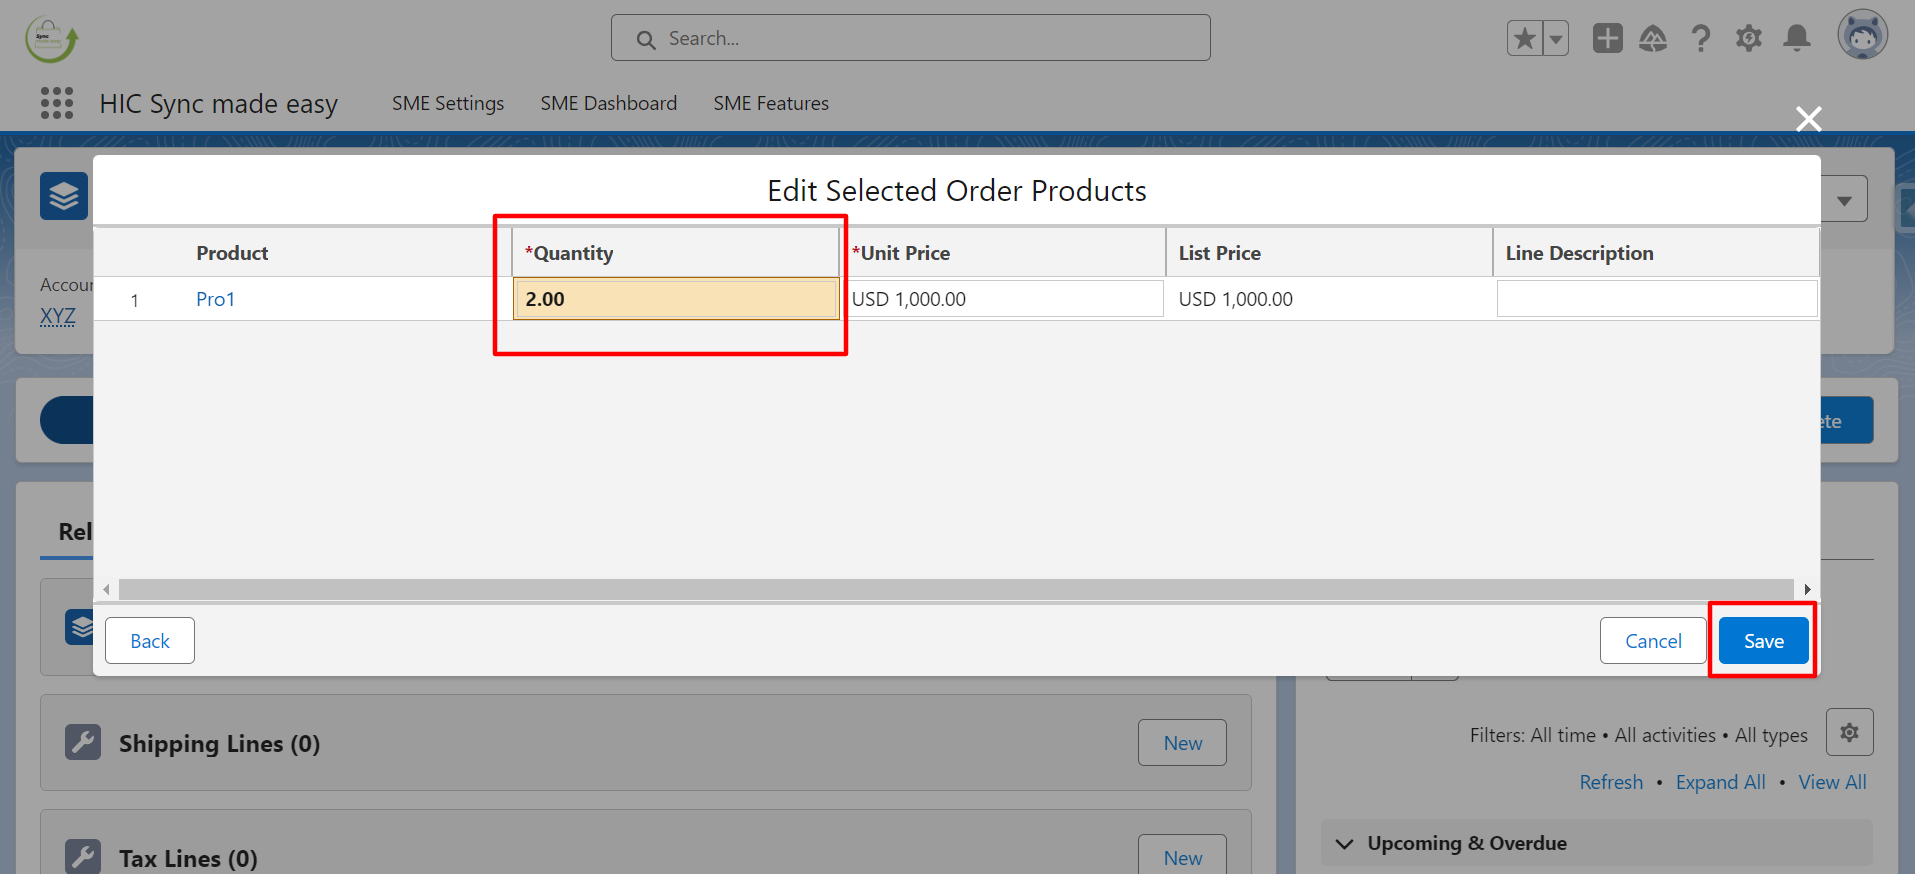
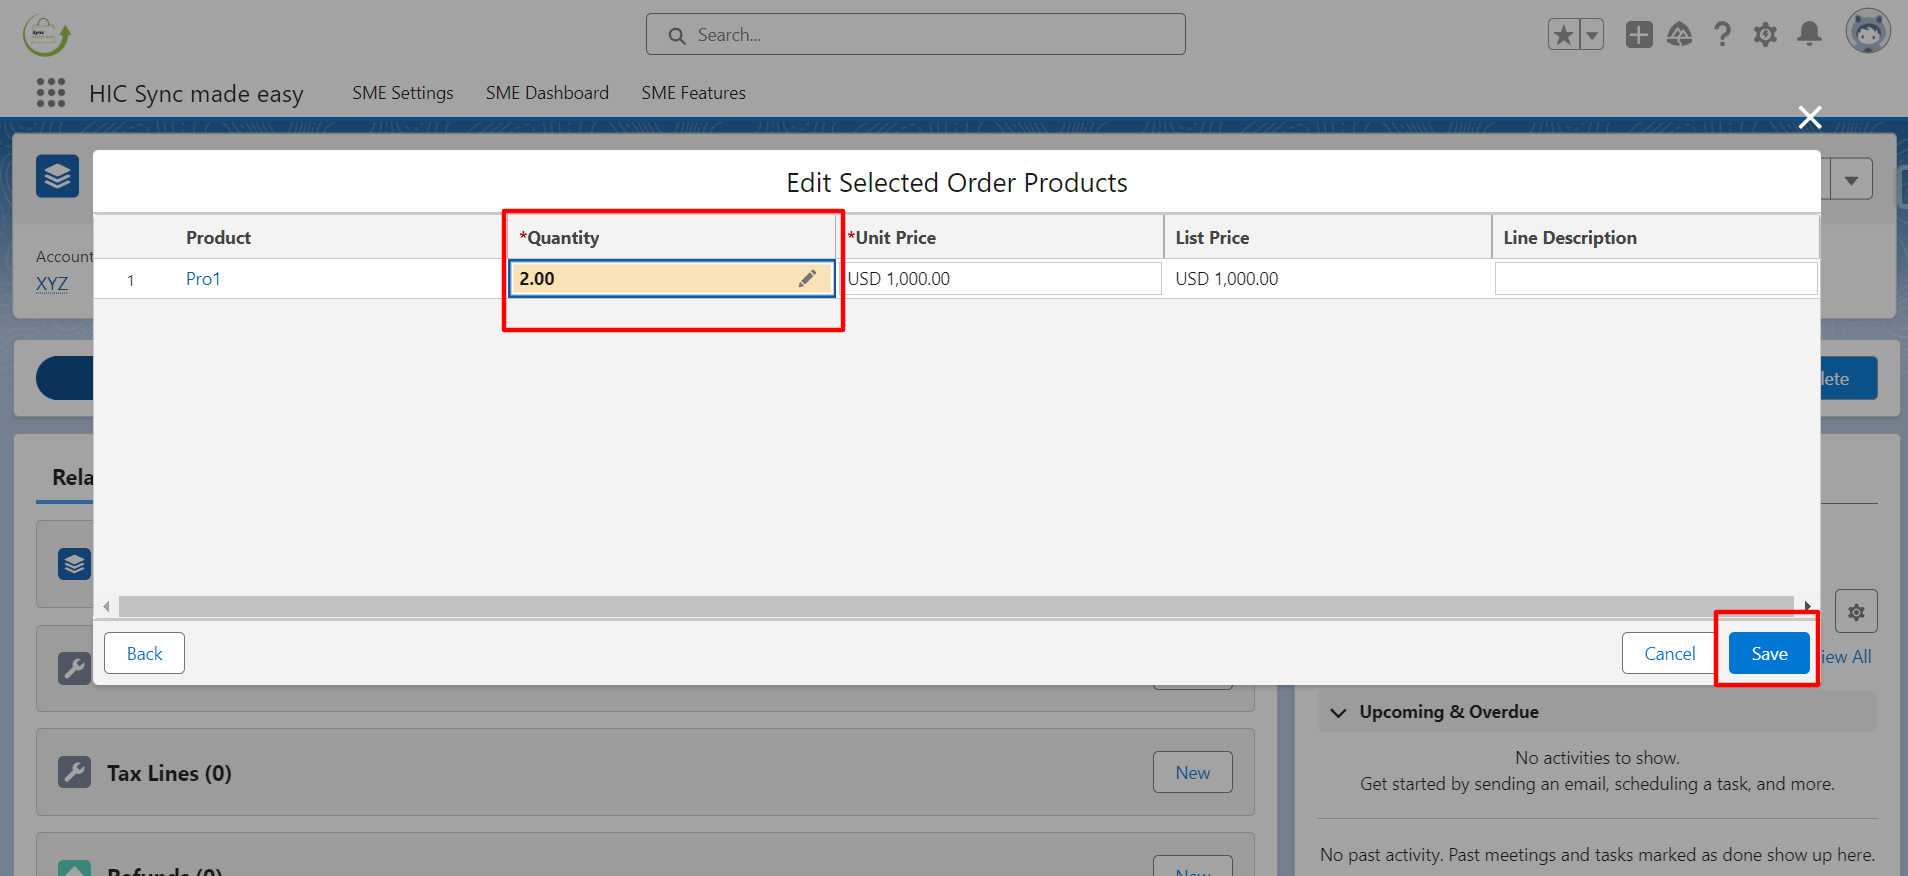
Step 7: Enter the “Quantity” for the Product and click Save.
Step 8: After the Order Product is created, open the Product.
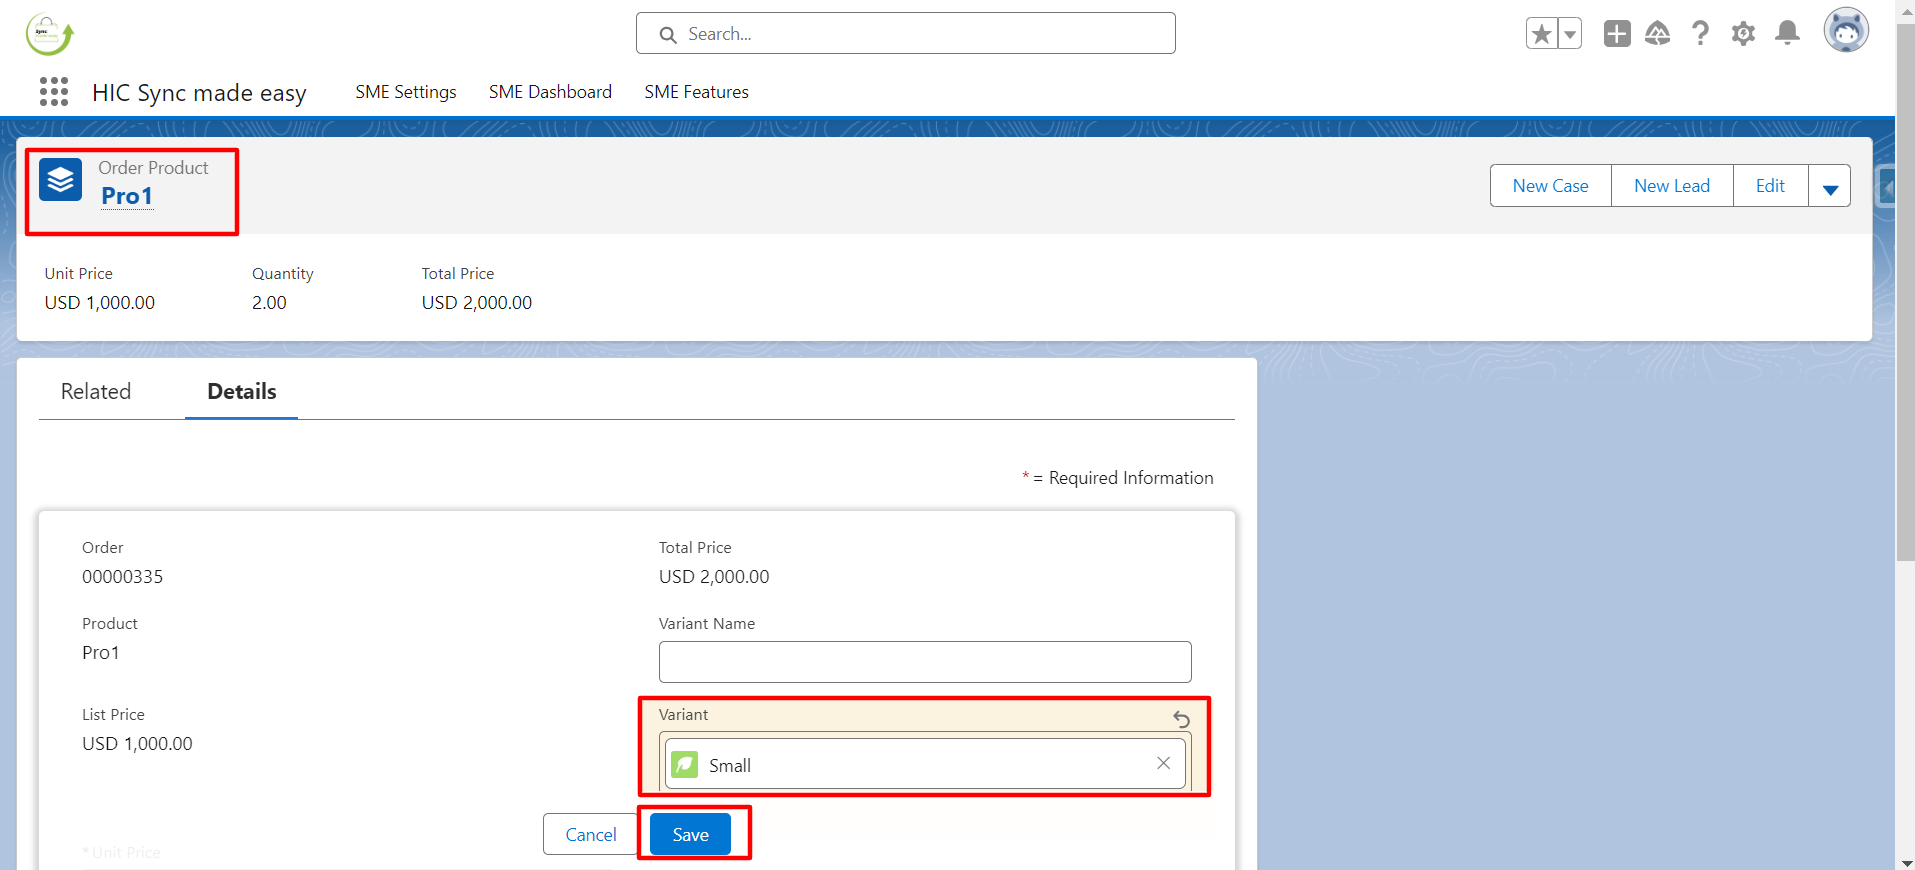
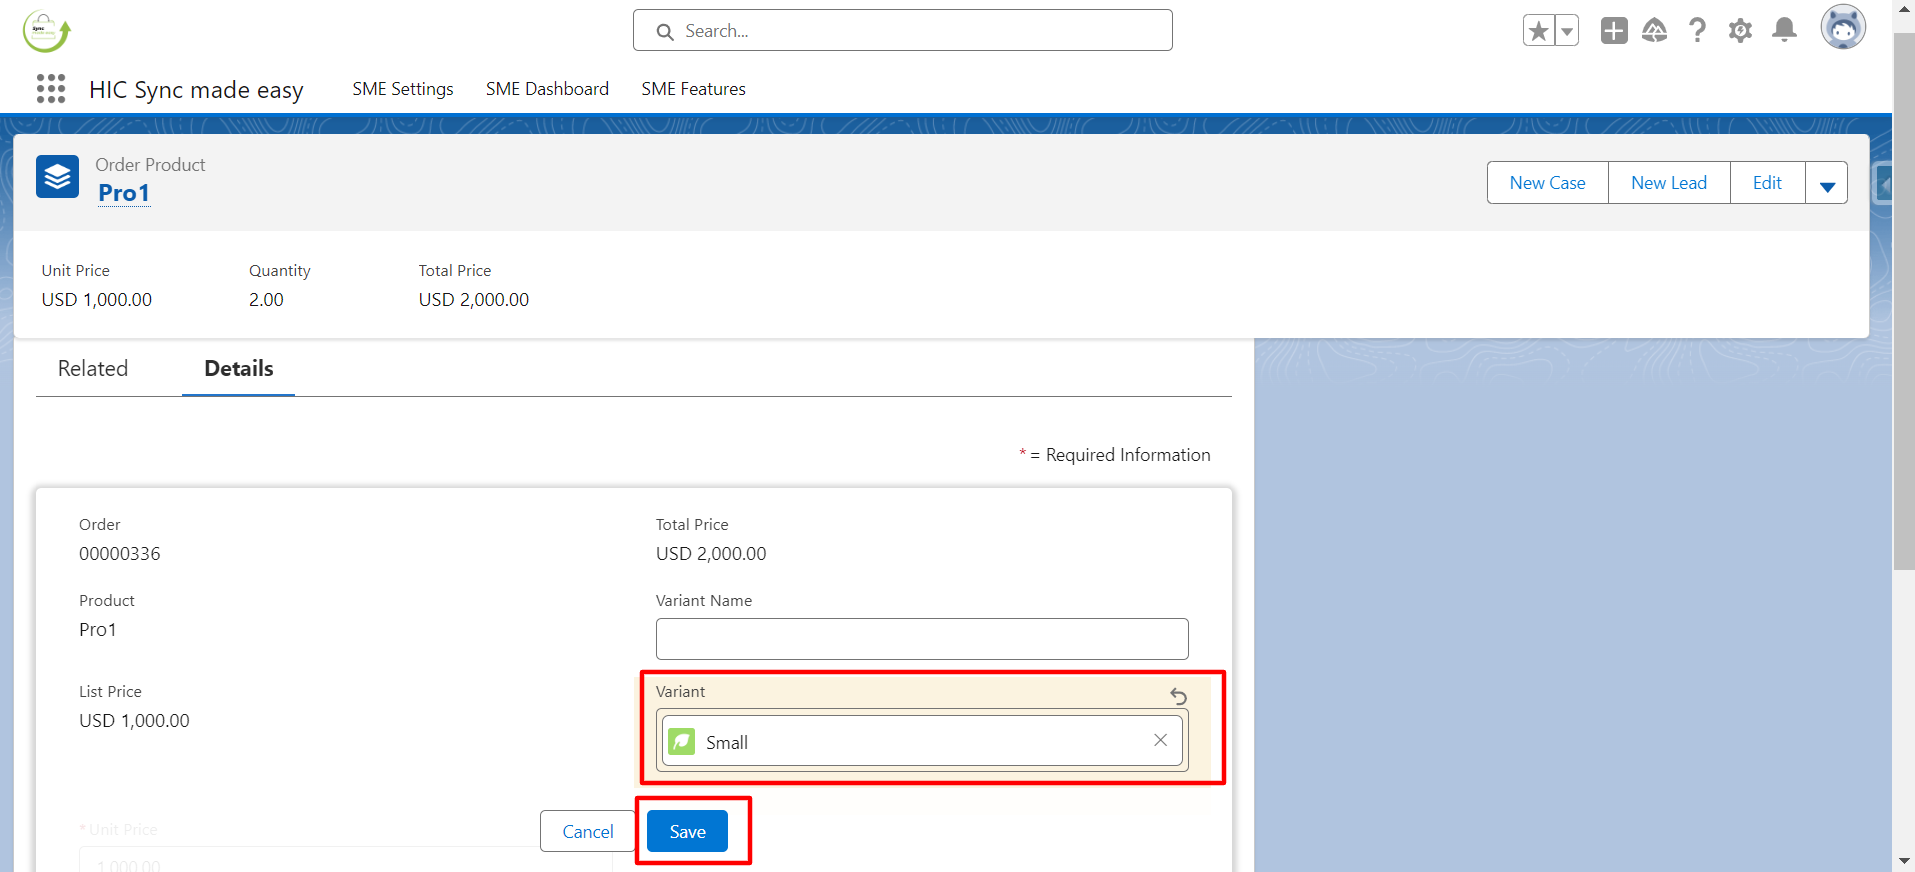
Step 9: In the Product, add a “Variant” and click Save.
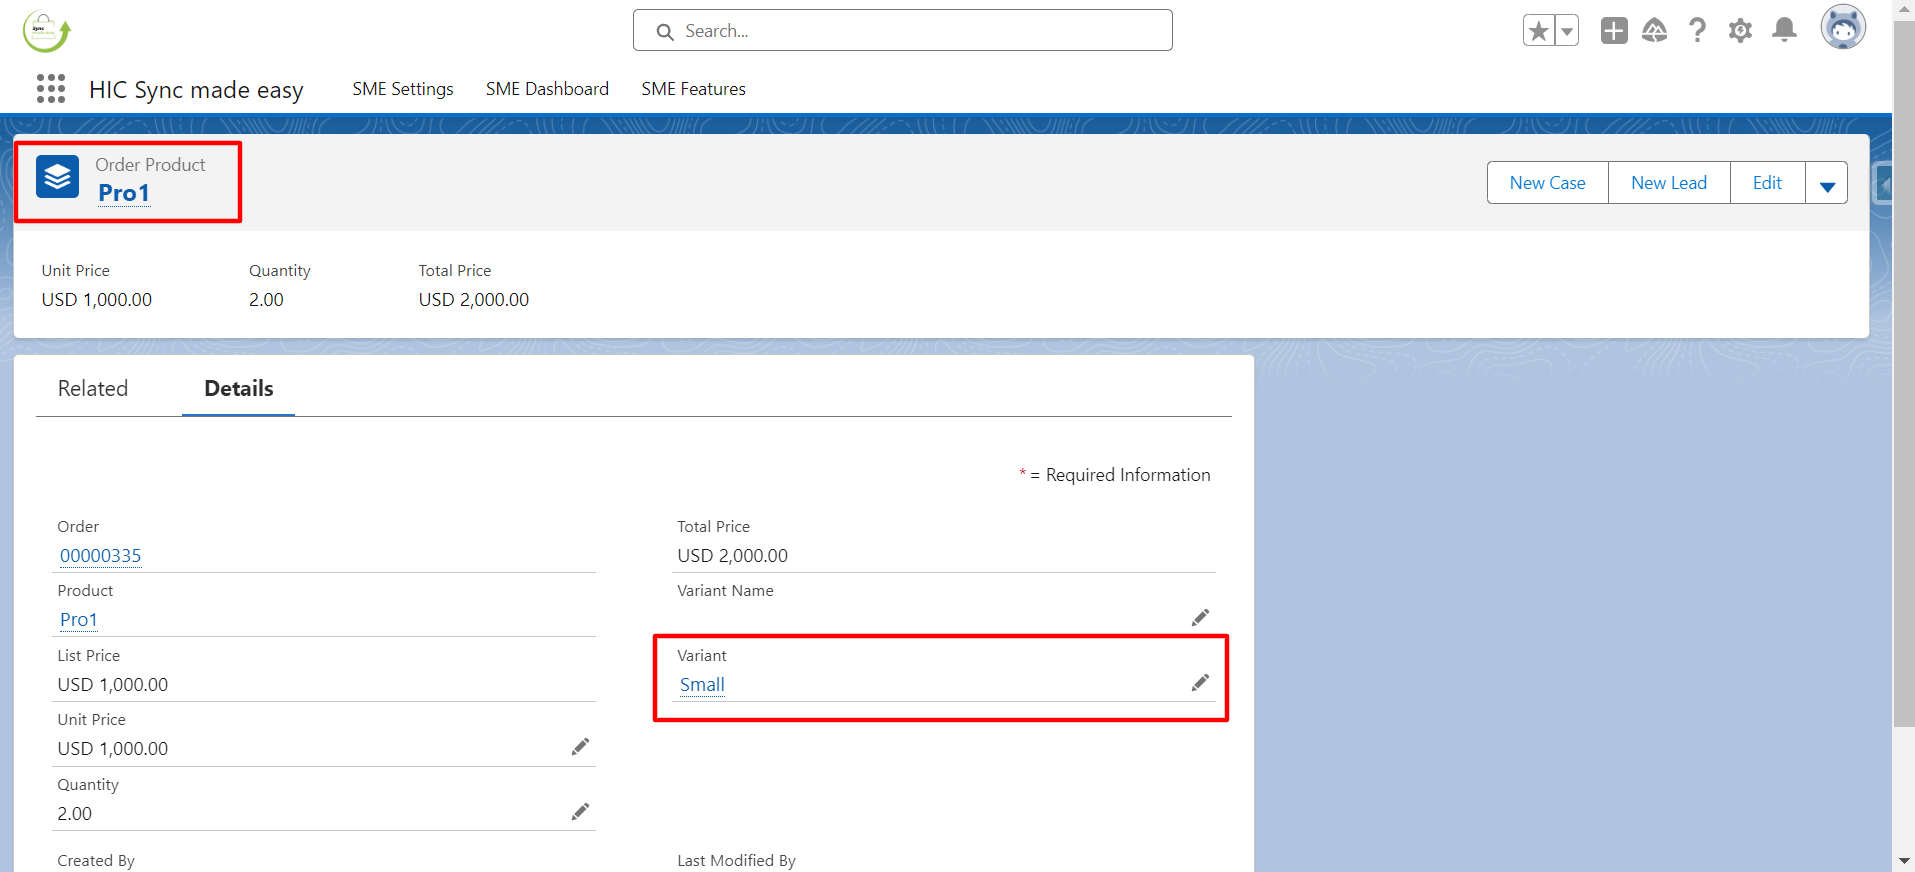
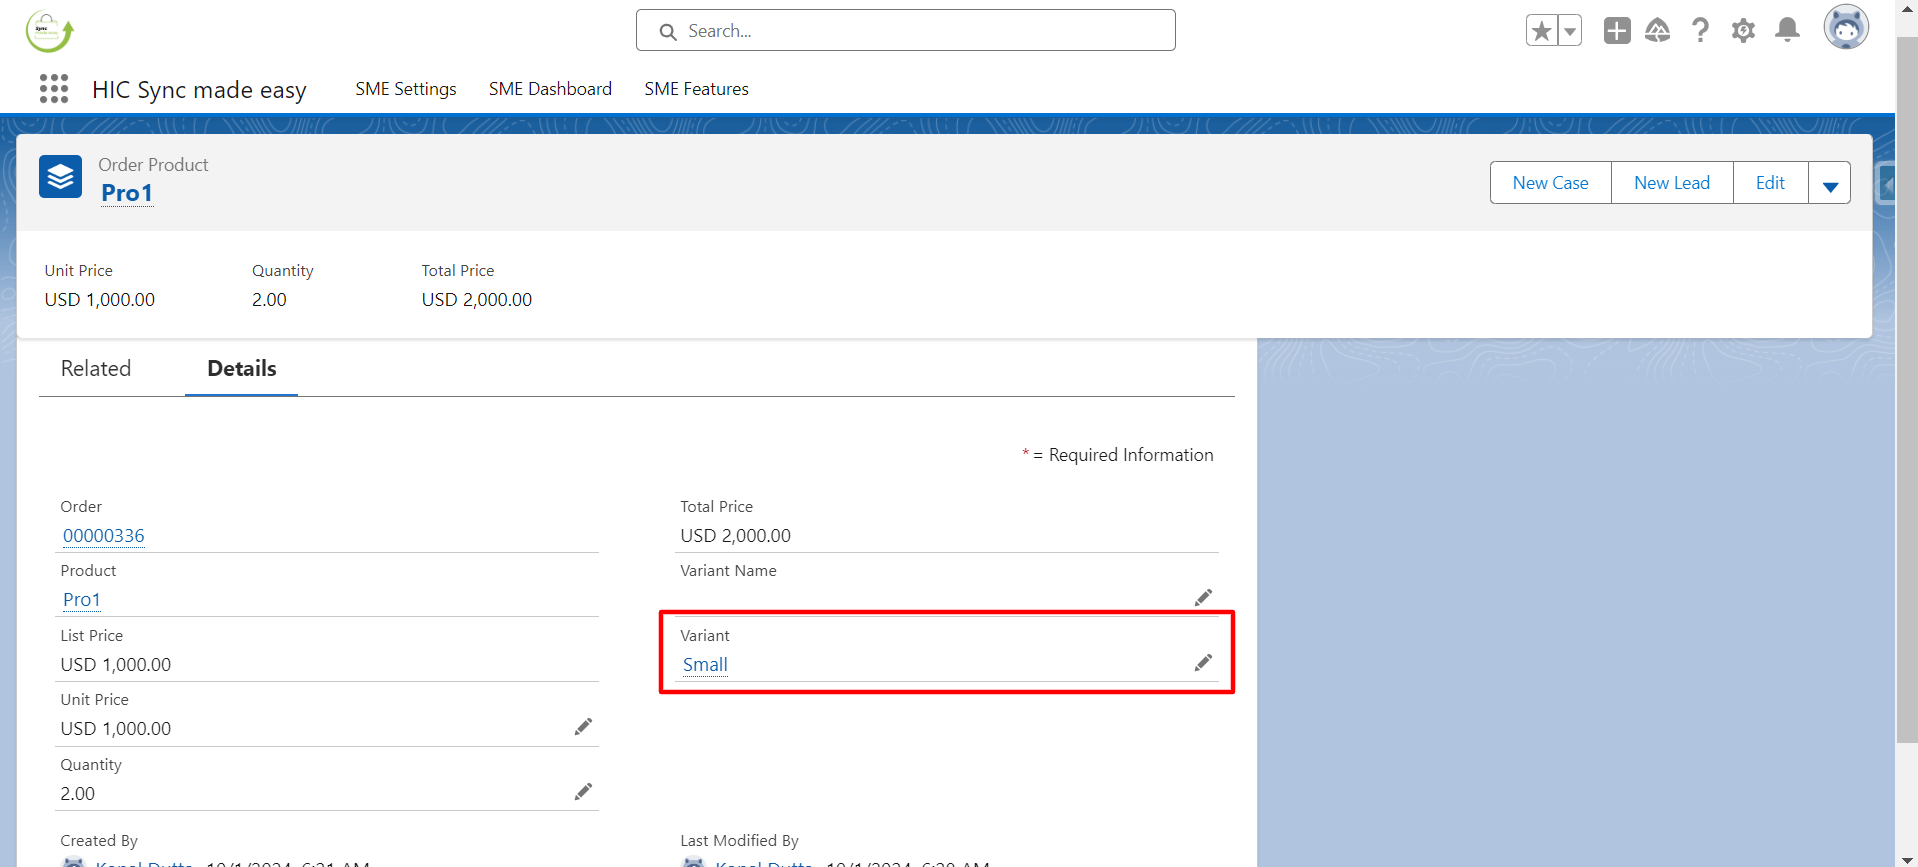
Step 10: Verify that the Variant has been successfully added to the Order Product.
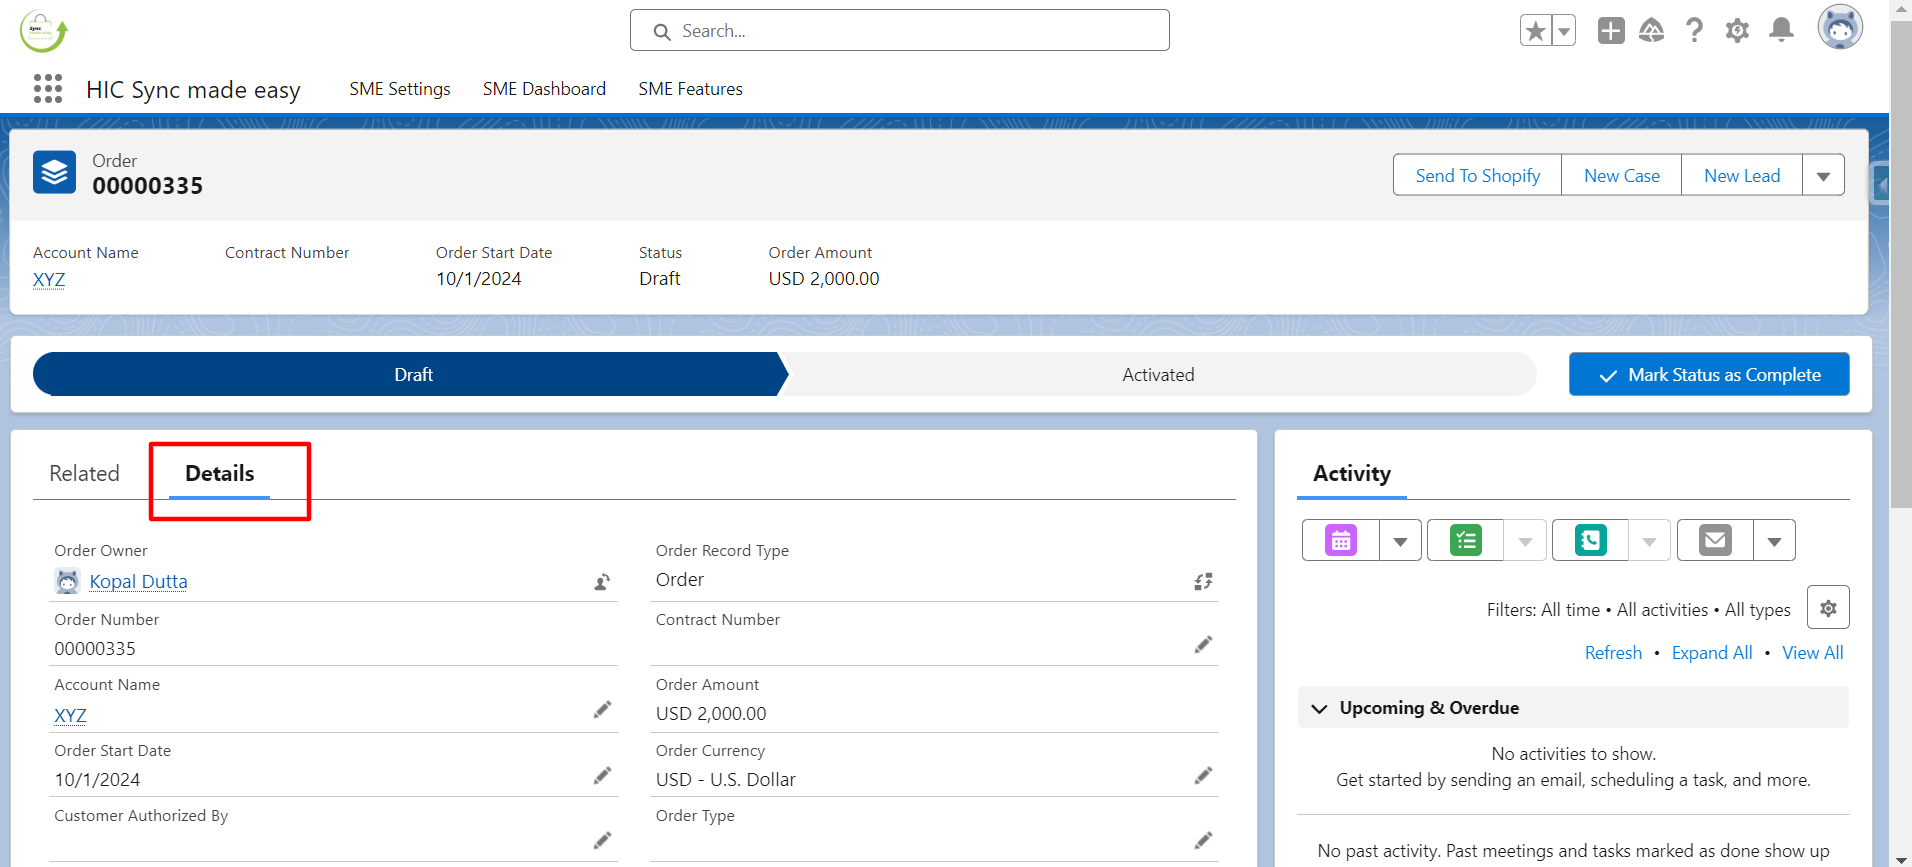
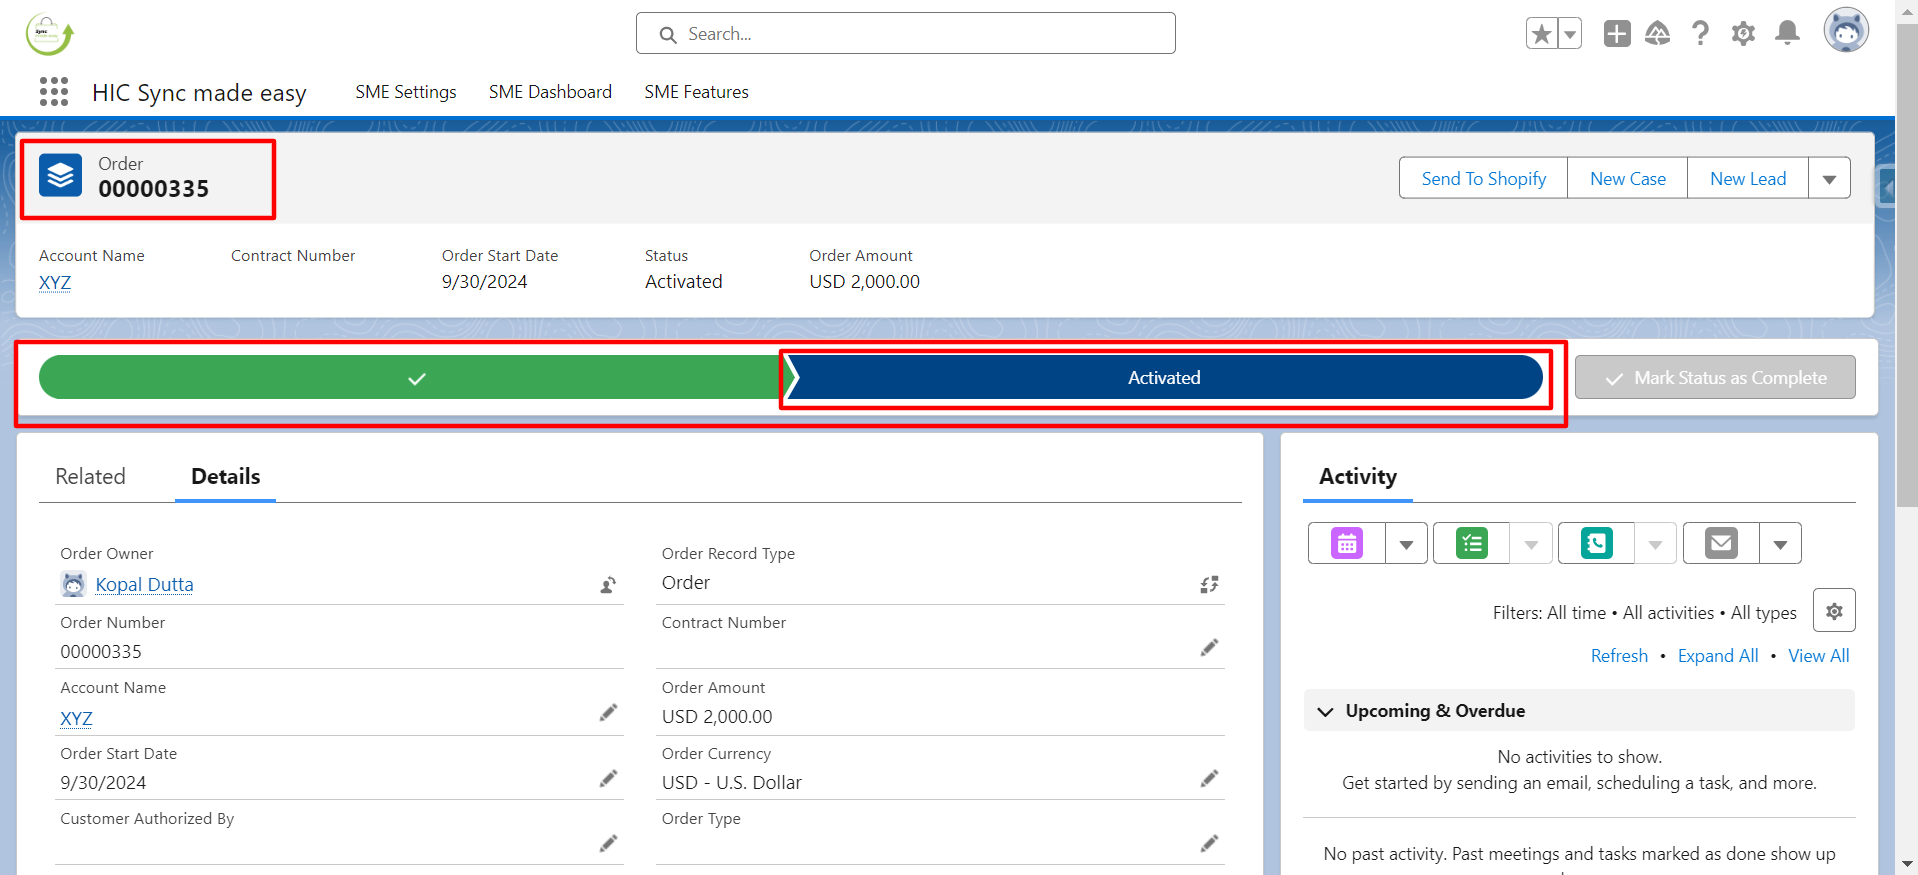
Step 11: Navigate back to the Order detail page.
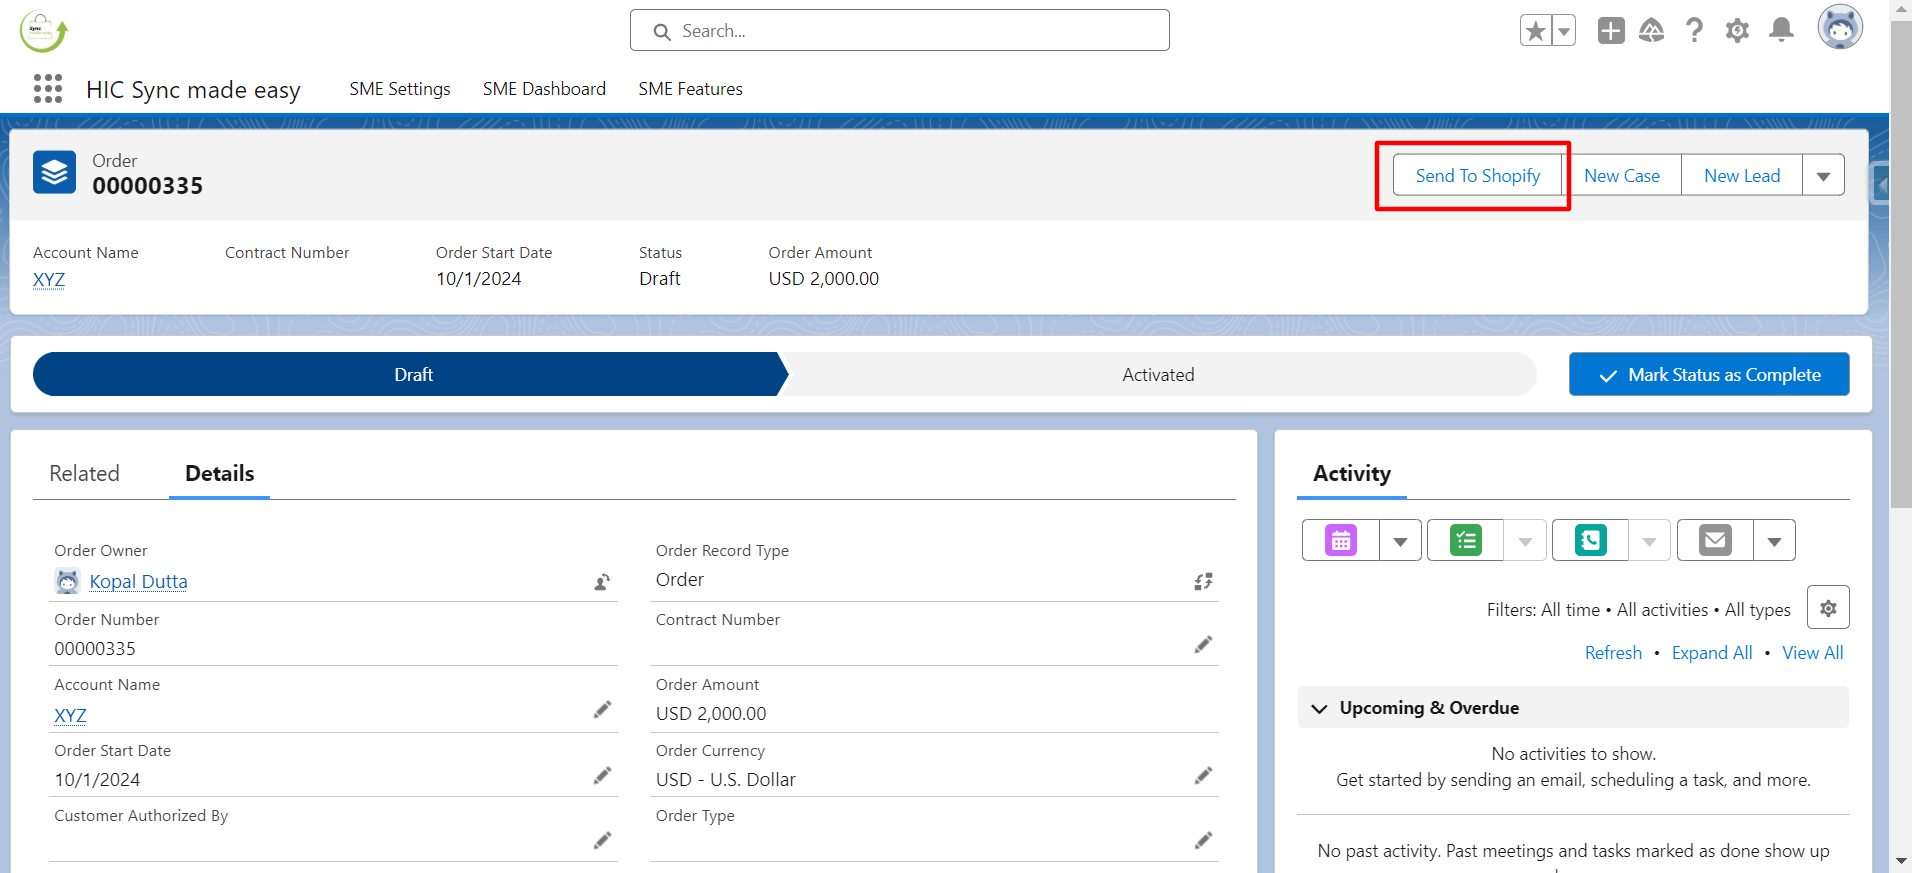
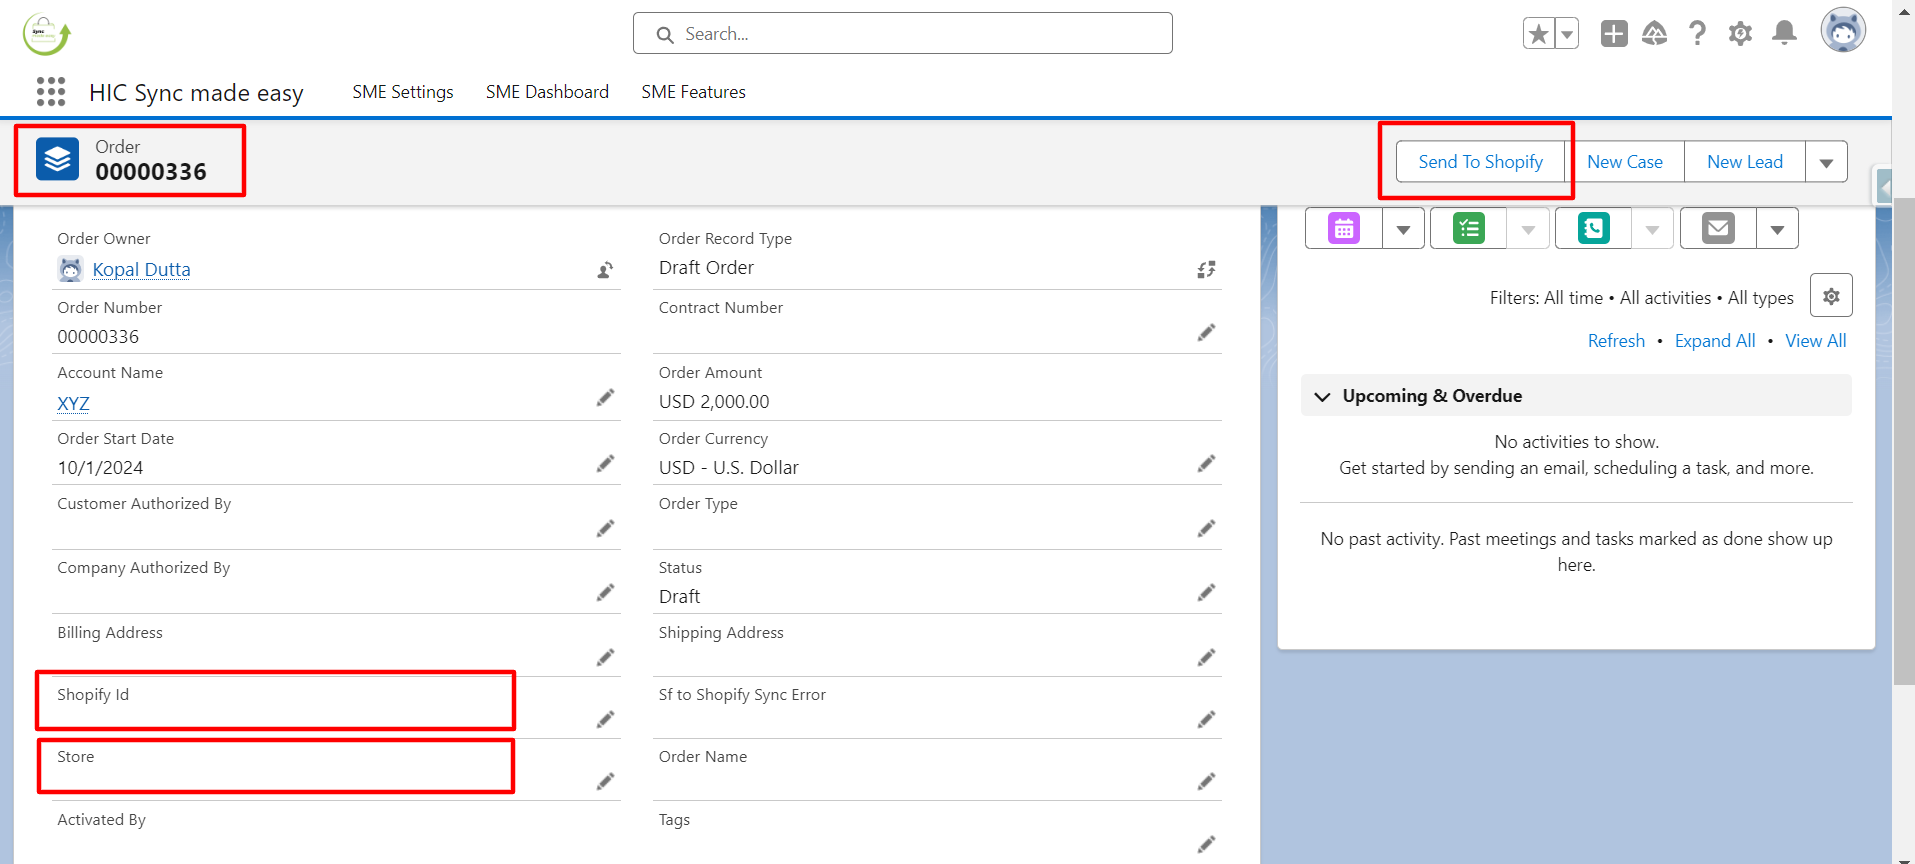
Step 12: Check the “Shopify ID” and “Store Name” fields, which will initially be blank.
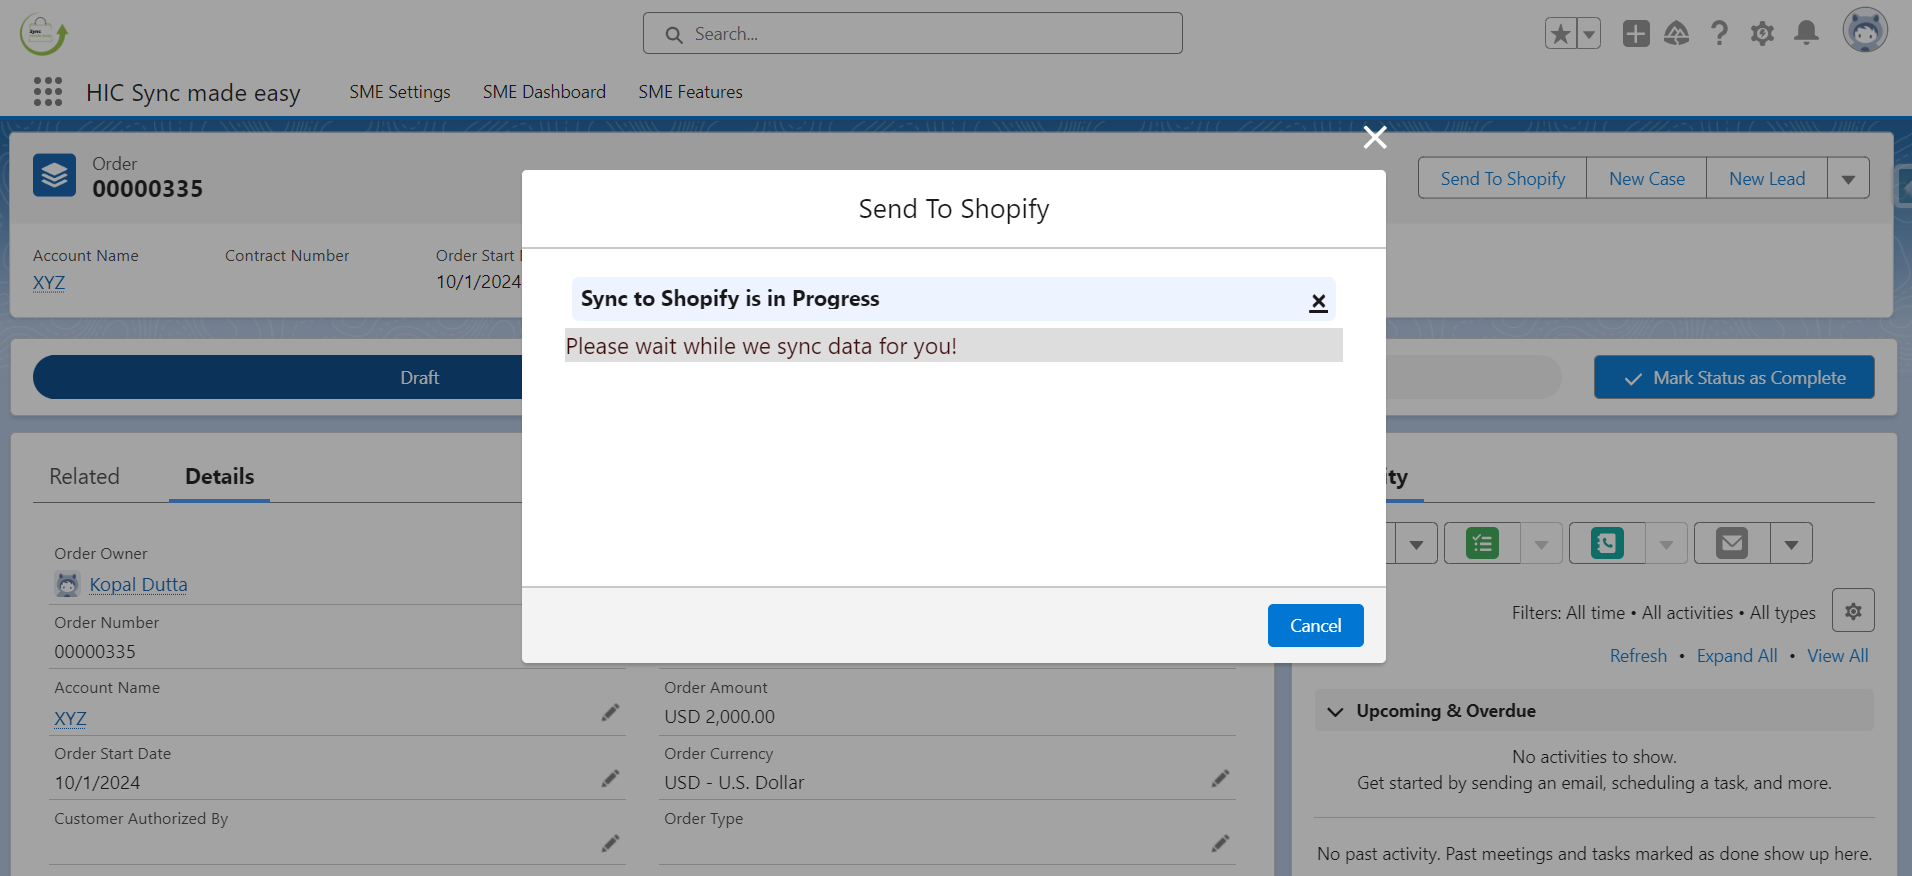
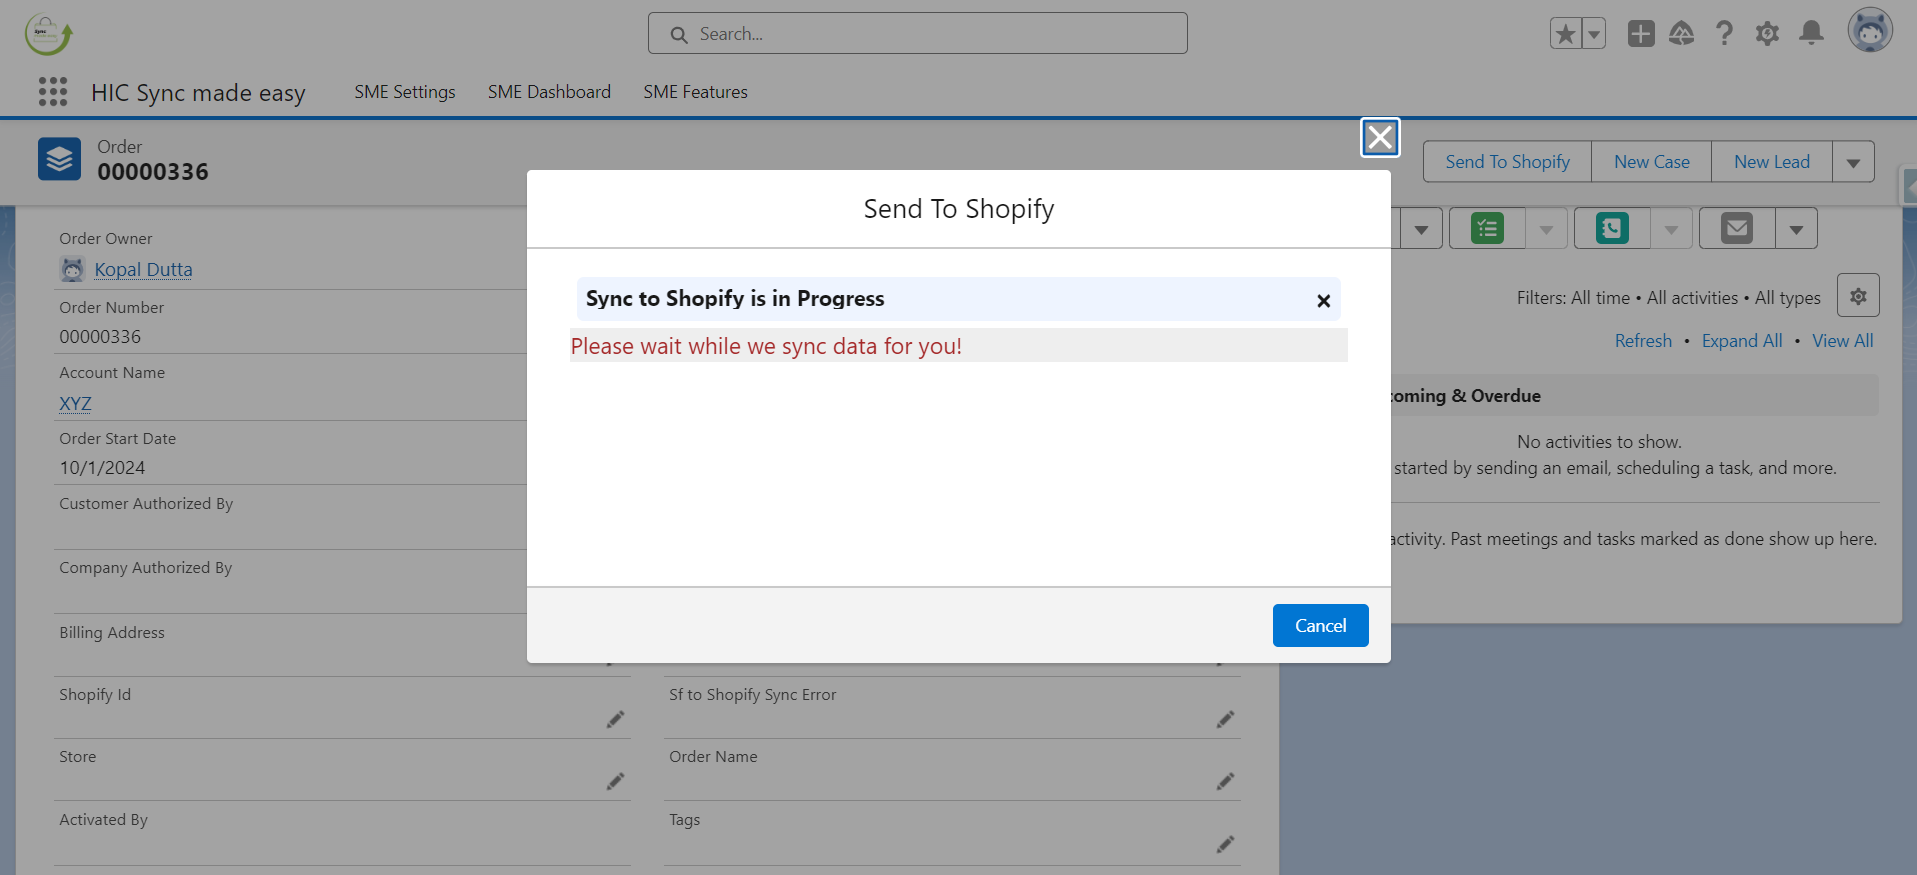
Step 13: Click on the “Send to Shopify” button to generate the Shopify ID and Store Name.
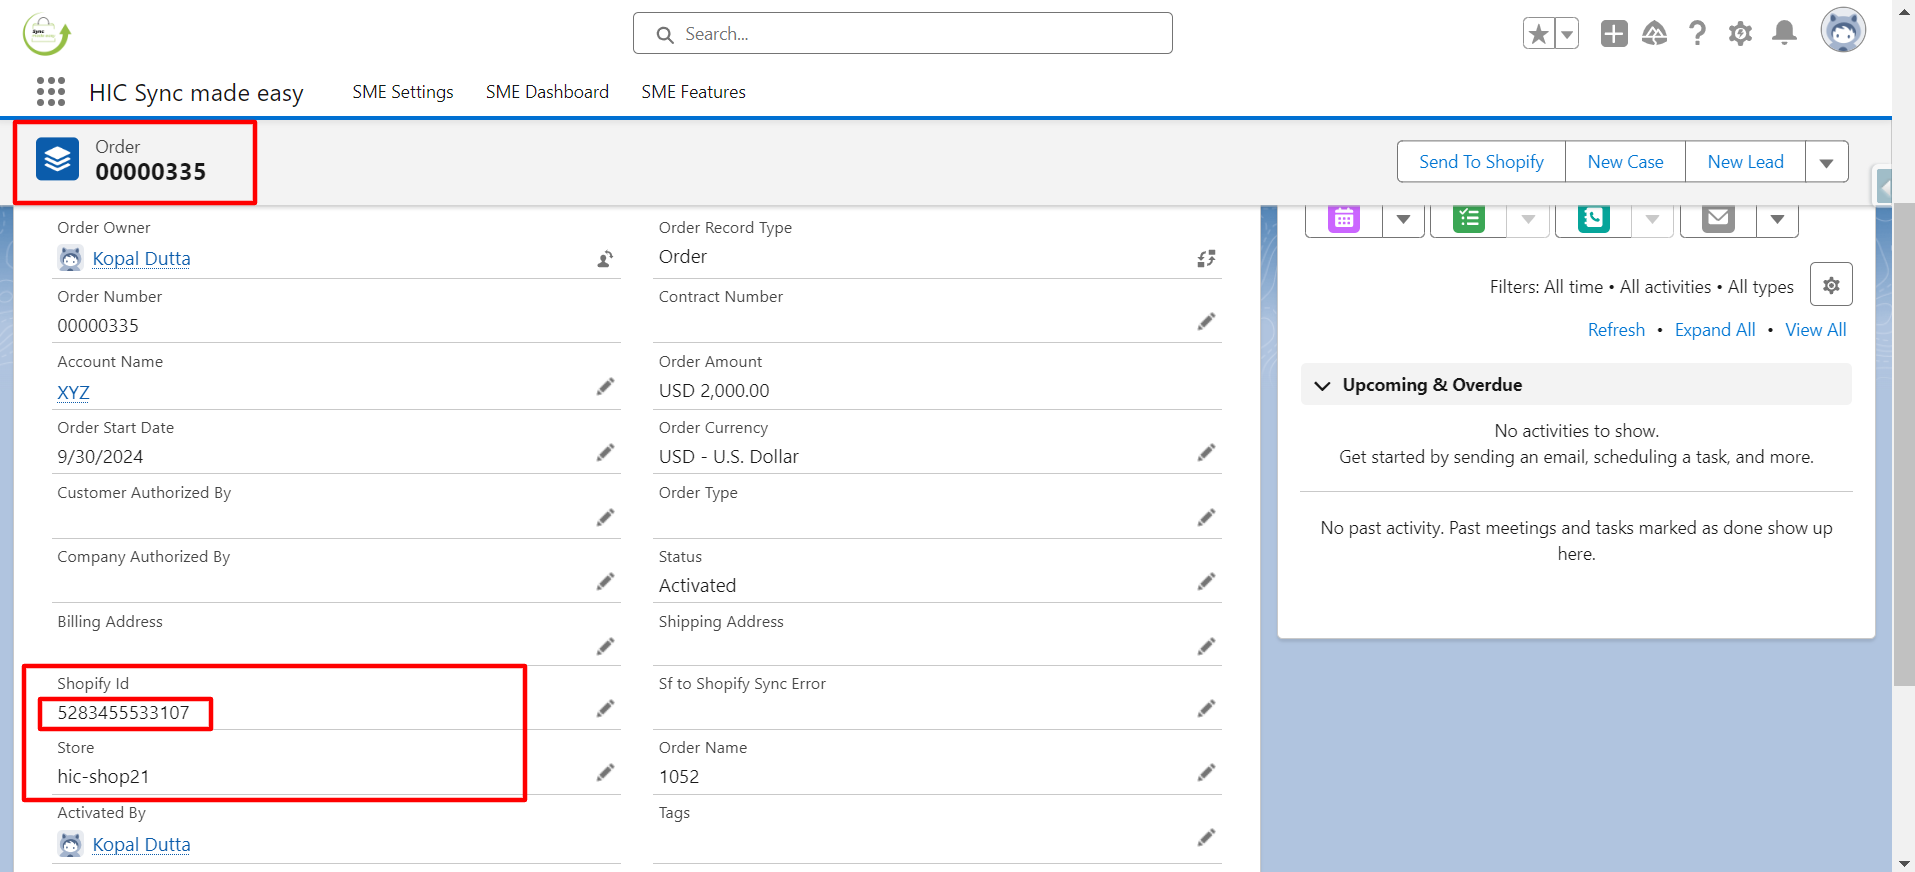
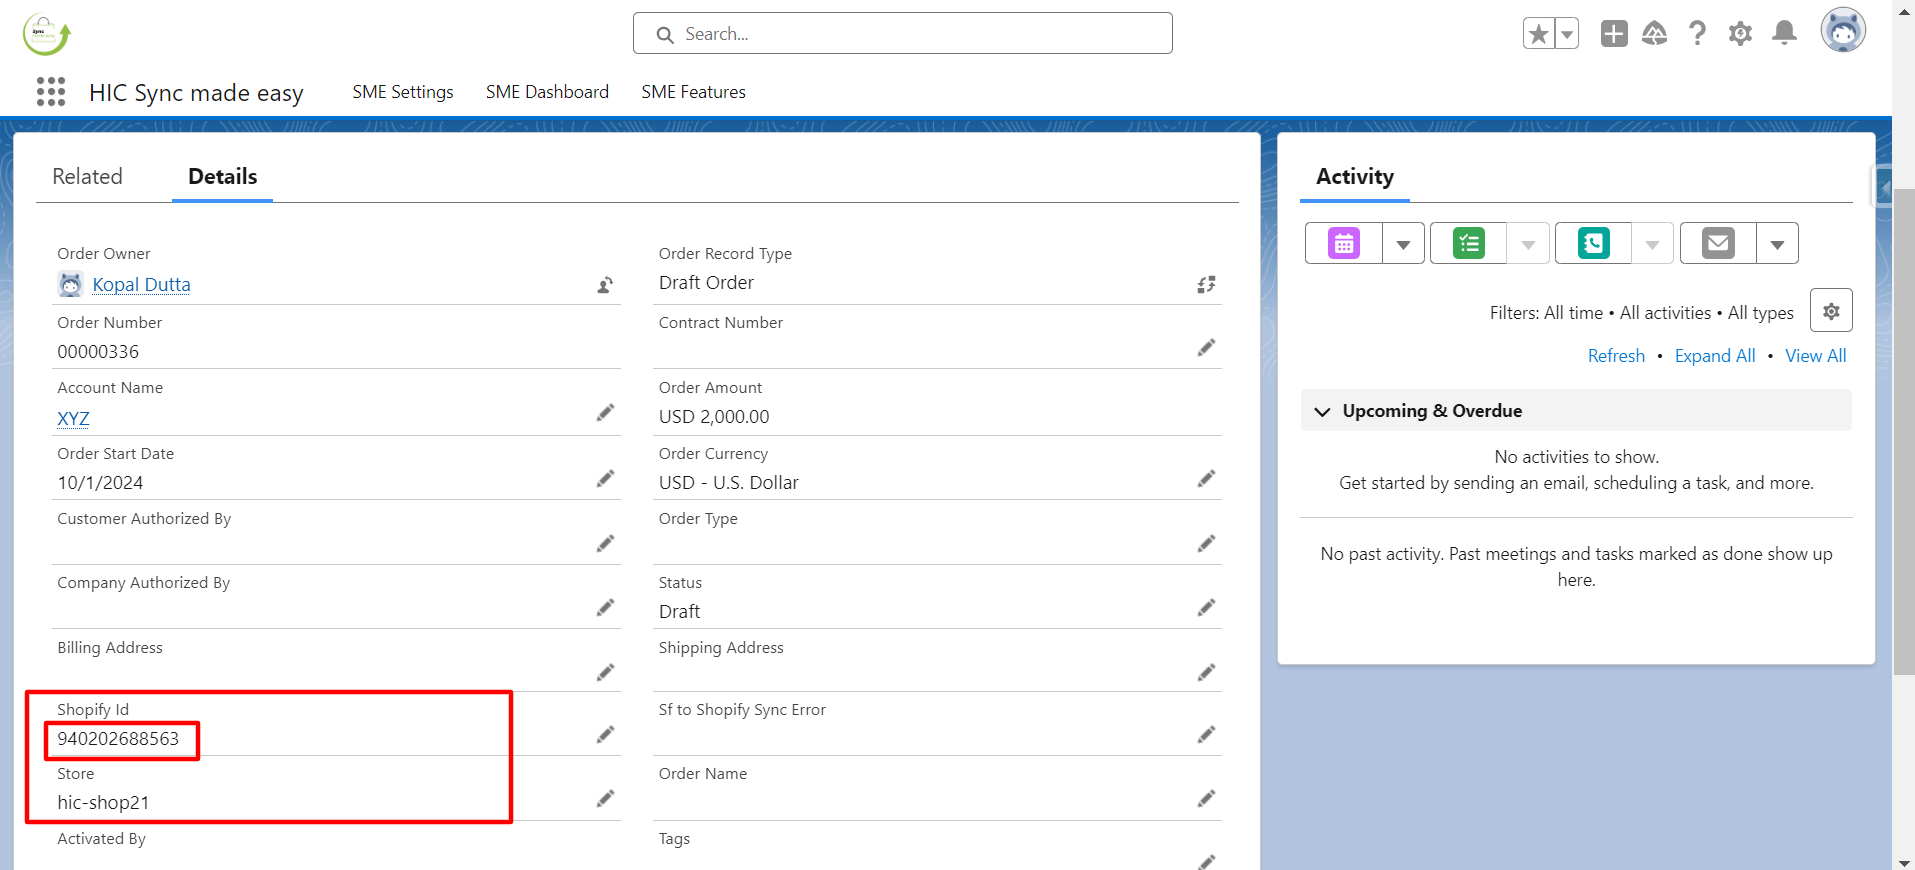
Step 14: Once the process is complete, the “Shopify ID” and “Store Name” fields will be populated.
Step 15: Verify that the “Shopify ID” and “Store Name” are now populated, then copy the Shopify ID.
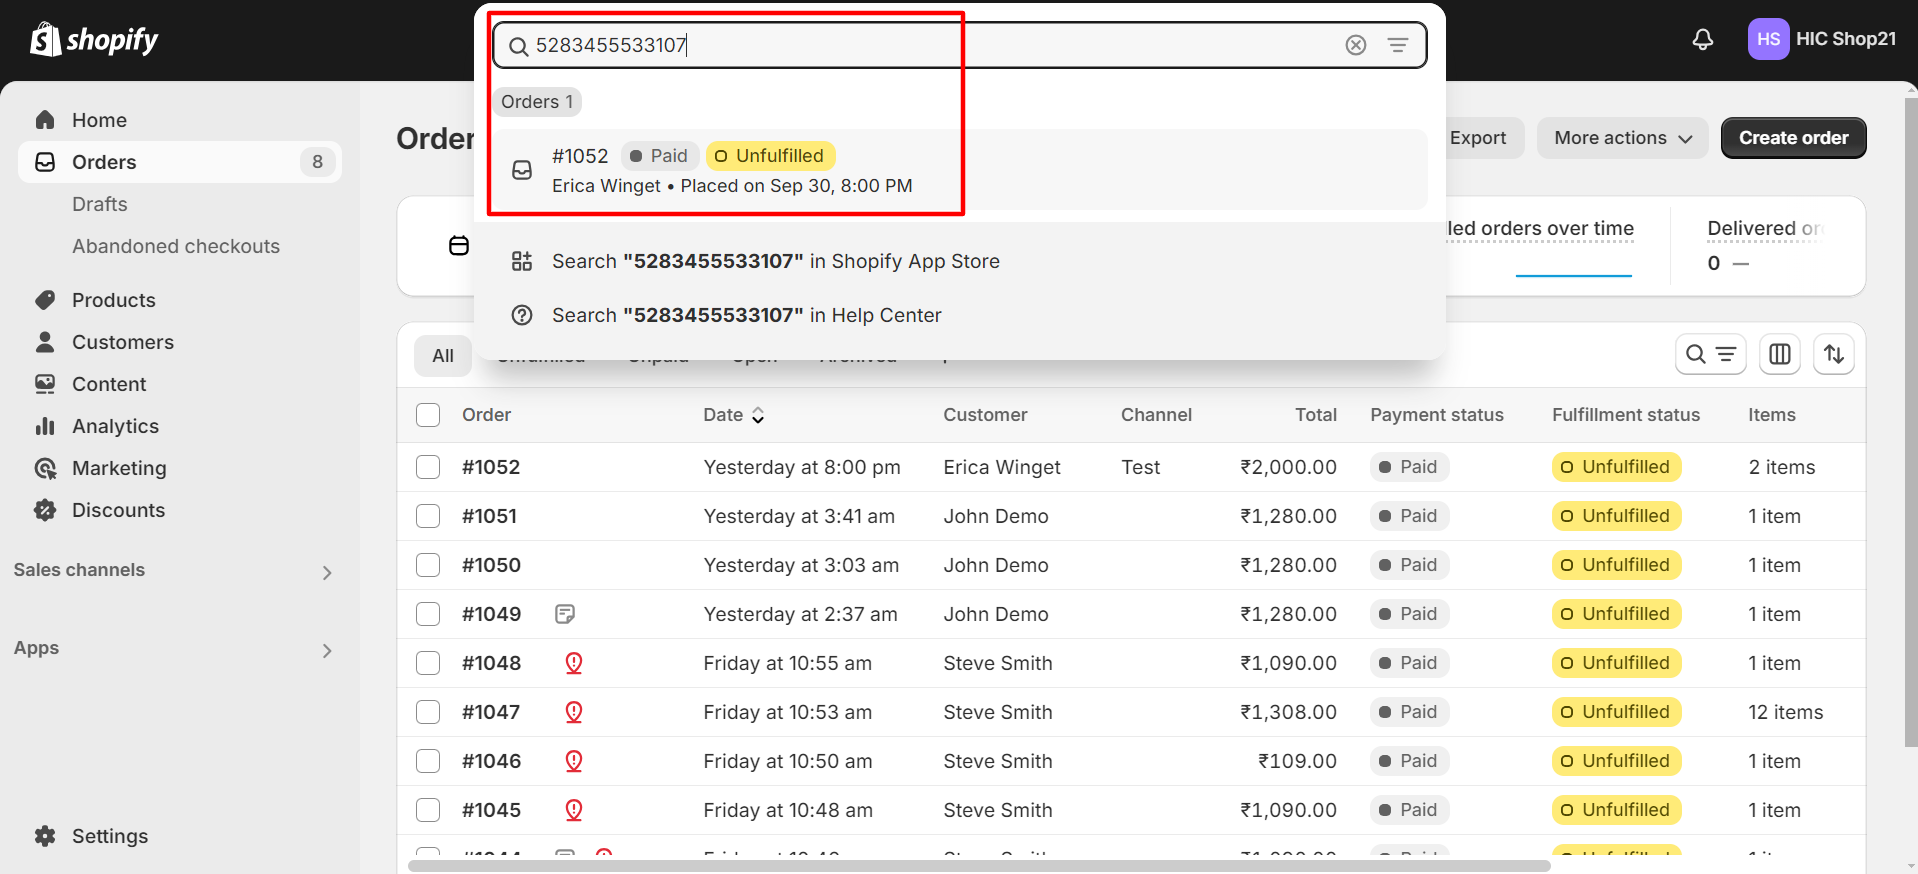
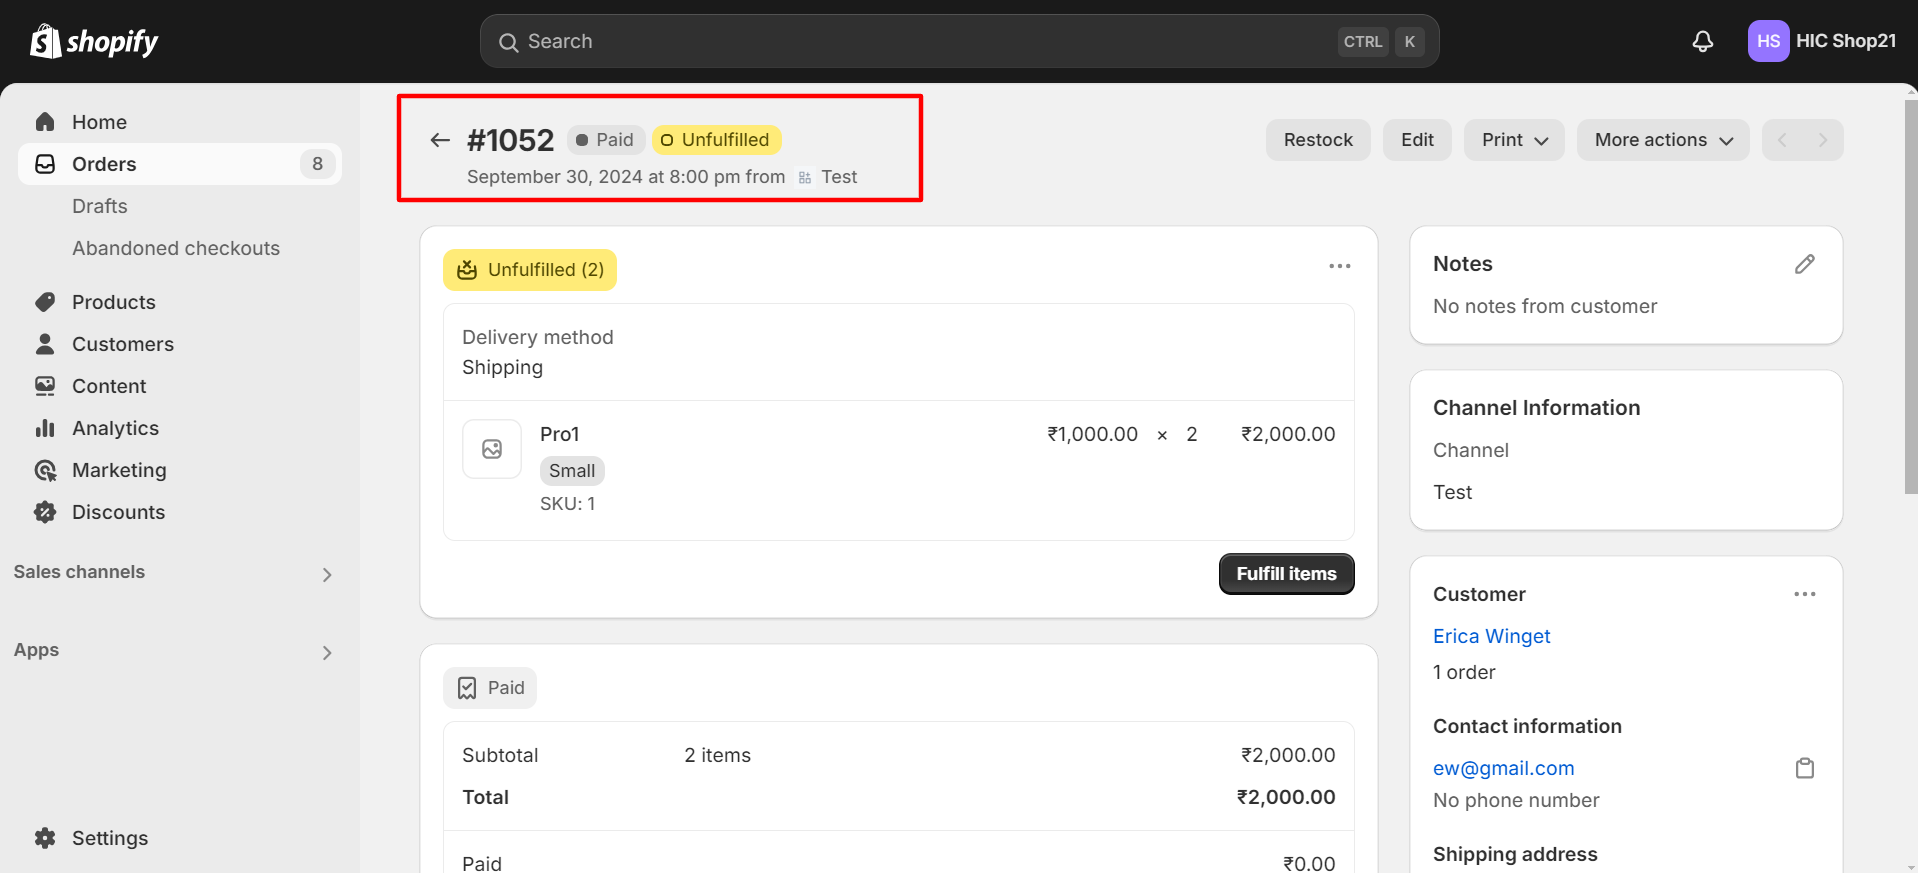
Step 16: Use the “Shopify ID” to search for the Order in your Shopify store.
Step 17: Confirm that the Order has been successfully synced to Shopify using the Send to Shopify feature.
Step 18: Open the Order in Salesforce and refresh the page to check the Order status. The status should change from Draft to Activated.
This concludes the functionality of the Send to Shopify button for Orders.
SEND TO SHOPIFY – DRAFT ORDER
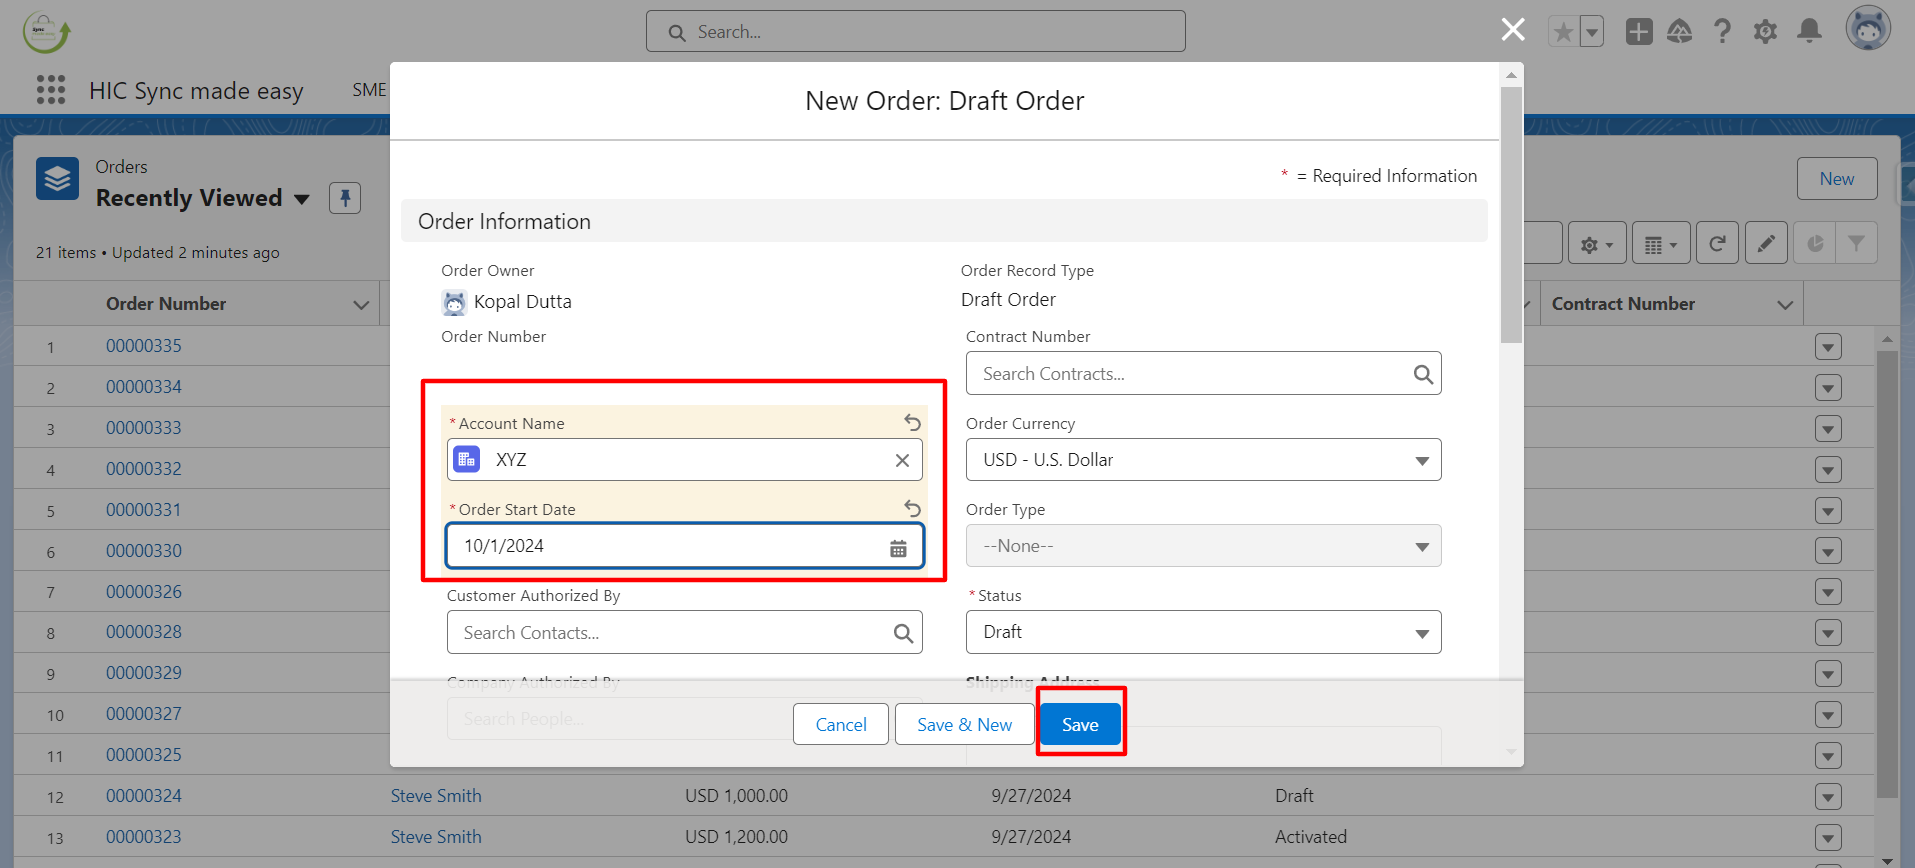
Step 1: Create a Draft Order in Salesforce with the record type set as “Draft Order”, then click Next.
Step 2: Fill in the required fields, such as Order Start Date, and click the Save button.
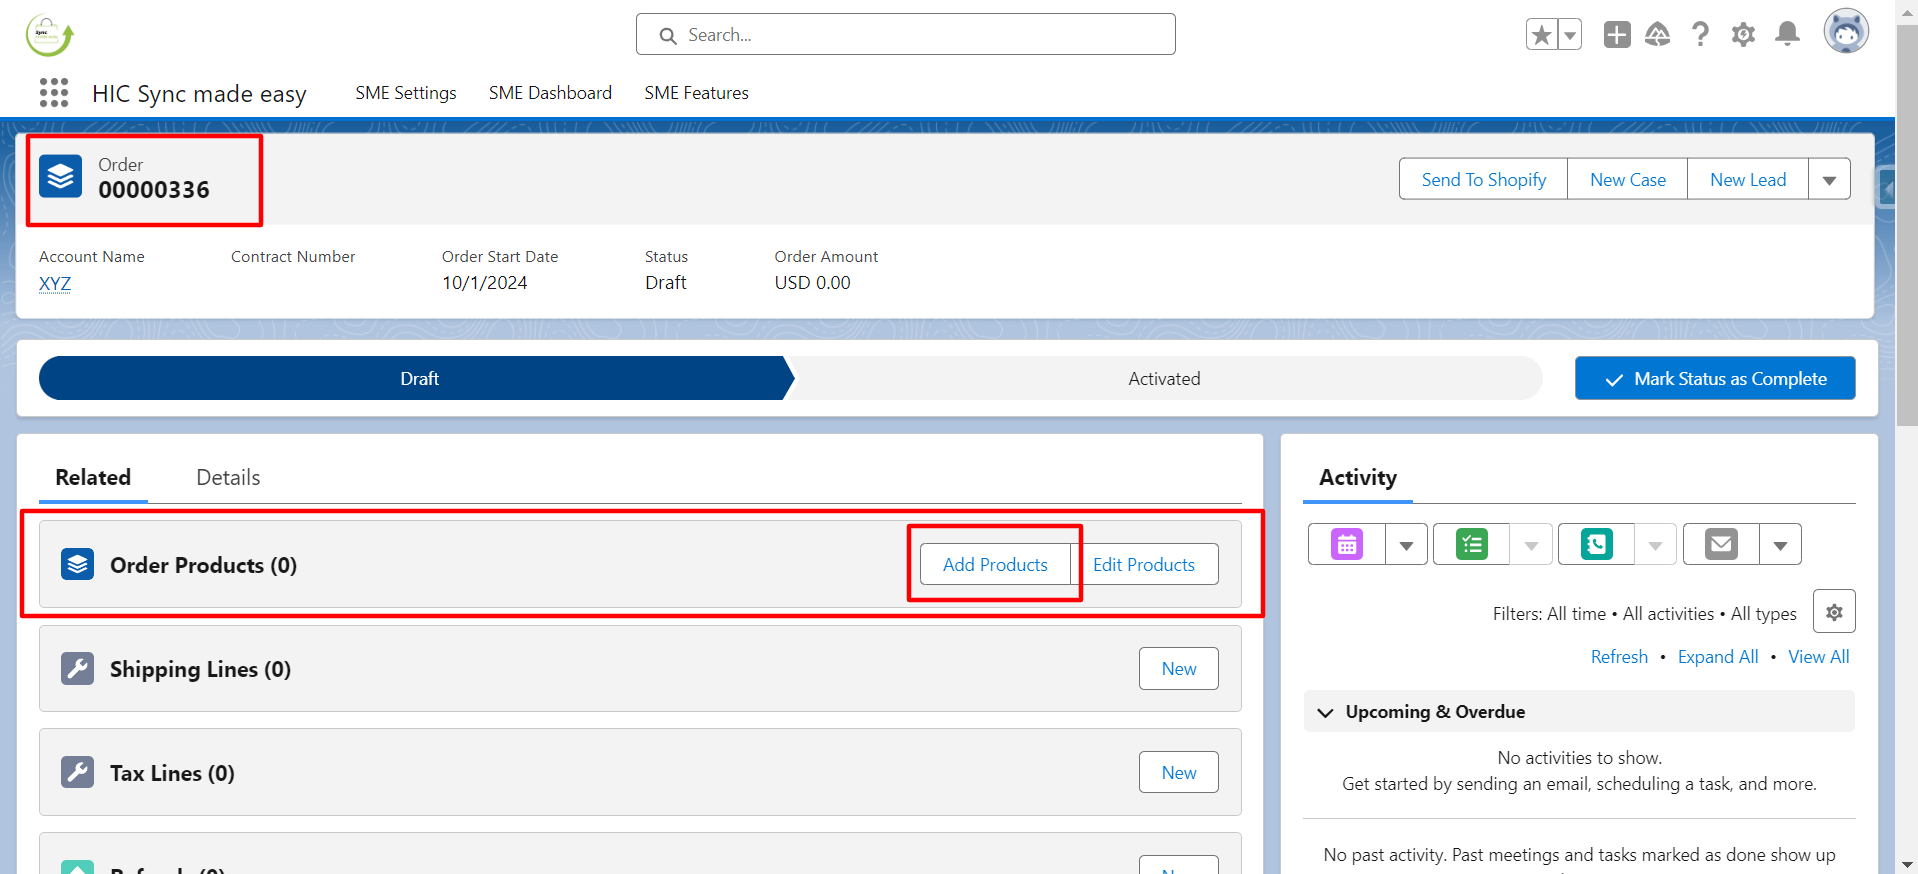
Step 3: Once the Draft Order is created, open it and add a product to the Draft Order.
Step 4: Select the Product and click Next.
Step 5: Enter the “Quantity” for the Product and click Save.
Step 6: After the Order Product is created, open the Product.
Step 7: In the Product, add a “Variant” and click Save.
Step 8: Verify that the Variant has been successfully added to the Order Product.
Step 9: Navigate back to the Draft Order detail page.
Step 10: Check the “Shopify ID” and “Store Name” fields, which will initially be blank, and click on the “Send to Shopify” button to generate the “Shopify ID” and “Store Name”.
Step 11: Once the process is complete, the “Shopify ID” and “Store Name” fields will be populated.
Step 12: Verify that the “Shopify ID” and “Store Name” are generated, then go to the Shopify store and search for the Draft Order.
Step 13: Refresh the Shopify Draft Order page, and you will observe that the Draft Order has been created.
Step 14: Confirm that the Draft Order has been successfully synced to Shopify using the Send to Shopify feature.
This concludes the functionality of the Send to Shopify button for Draft Orders.
SEND TO SHOPIFY – OPPORTUNITY
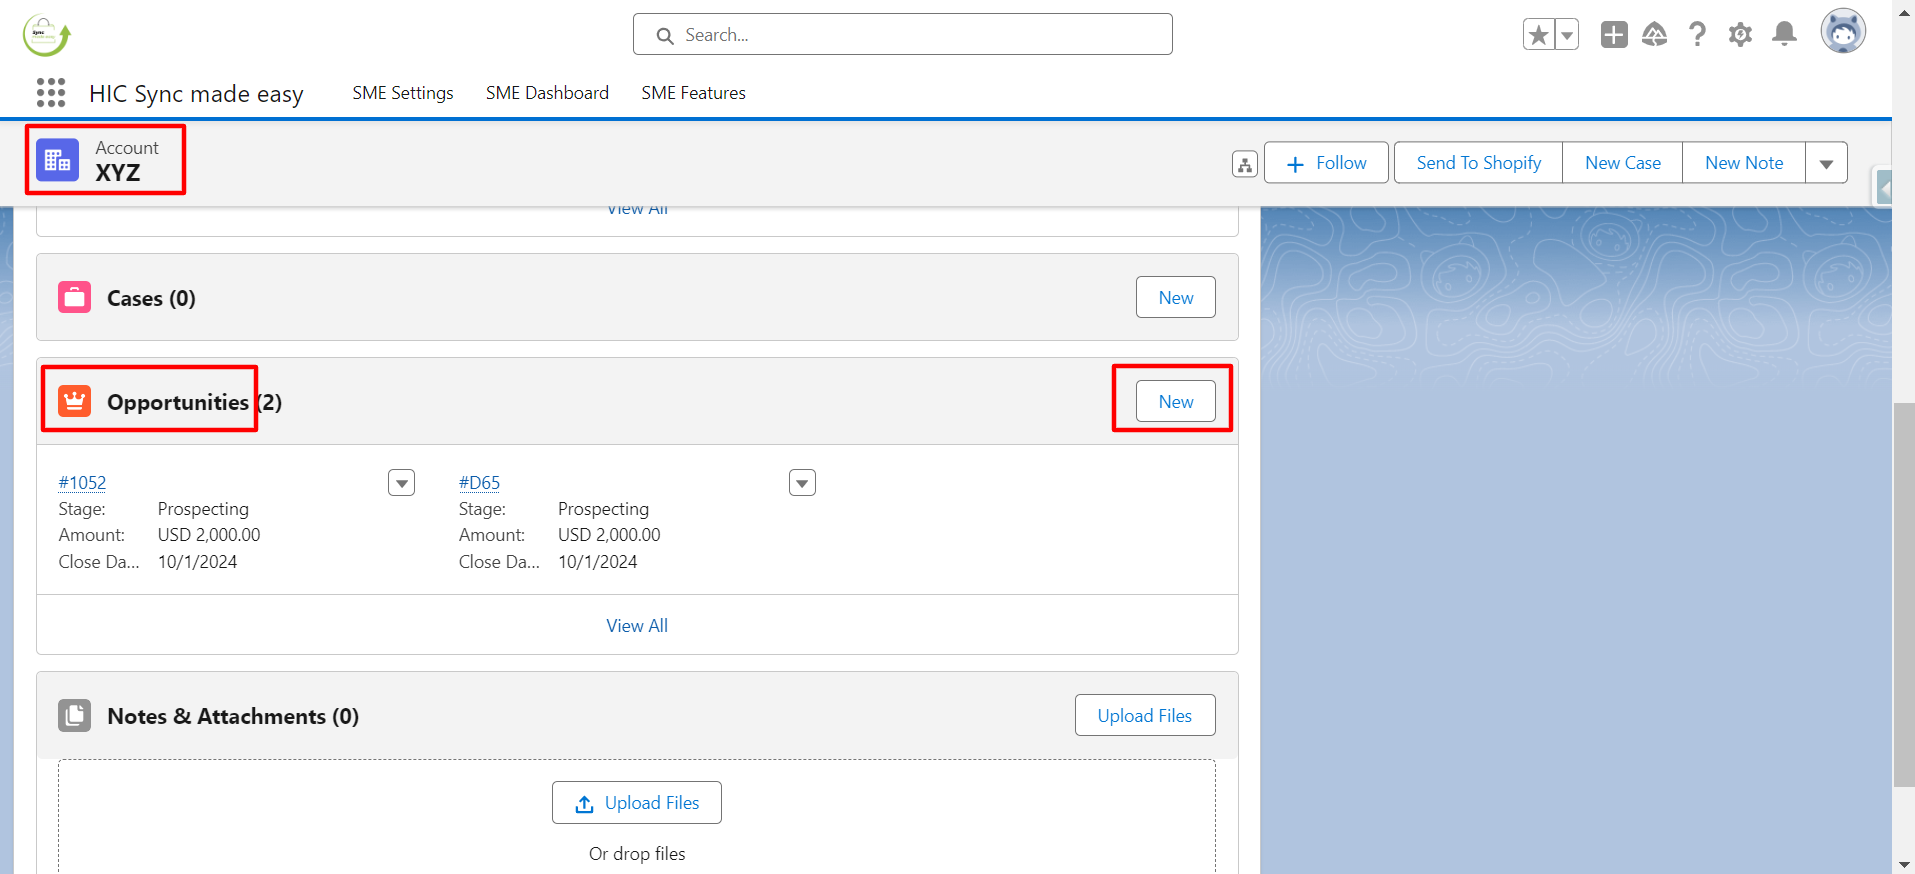
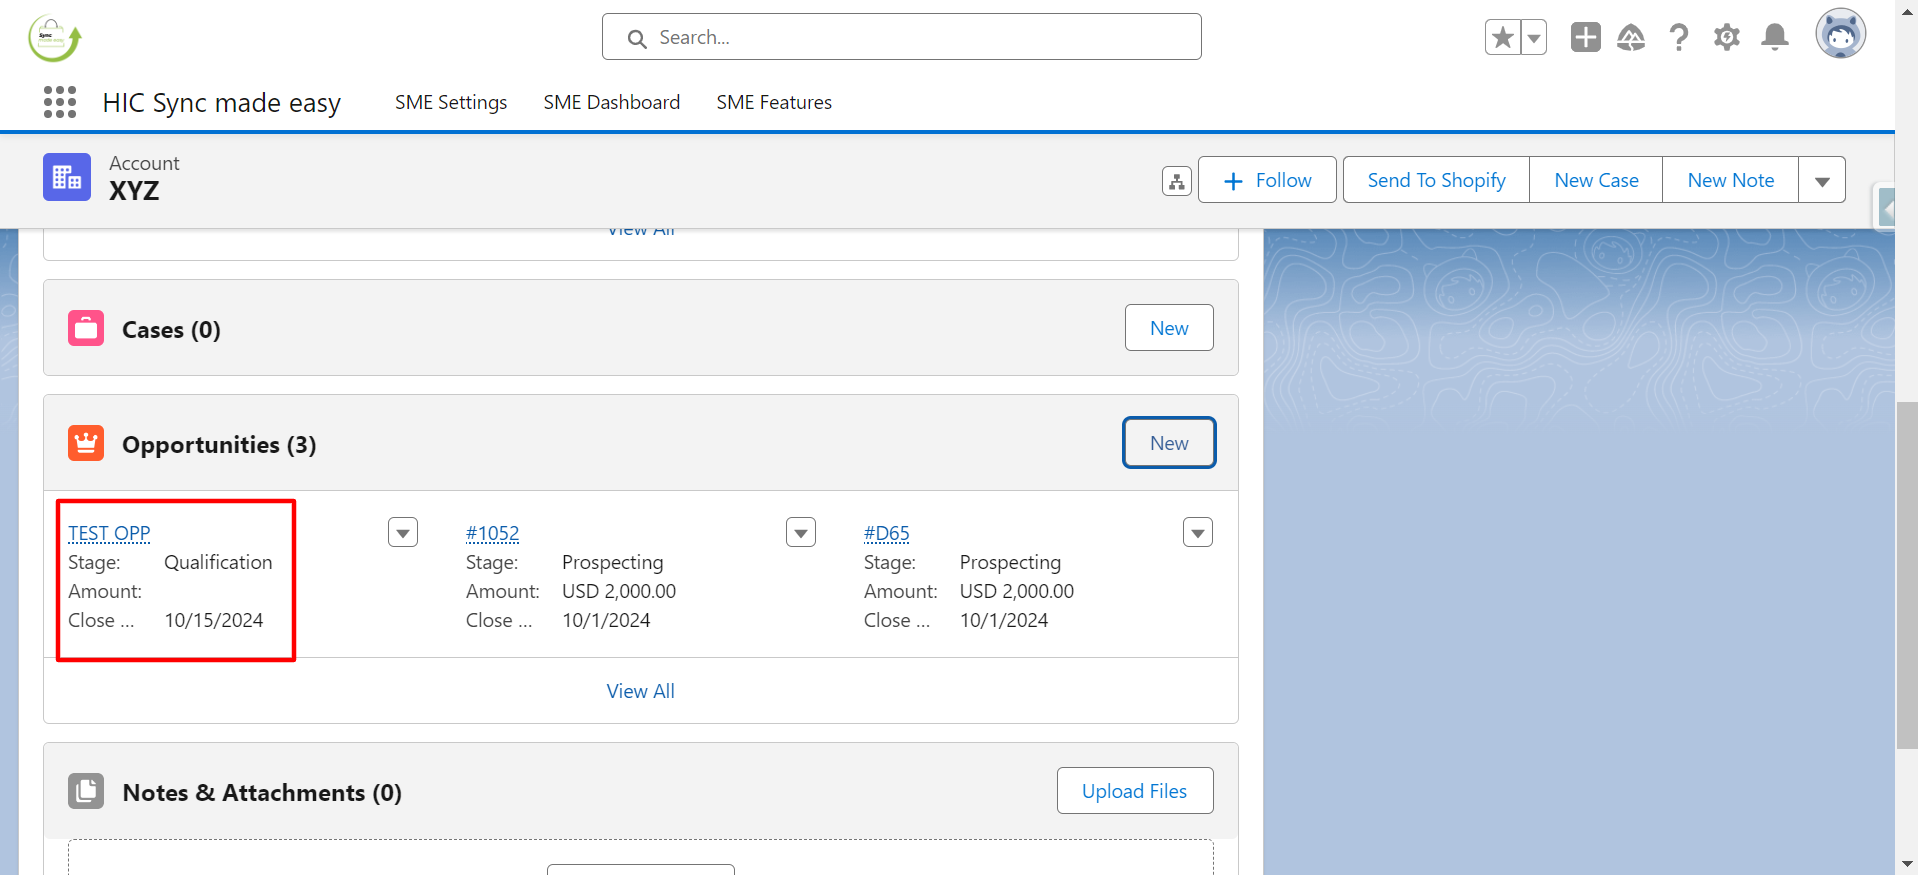
Step 1: Create an Opportunity in Salesforce under the account XYZ by clicking on the New button.
Step 2: Fill in the required fields, such as “Opportunity Name”, “Account Name”, “Stage”, and “Close Date”, then click the Save button.
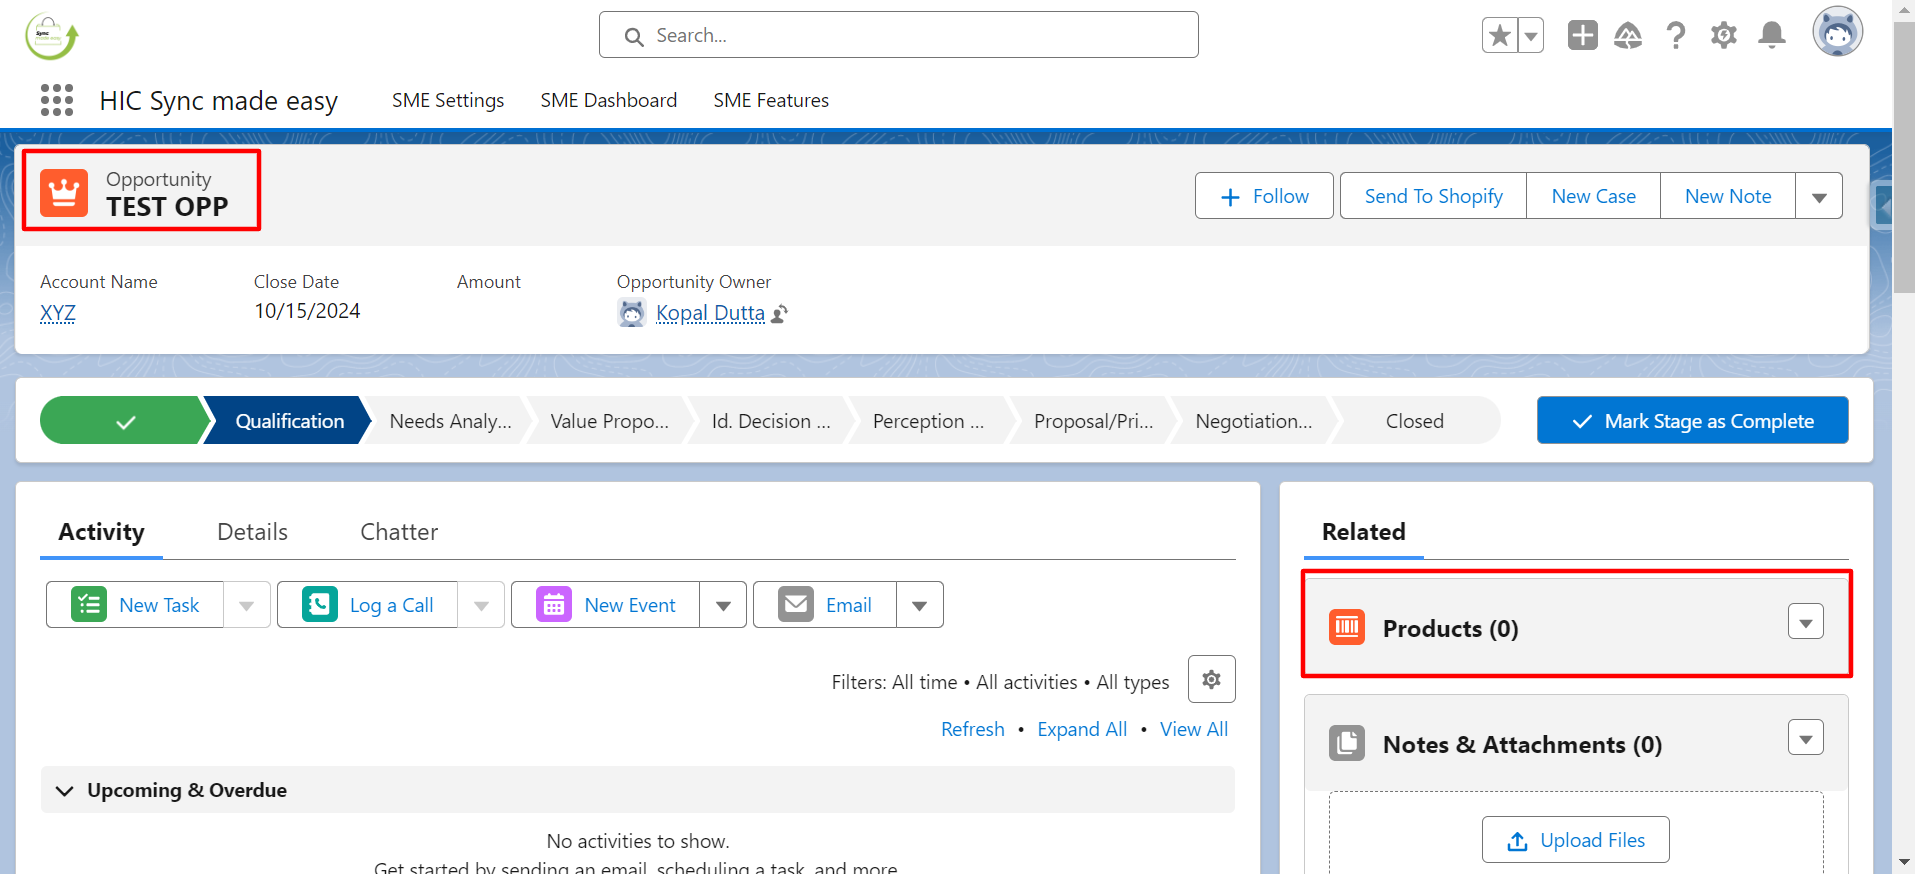
Step 3: Once the Opportunity is created, open it.
Step 4: Add a Product to the Opportunity.
Step 5: Select the Product and click Next.
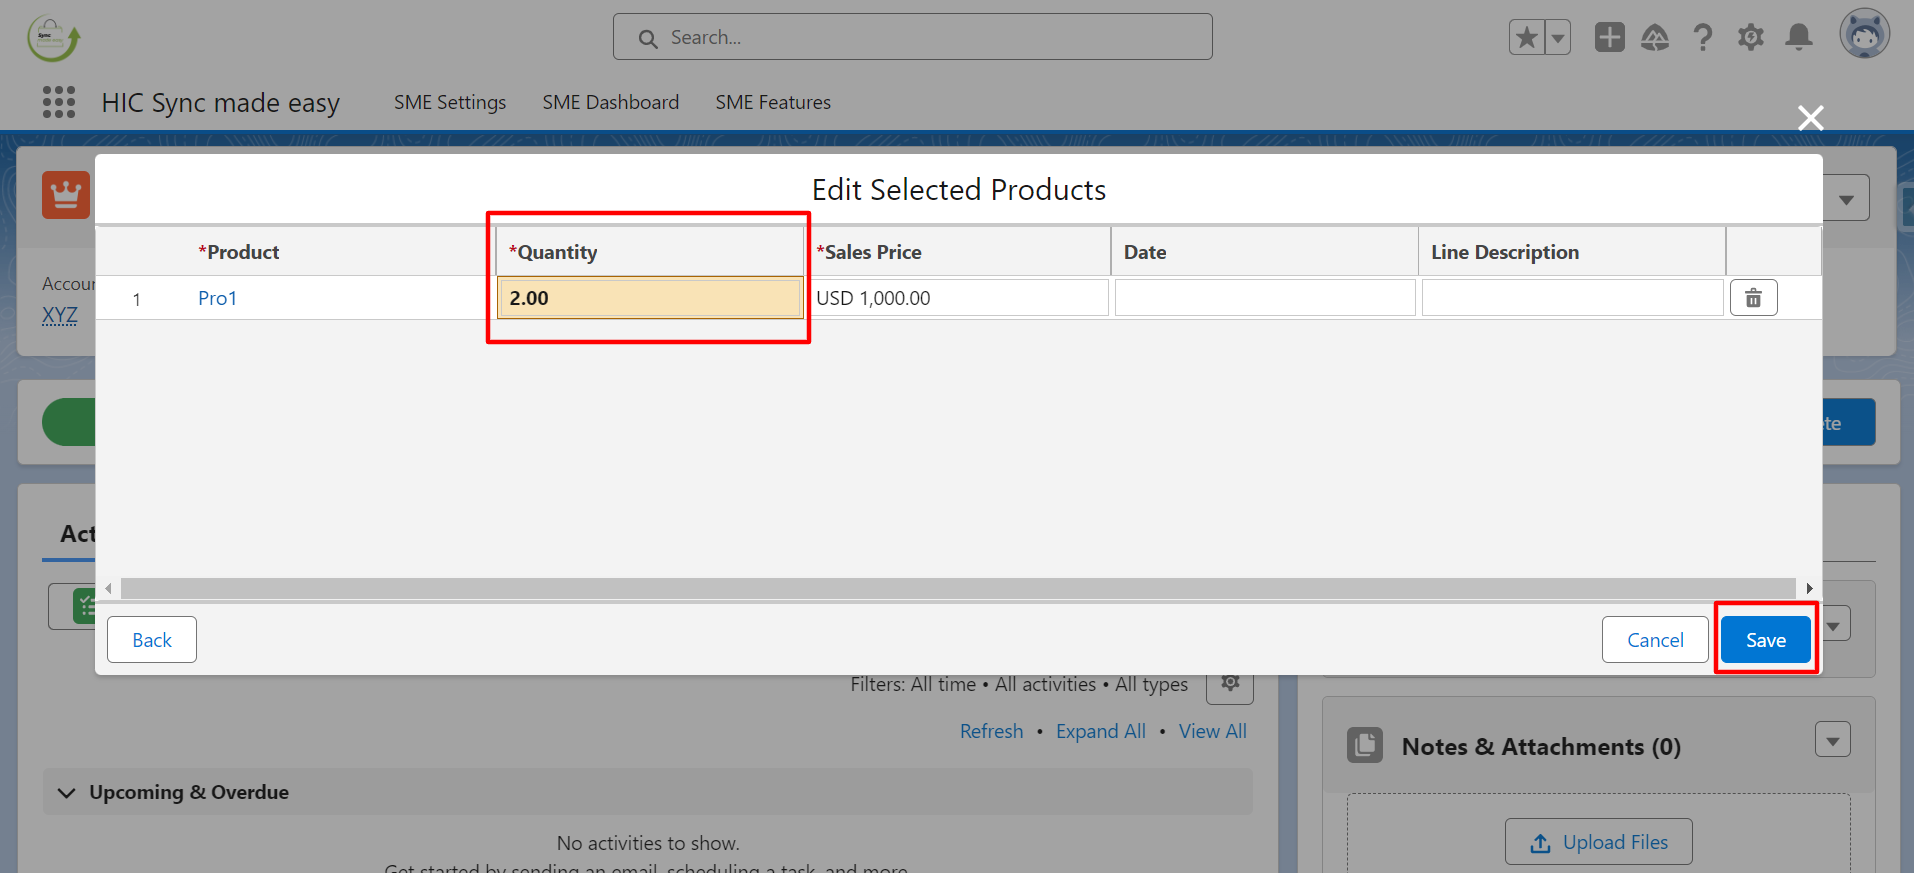
Step 6: Enter the “Quantity” for the Product and click Save.
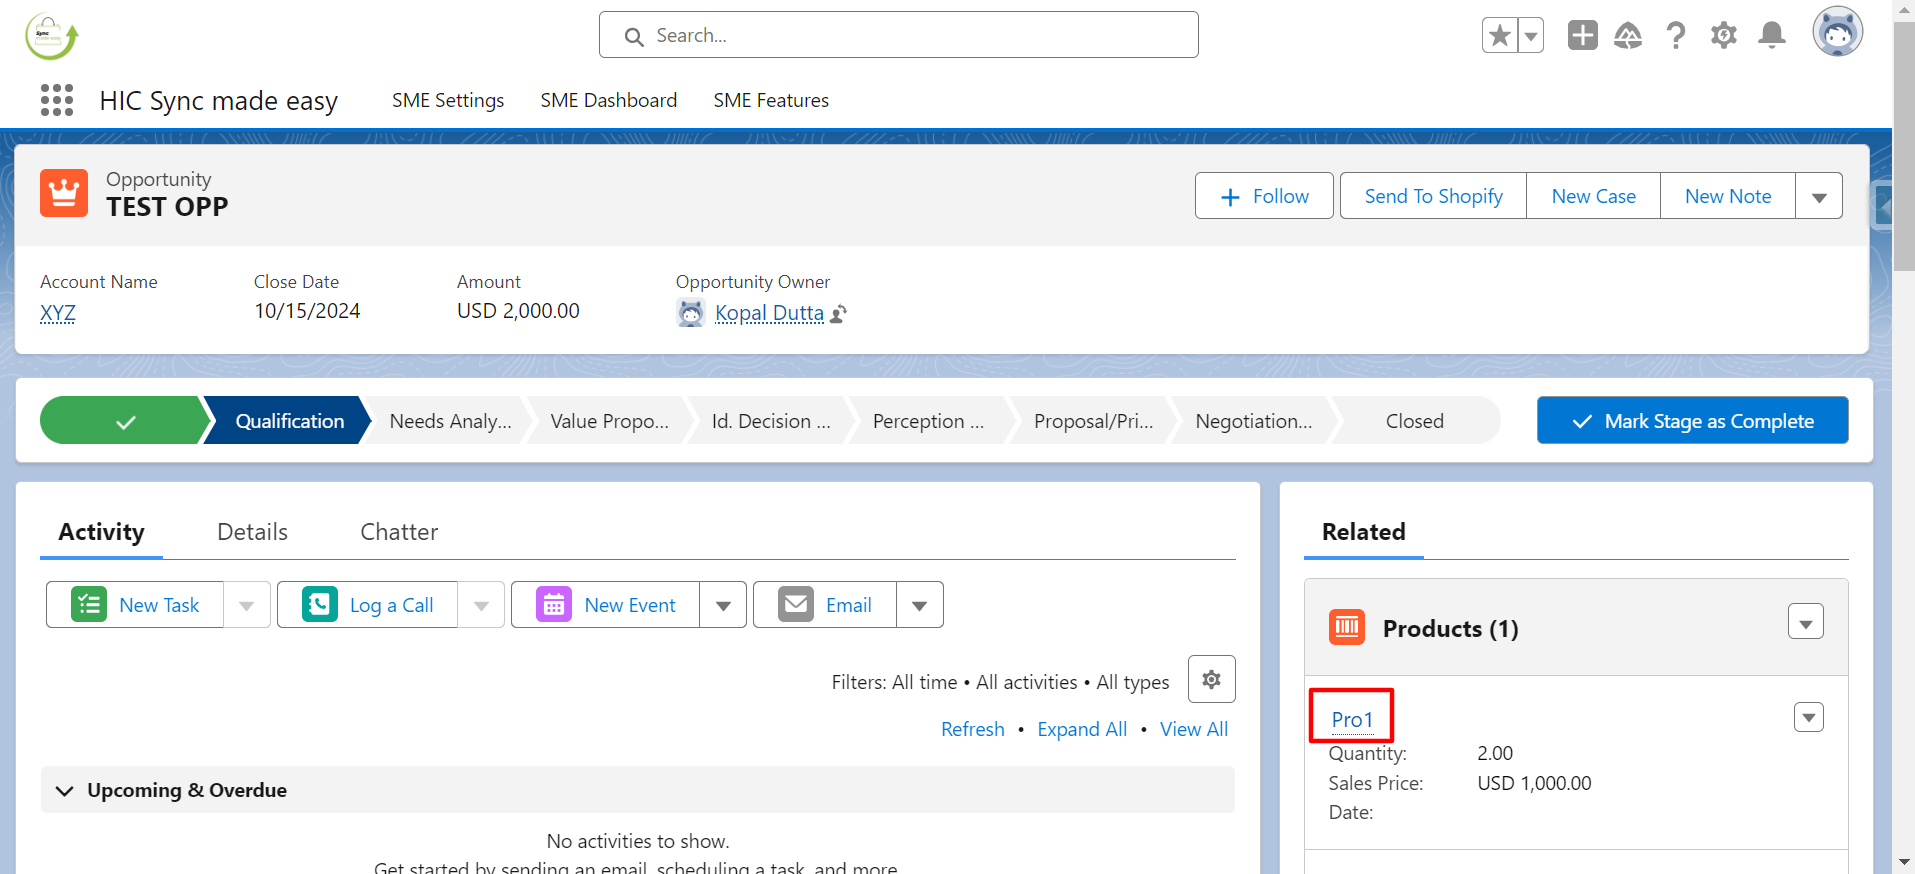
Step 7: After the Order Product is created, open the Product.
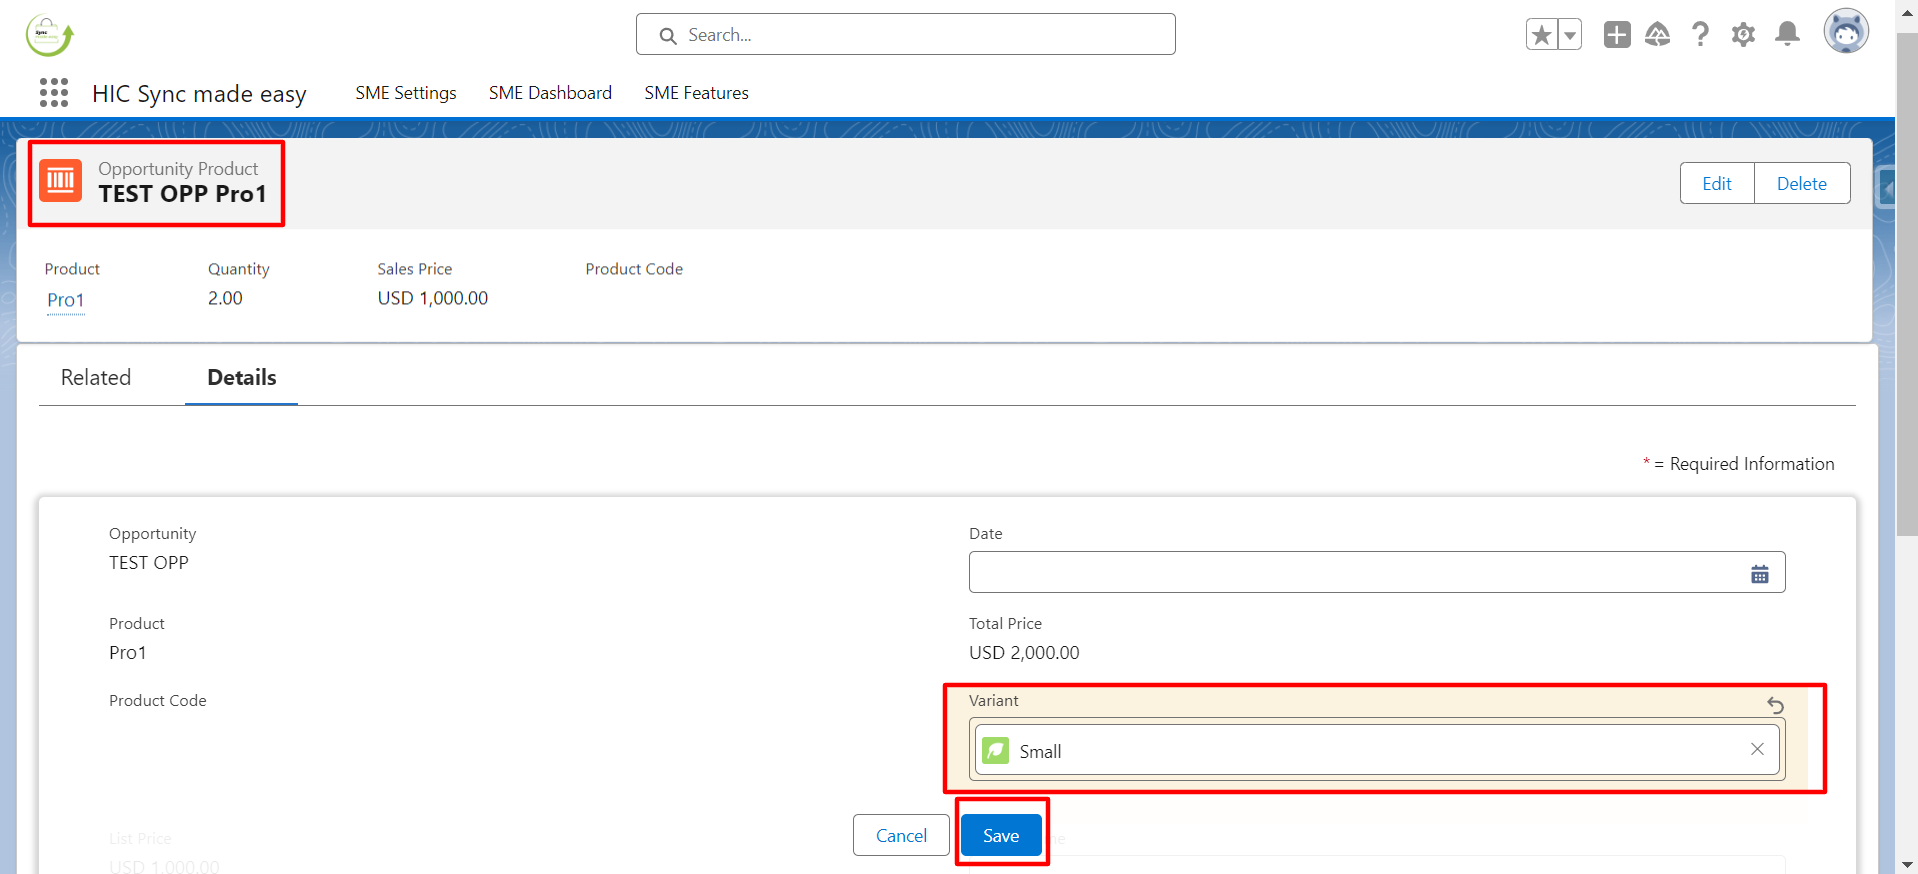
Step 8: In the Product, add a “Variant” and click Save.
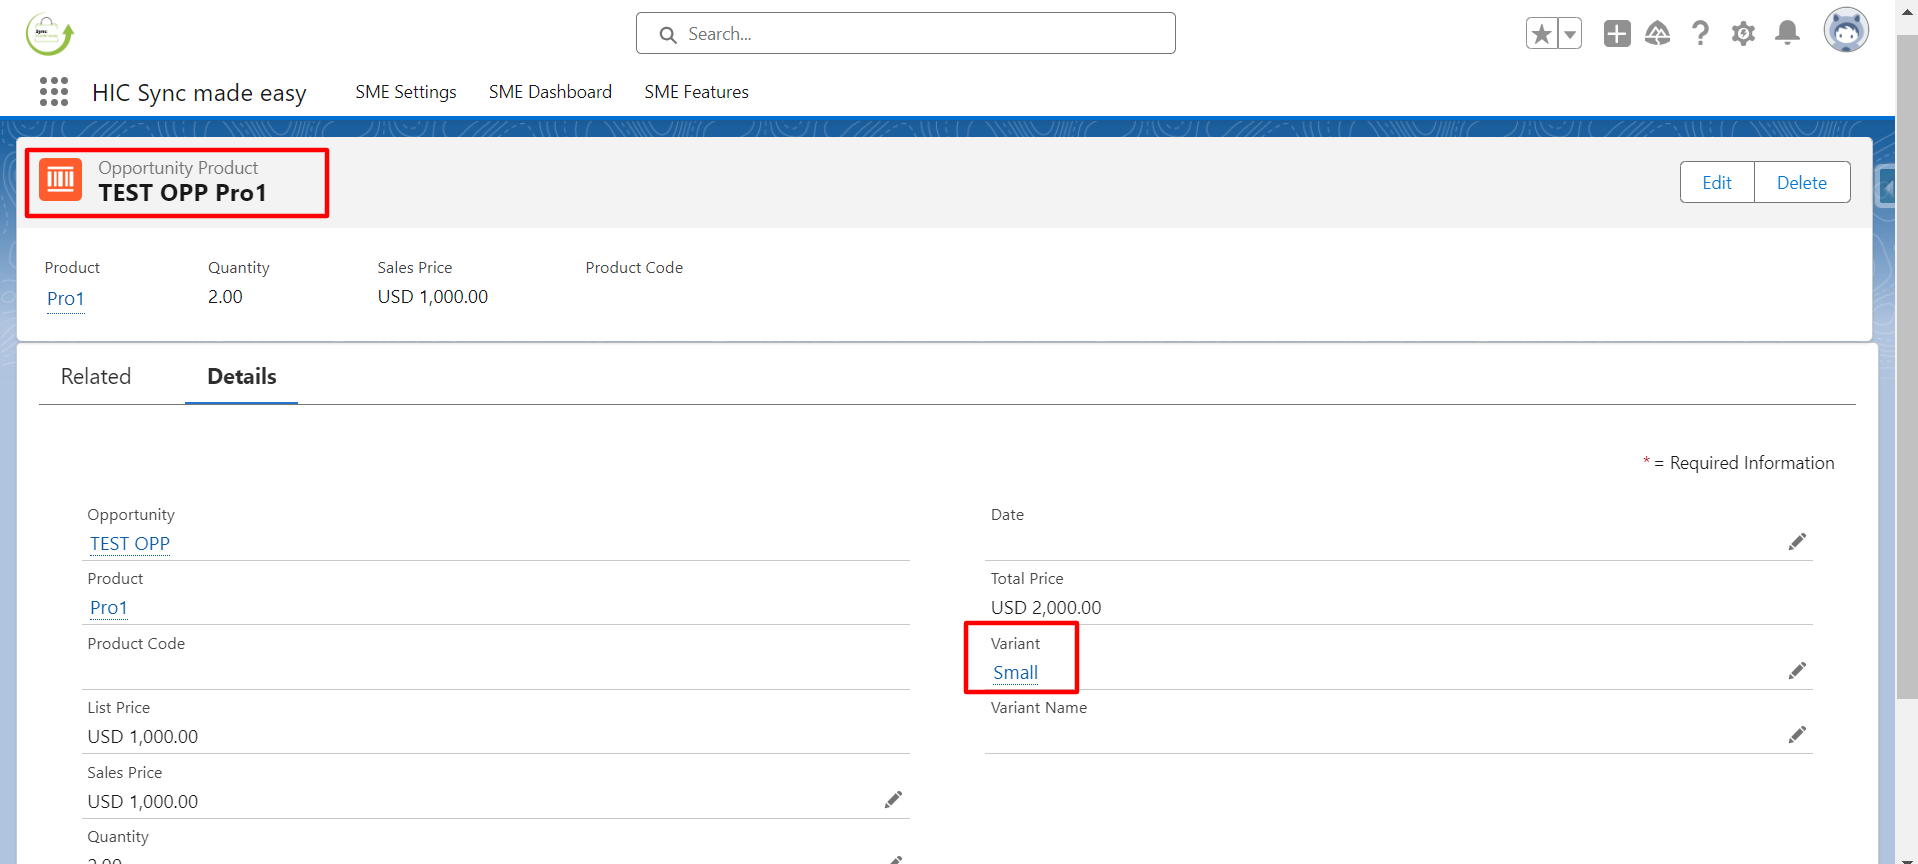
Step 9: Verify that the Variant has been successfully added to the Order Product.
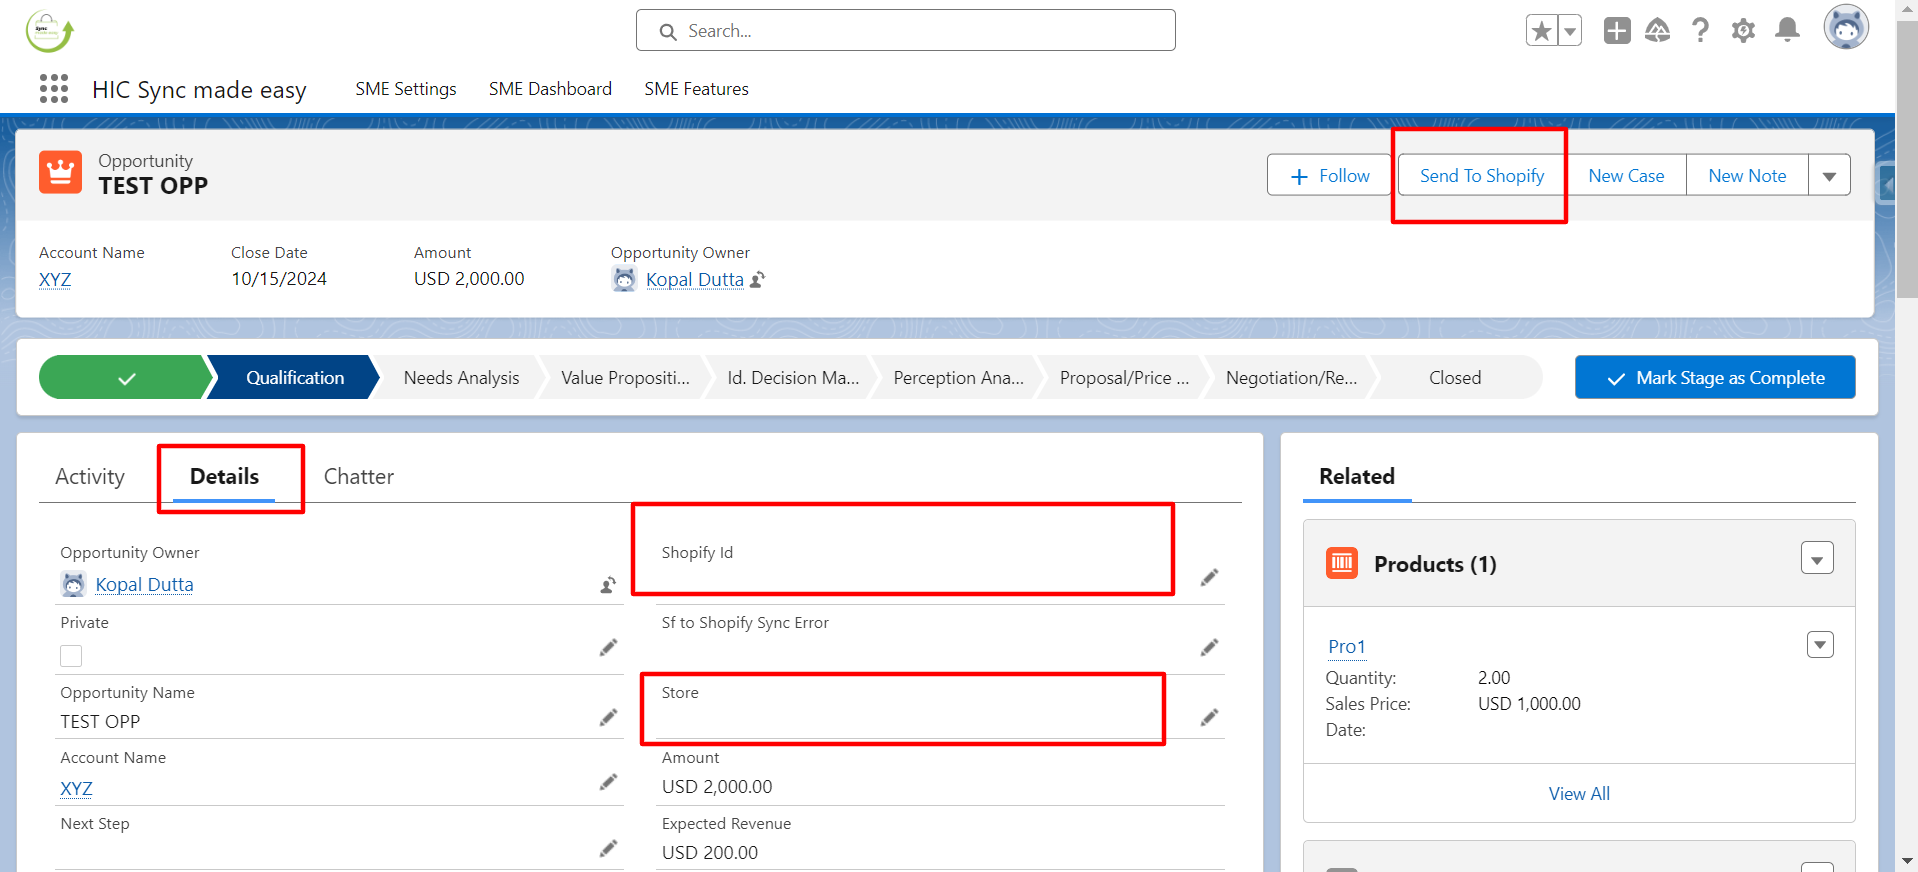
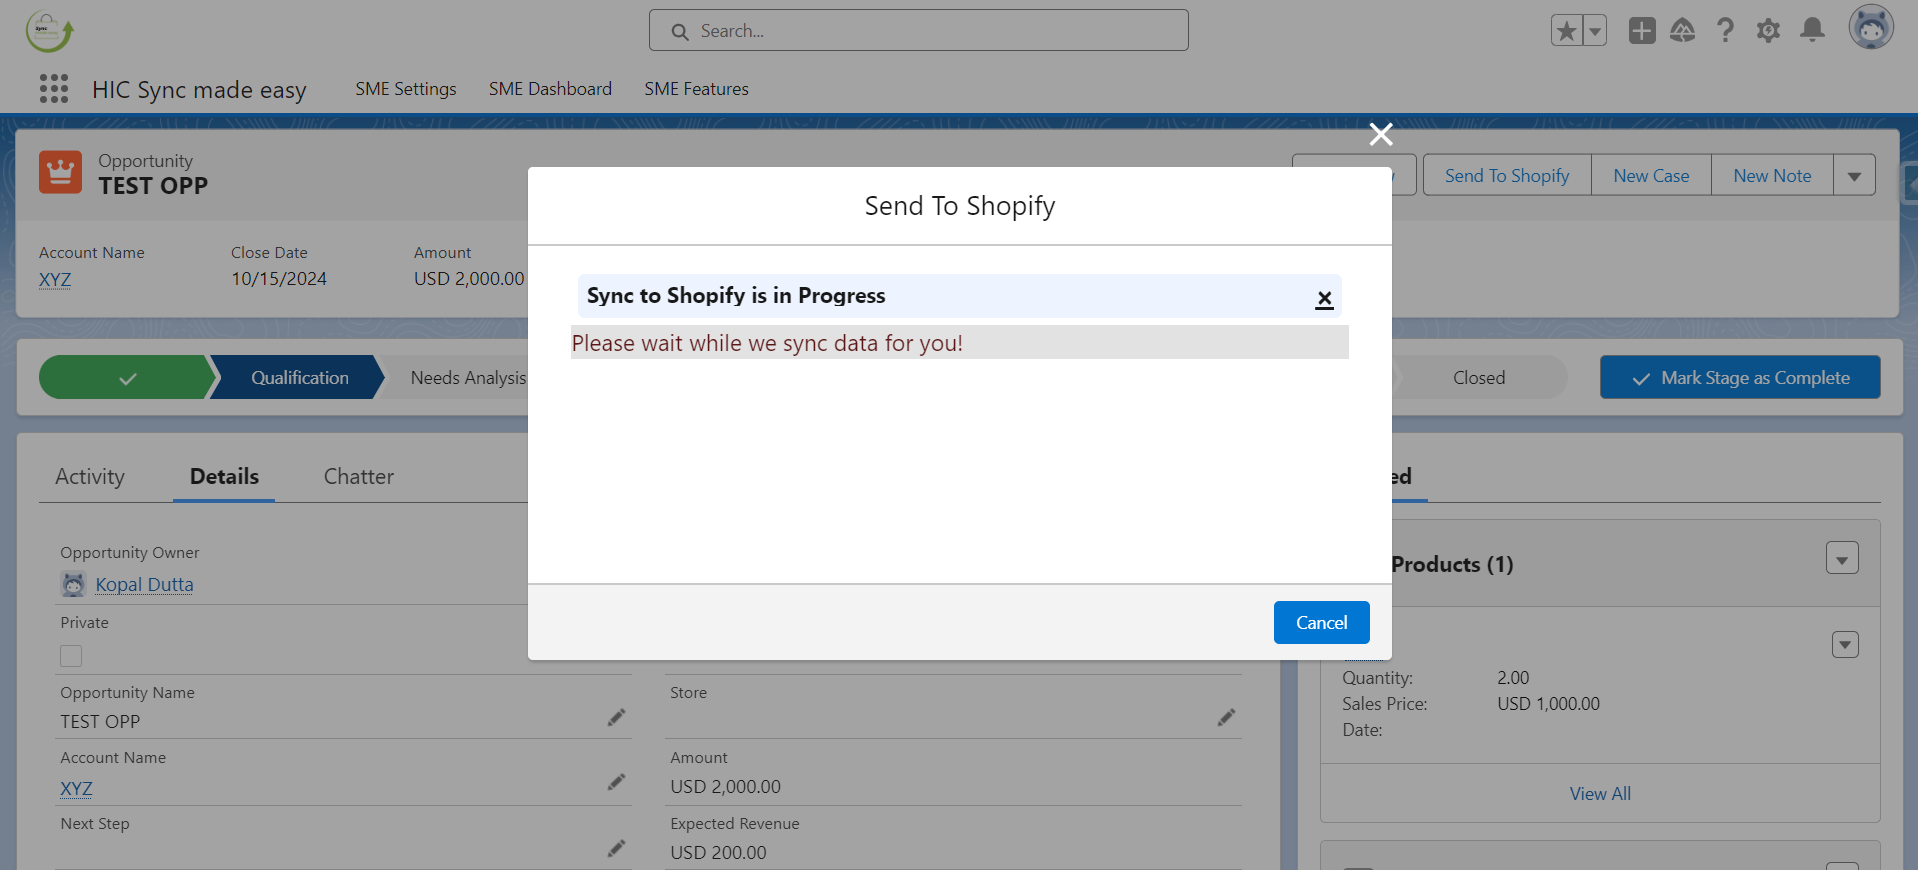
Step 10: Return to the Opportunity detail page. Check the “Shopify ID” and “Store Name” fields, which will initially be blank. Click on the “Send to Shopify” button to generate the “Shopify ID” and “Store Name”.
Step 11: Once the process is complete, the “Shopify ID” and “Store Name” fields will be populated.
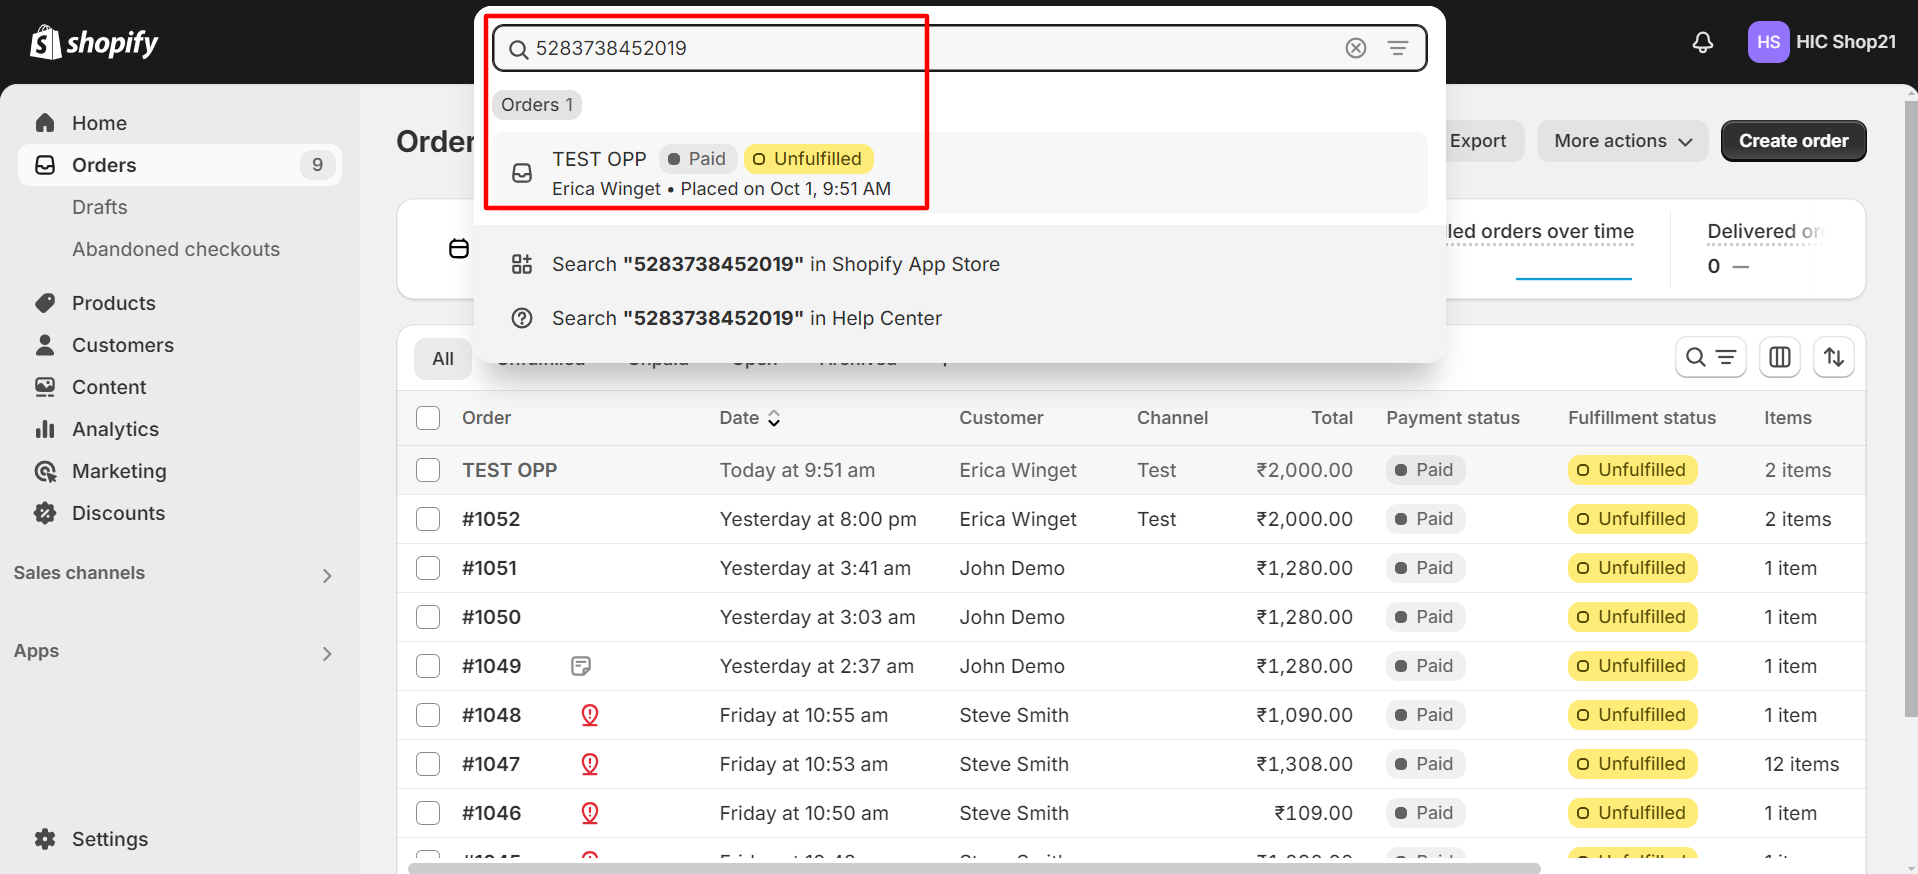
Step 12: Verify that the “Shopify ID” and “Store Name” are generated, then copy the Shopify ID.
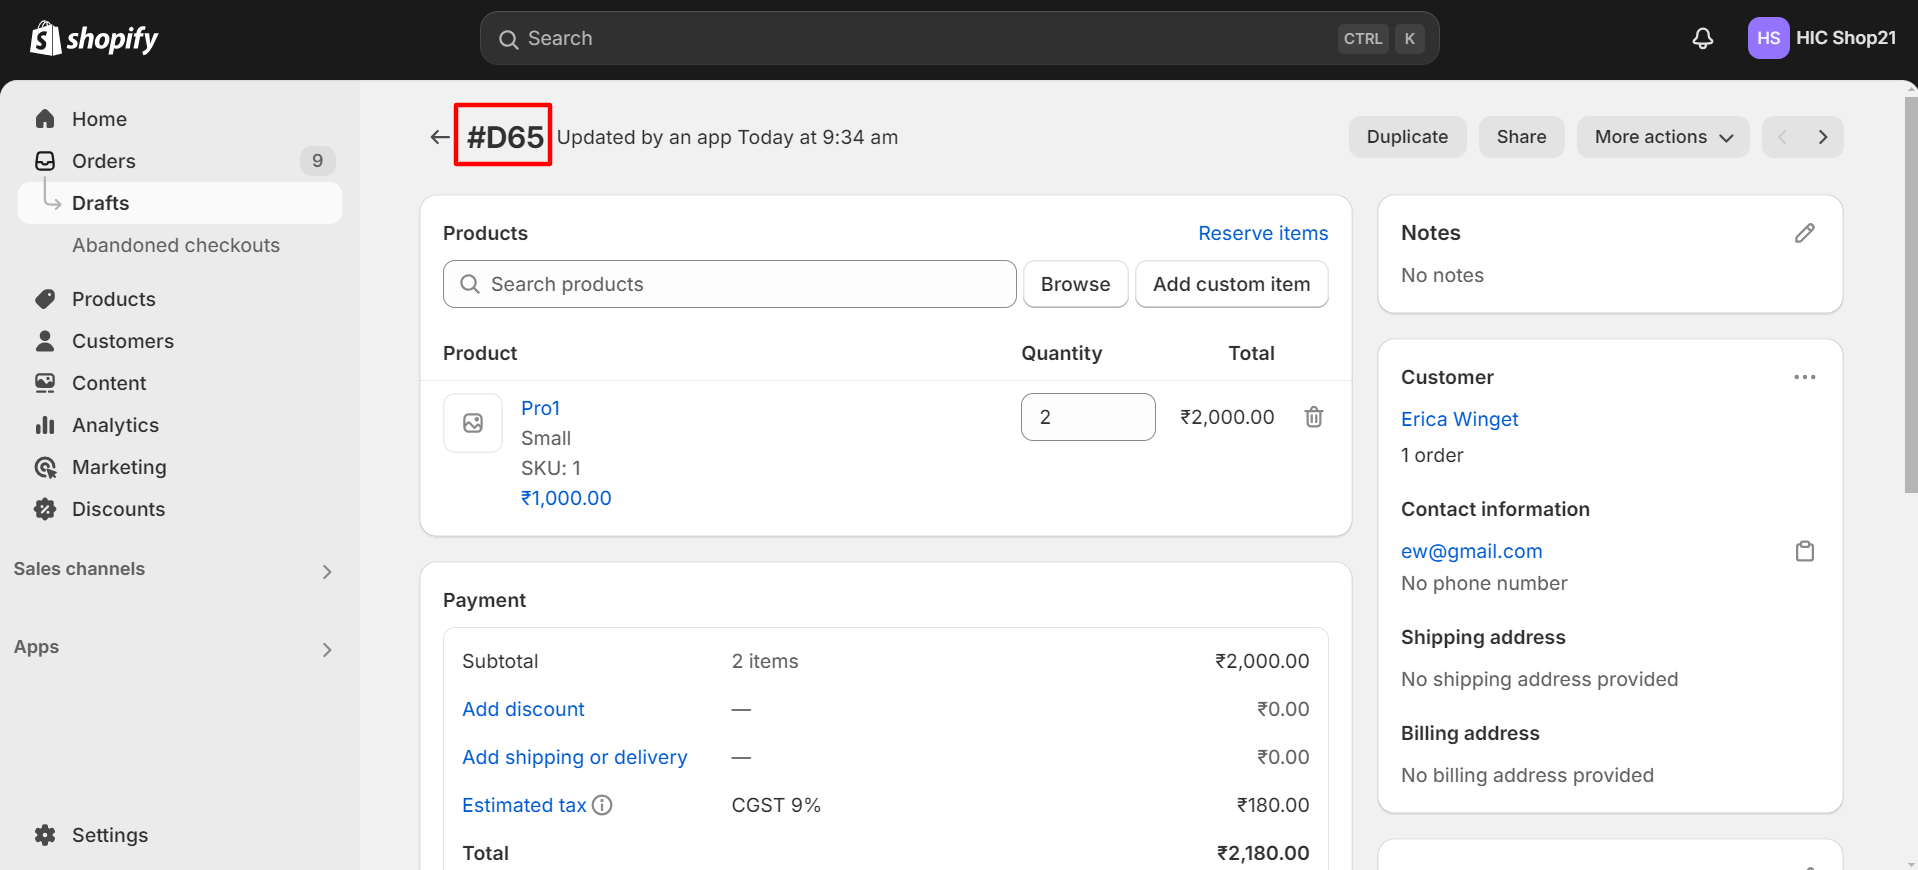
Step 13: Use the “Shopify ID” to search for the Opportunity in your Shopify store.
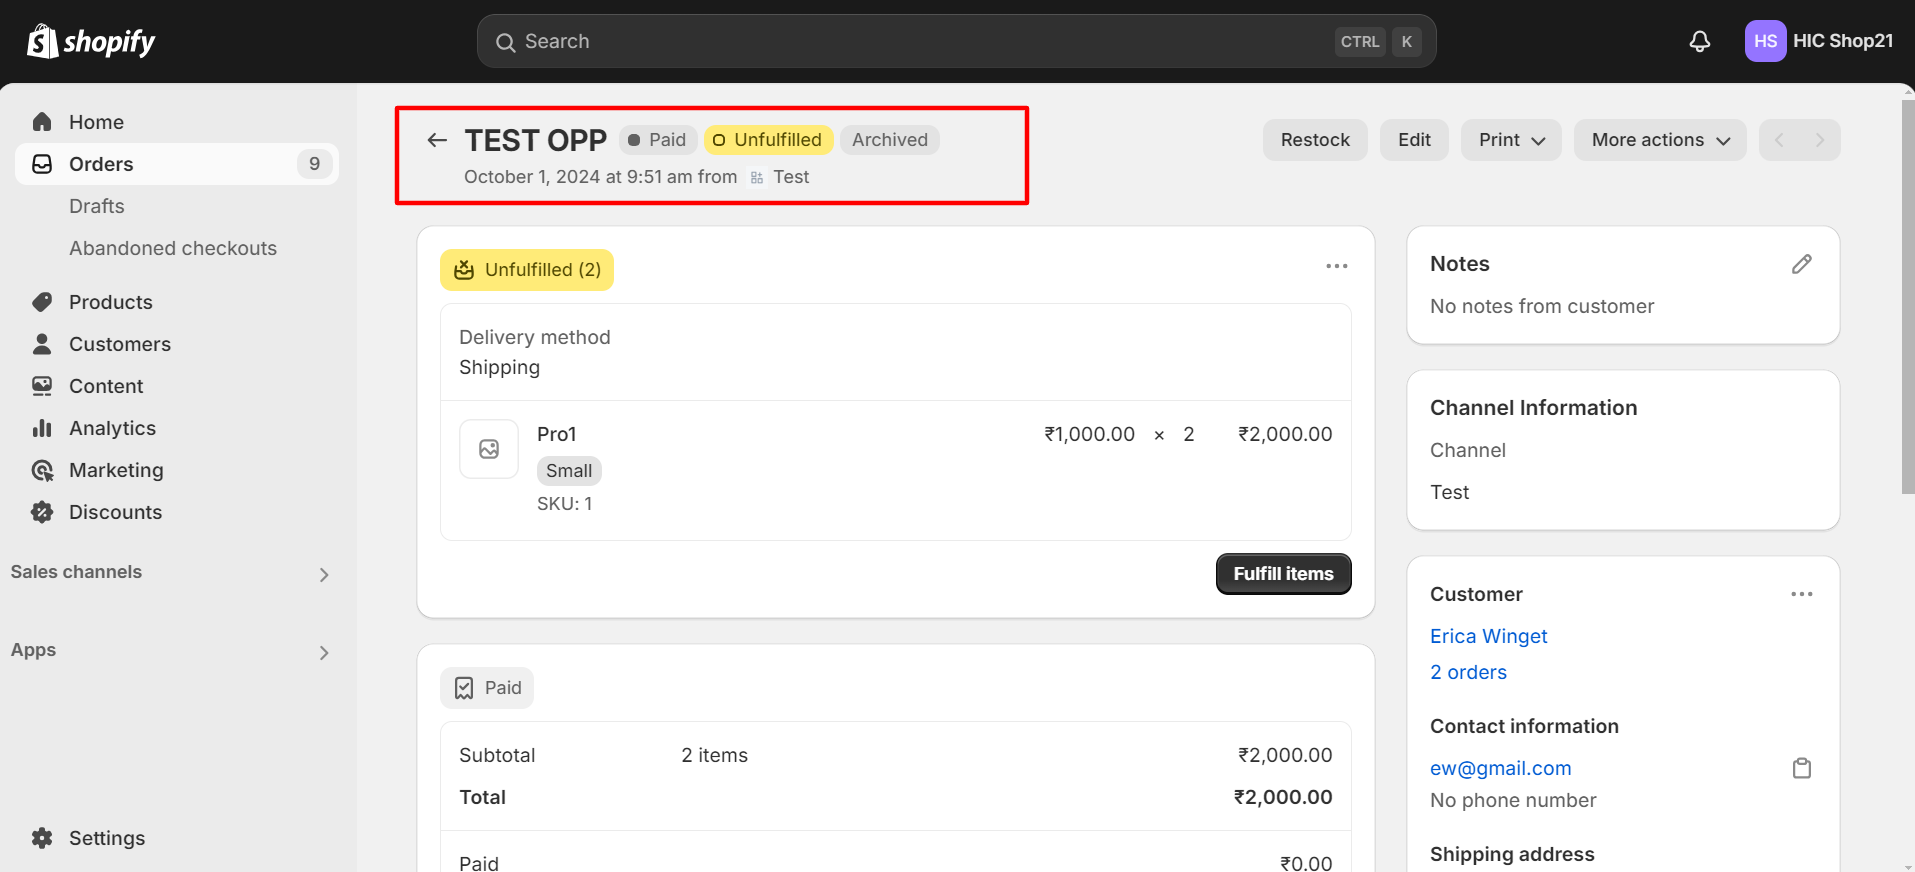
Step 14: Confirm that the Opportunity has been successfully synced to Shopify using the Send to Shopify feature.
This concludes the functionality of the Send to Shopify button for Opportunities.