How to Automate Lead Conversion from Shopify to Salesforce?
This guide explains how the Automate Lead Conversion feature seamlessly converts new Shopify customers into Accounts & Contacts or Person Accounts in Salesforce based on your predefined mappings. When a customer account is created in Shopify, a Lead is automatically generated in Salesforce and converts upon order creation. Follow this step-by-step process to enable and use this automation effortlessly. Let’s get started!
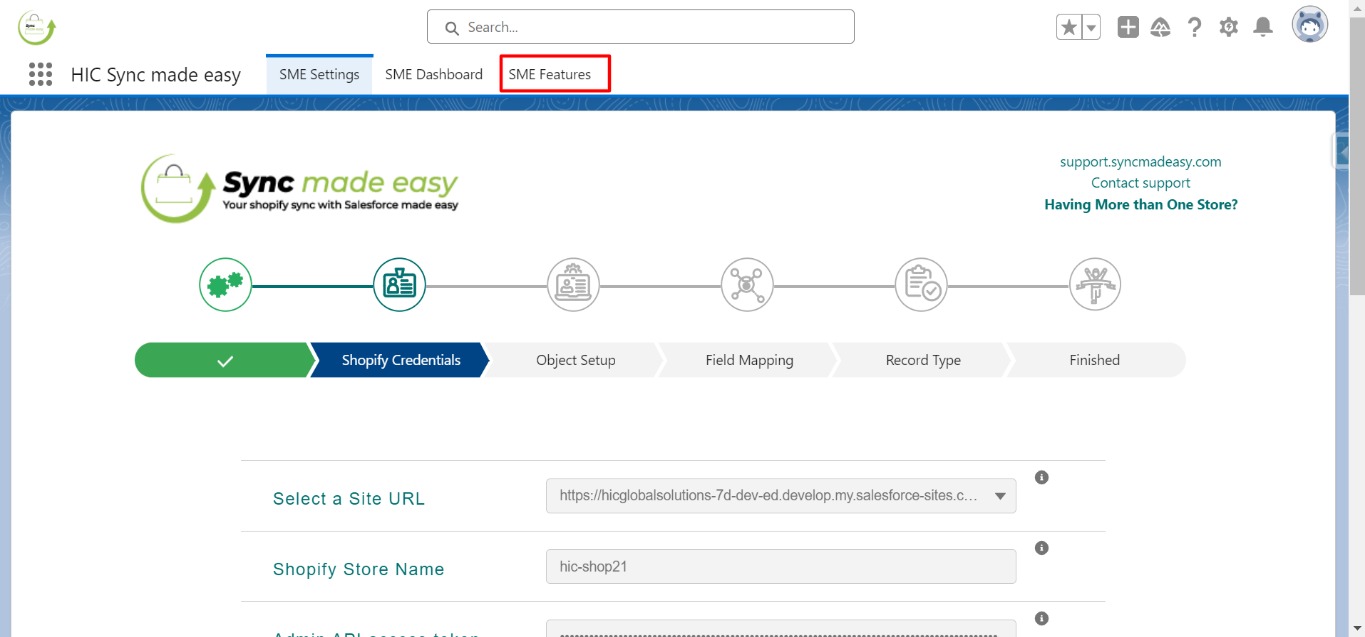
Step 1:Open your Salesforce organization and navigate to the “SME Features” tab.
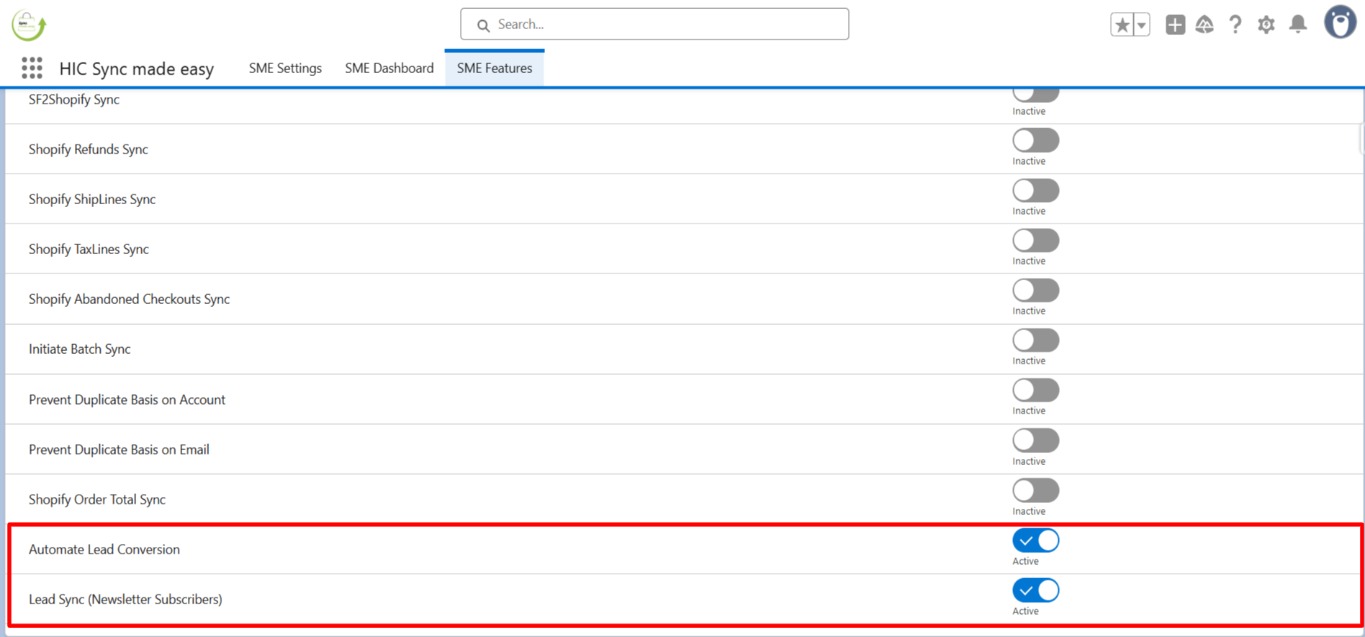
Step 2:Enable the “Automate Lead Conversion” and “Lead Sync (Newsletter Subscribers)” Features.
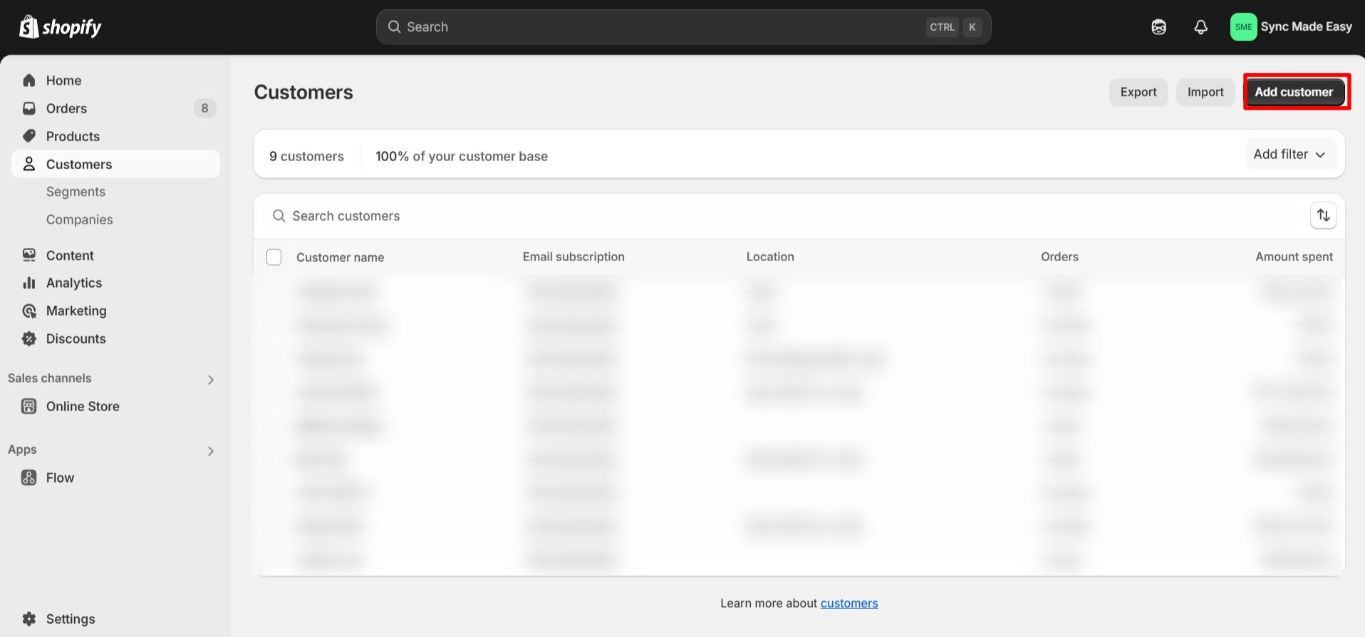
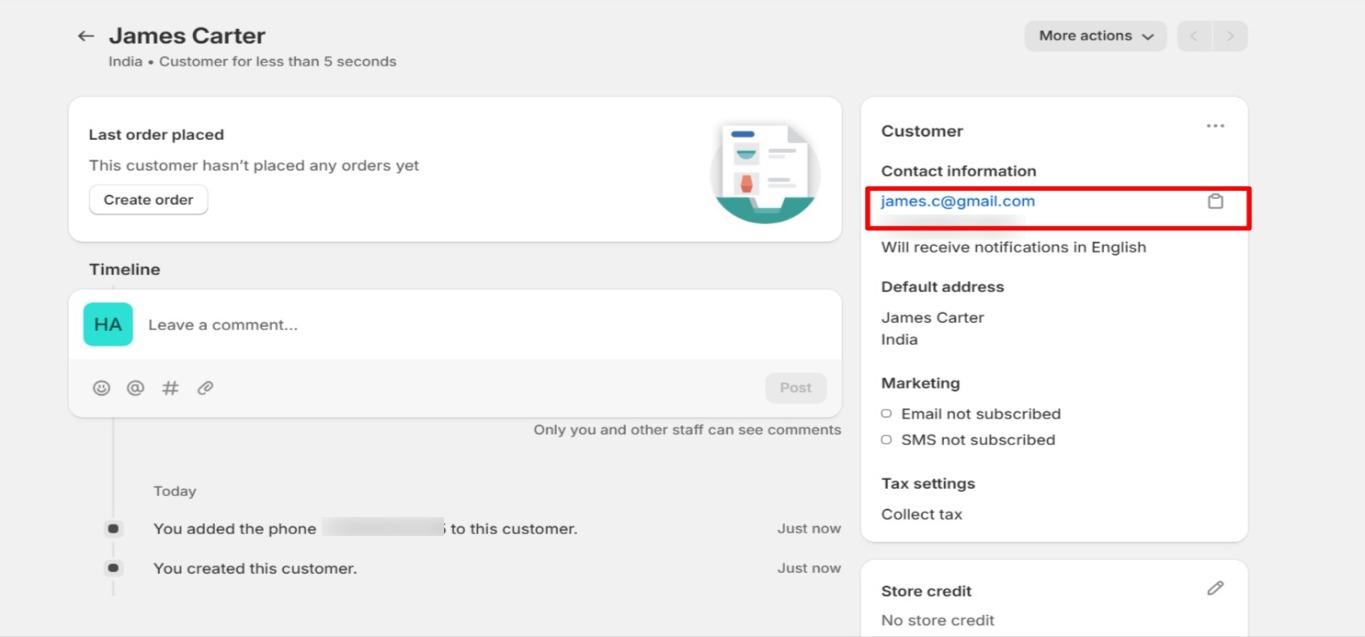
Step 3:Go to your Shopify Store and Create a new Customer by clicking on “Add Customer”.
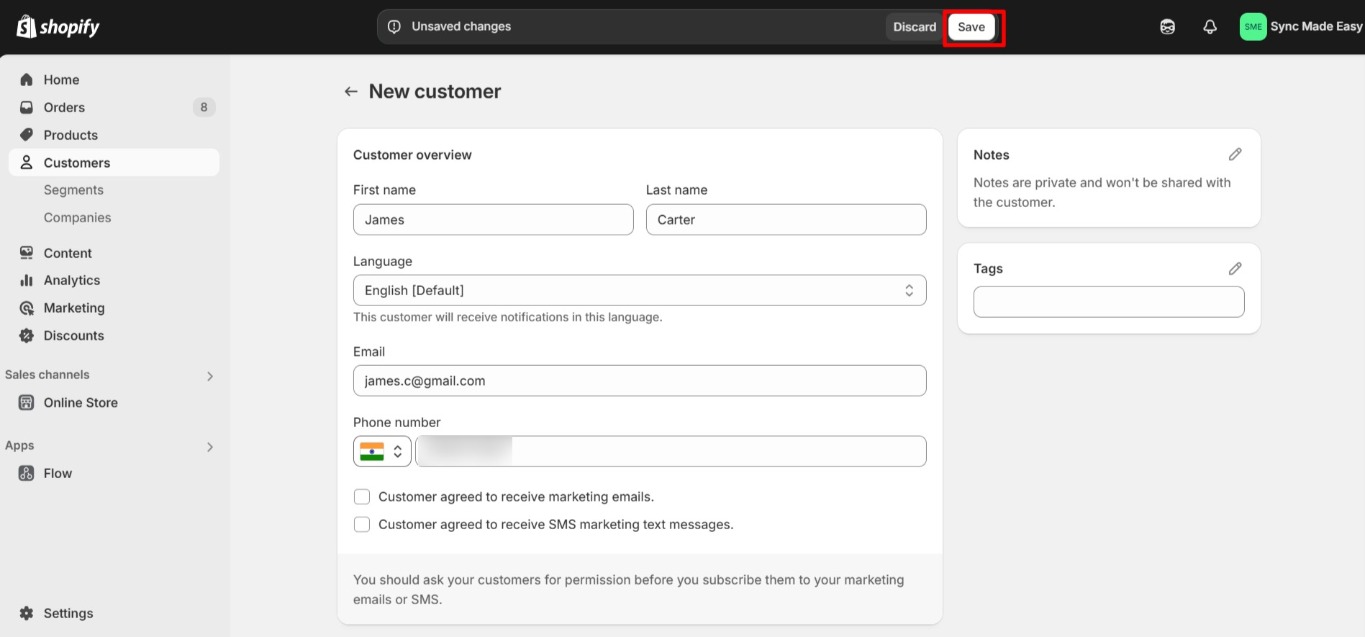
Step 4:Enter all the required information and click on “Save”.
Step 5:Copy the “Shopify Email ID” from the Shopify Customer.
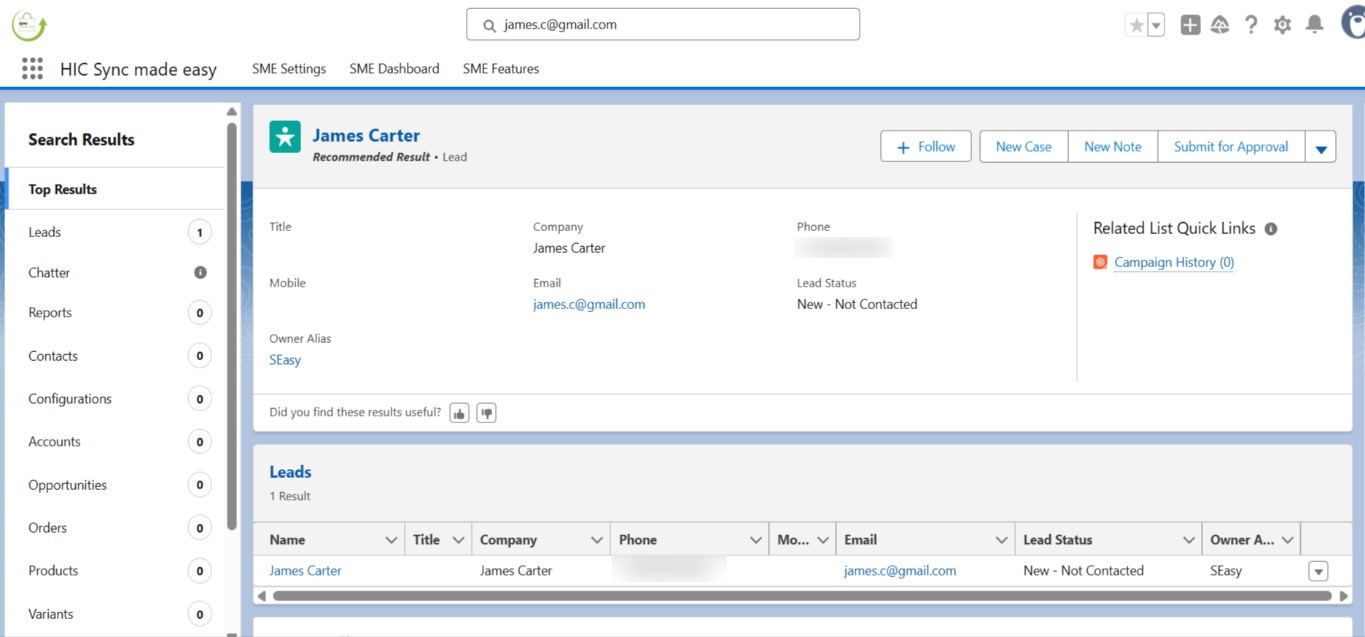
Step 6:Open your Salesforce Org and search for the copied Shopify Email ID on the “Search box“.
Step 7:A ‘New Lead’ will be successfully created in Salesforce.
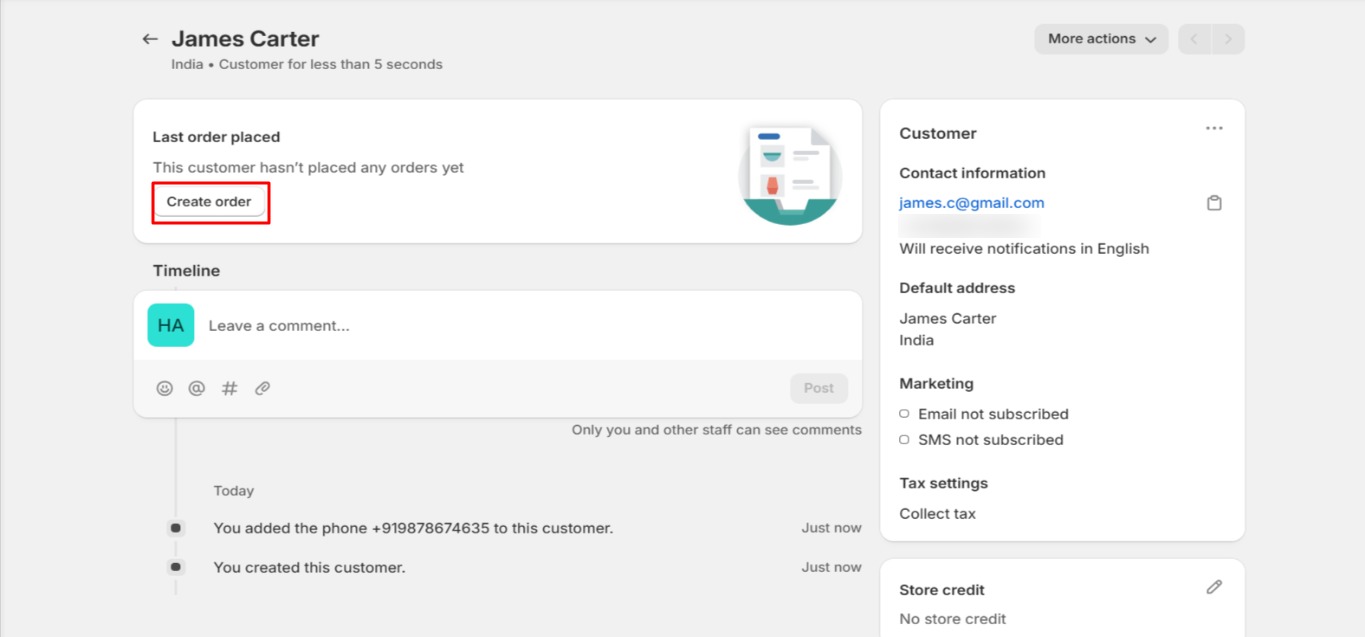
Step 8:Again, go back to Shopify and create a new order under the customer.
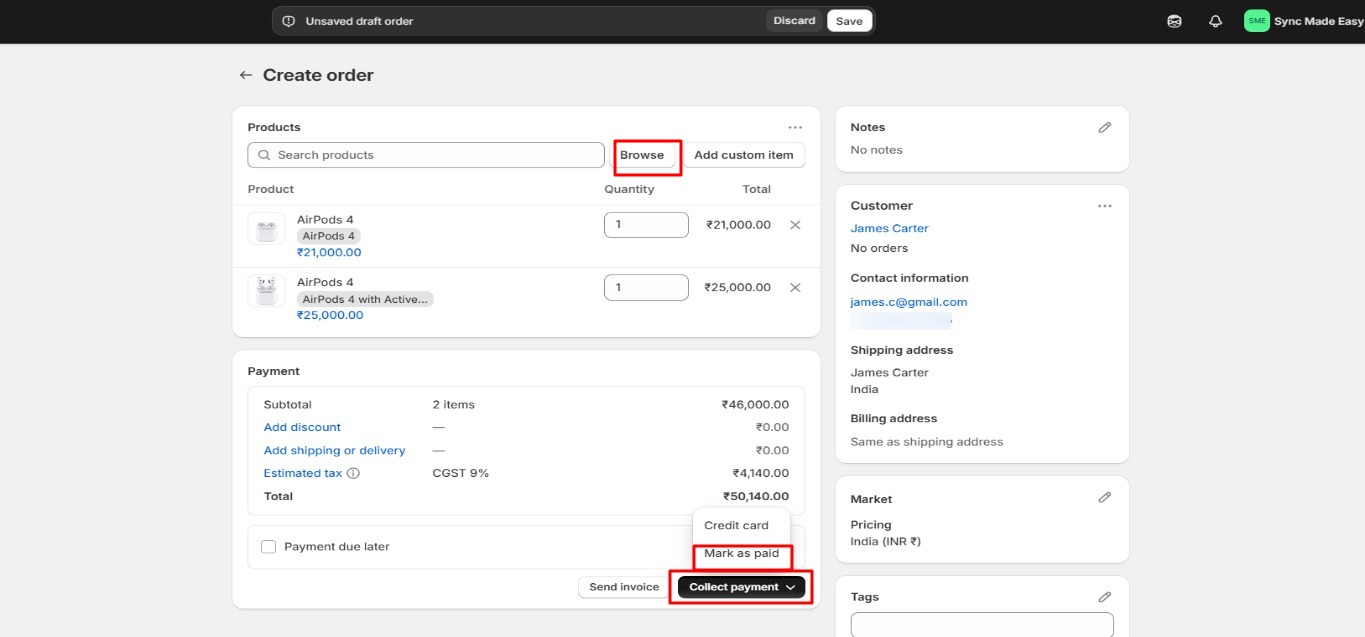
Step 9:Click on “Browse” and select the products then click on “Collect Payment” then click on “Mark as paid” to create an order.
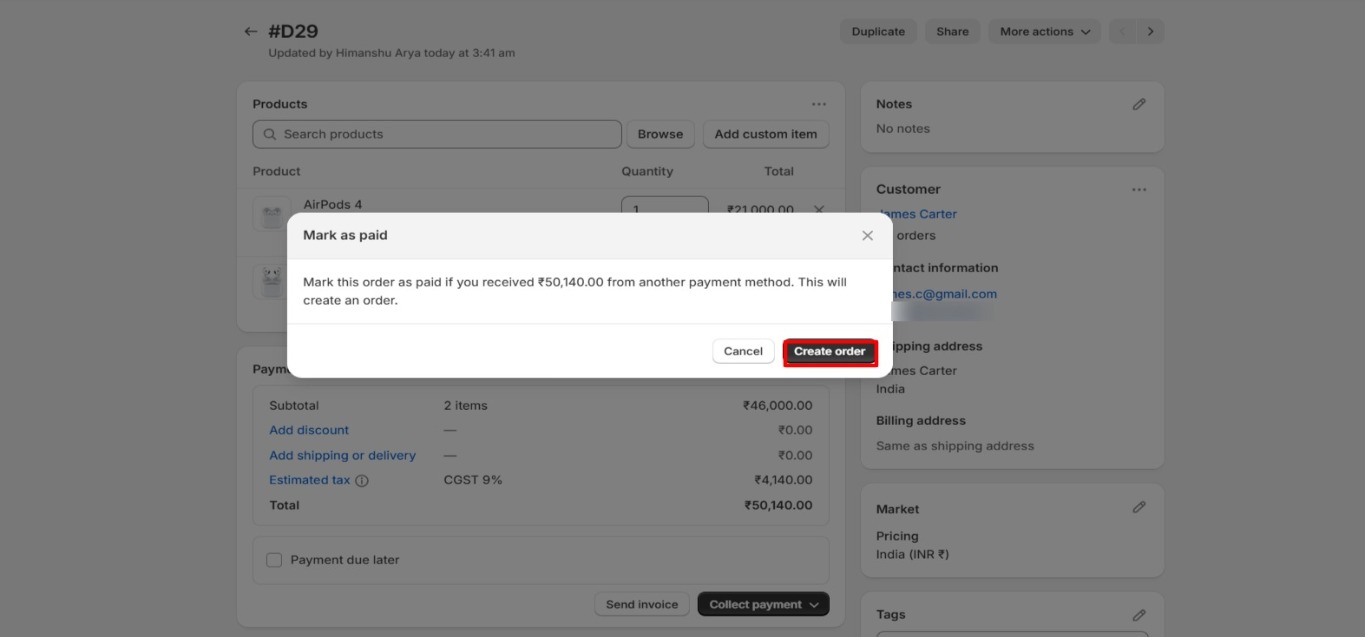
Step 10:Click on “Create Order” to confirm and create the order.
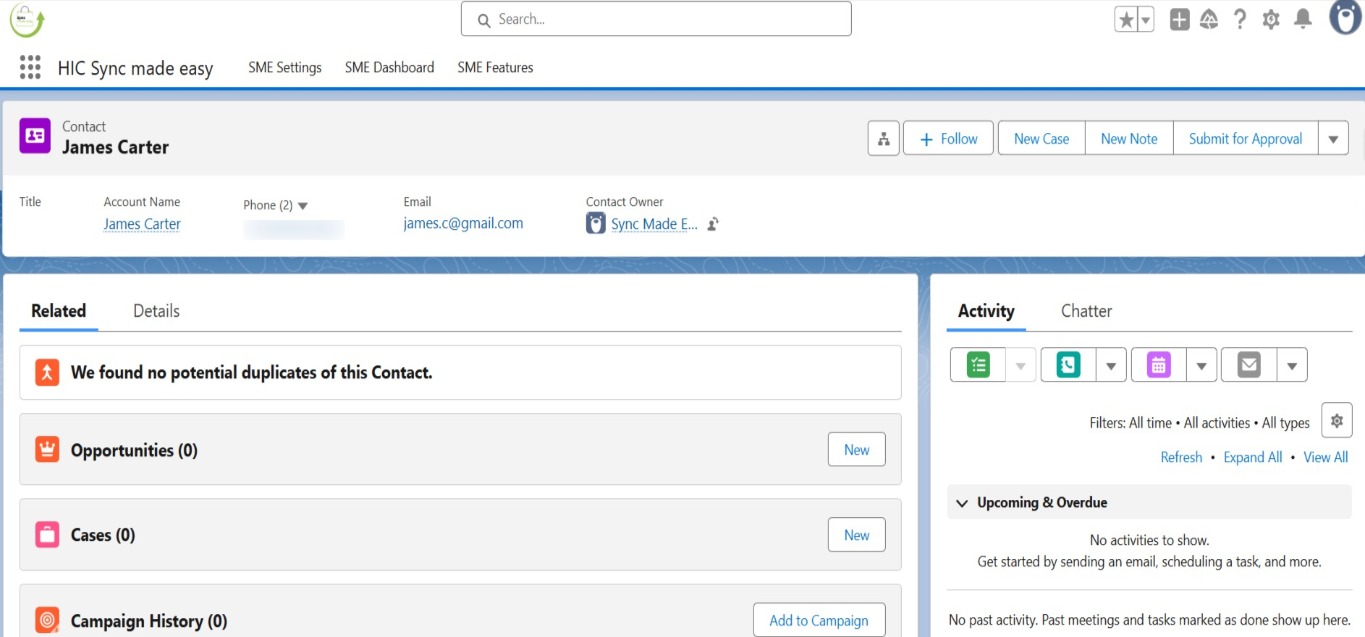
Step 11:Navigate to Salesforce, and refresh the Lead after 5-10 seconds, it will automatically convert into “Contact”.
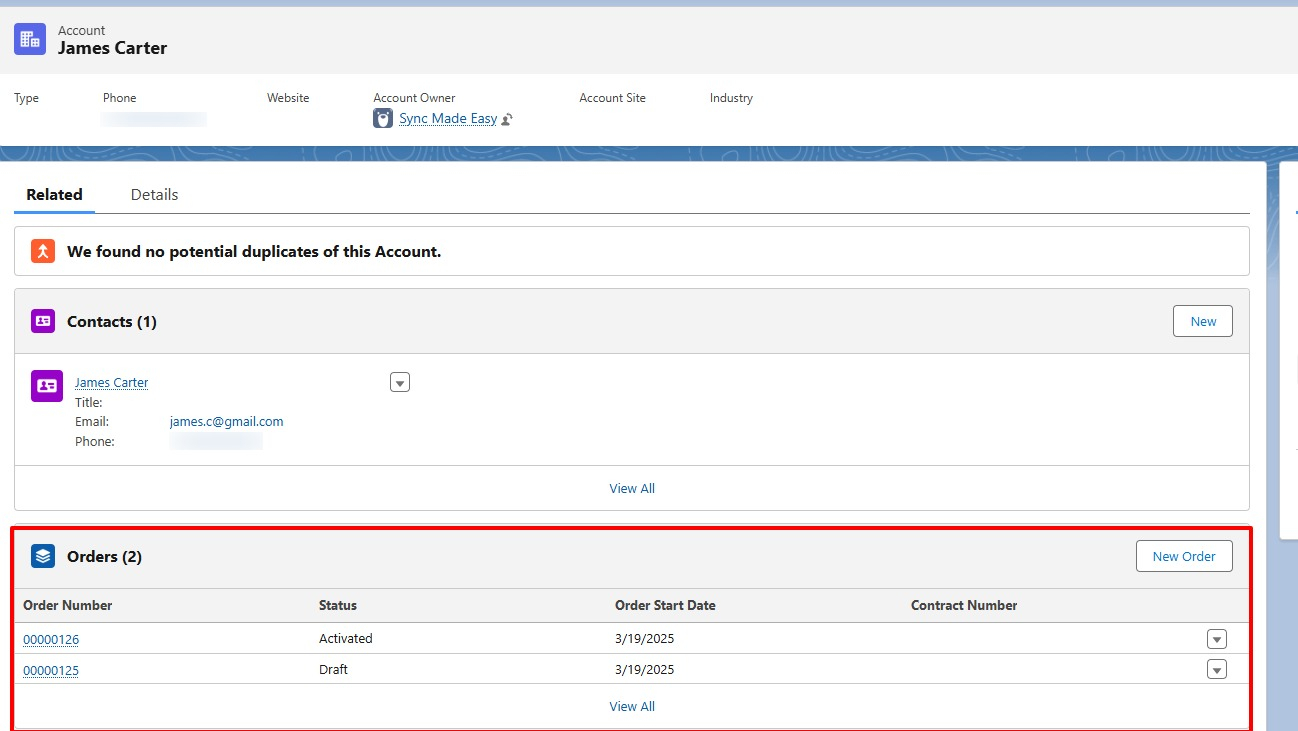
Step 12:You can also view the order by clicking on the “Account Name” and then going to the related list.
So this was the overall functionality of the Automate Lead Conversion feature of Sync Made Easy. Thank You!