In this guide, we’ll walk you through how the Shopify Refunds Sync feature works in Salesforce. Whenever a refund is initiated in Shopify, Salesforce automatically generates a refund record, including refund lines, transaction details, and order adjustments, ensuring complete financial transparency. Stay tuned as we break down the step-by-step process to enable and use this feature effortlessly. Let’s dive in!
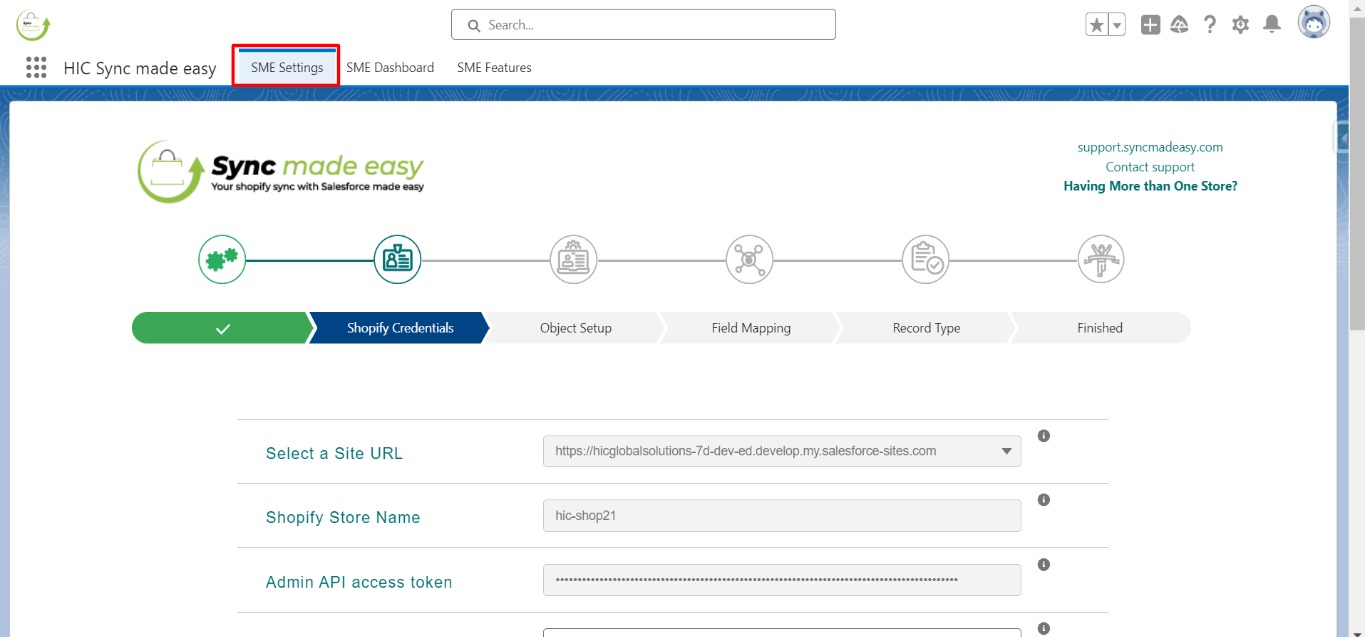
Step 1:Log in to Salesforce and navigate to “SME Settings“.
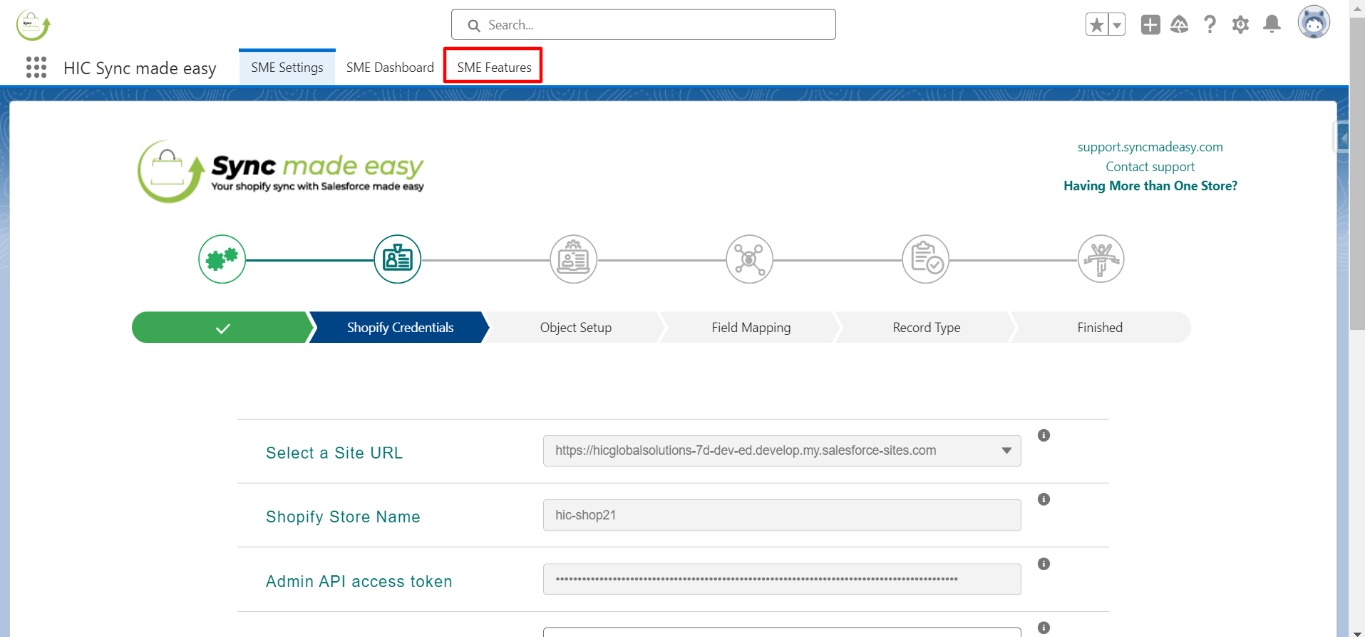
Step 2:Now click on “SME Feature“.
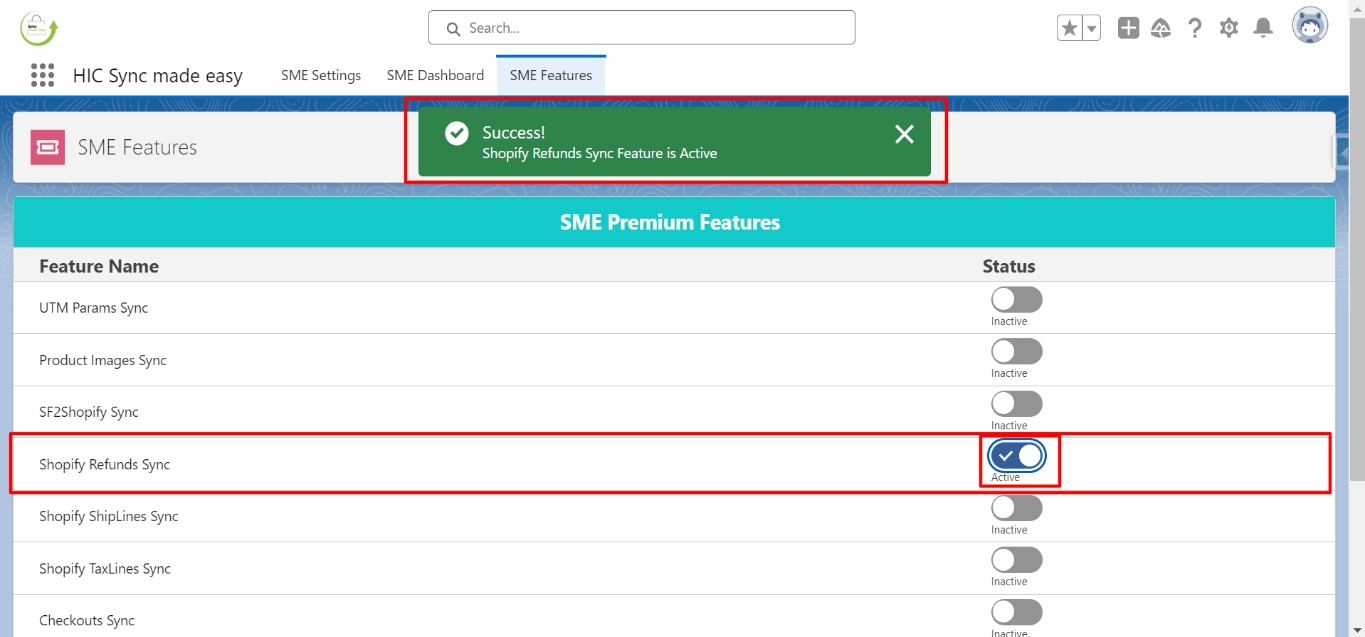
Step 3:Enable the “Shopify Refunds Sync” feature.
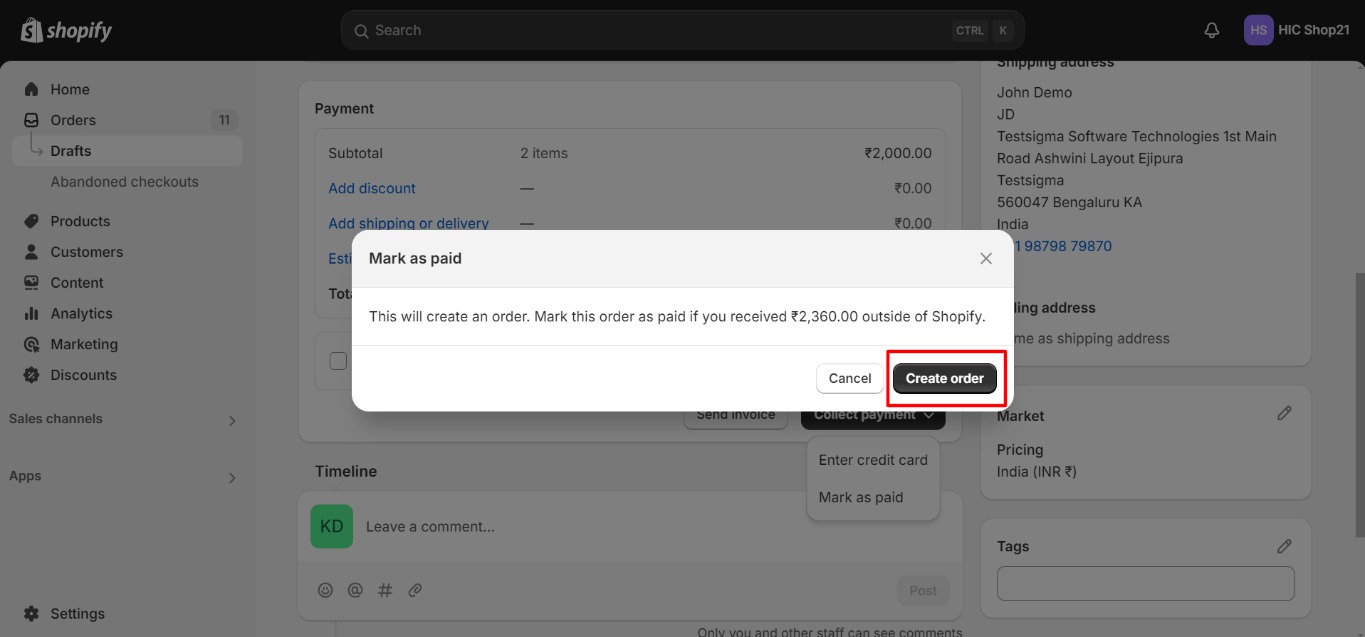
Step 4:Go to the Shopify store and create a new order by clicking on “Create order.”
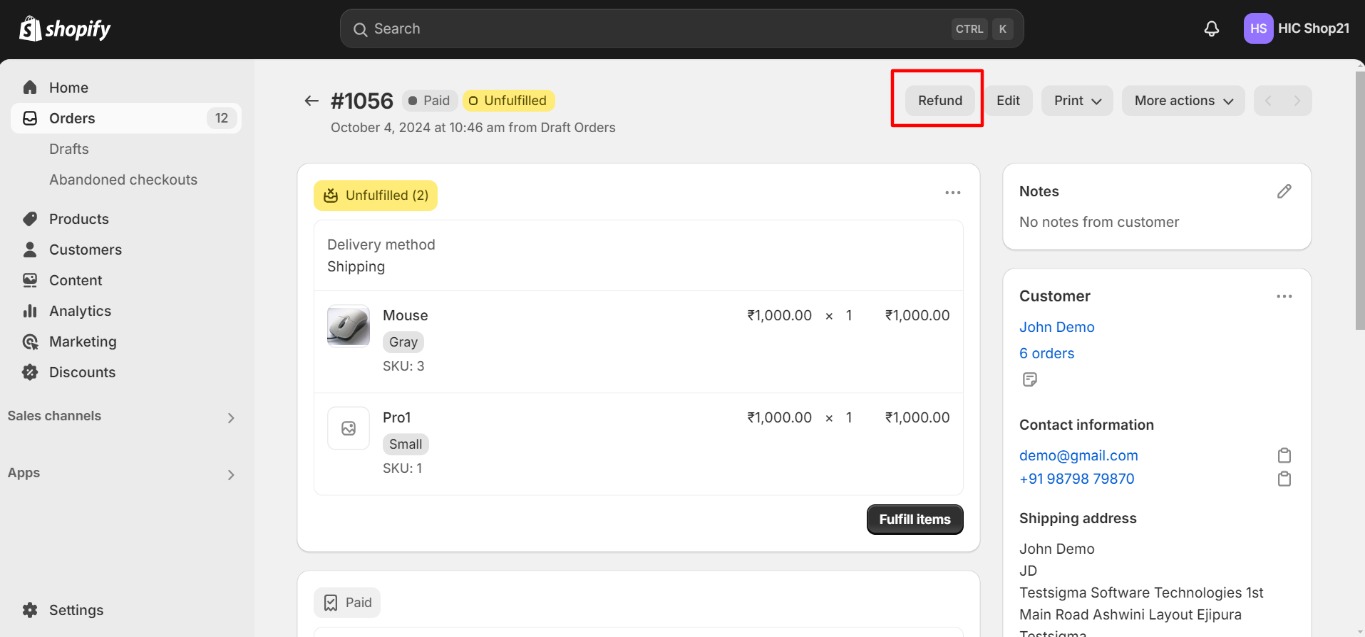
Step 5:After placing the order, click on the “Refund” button.
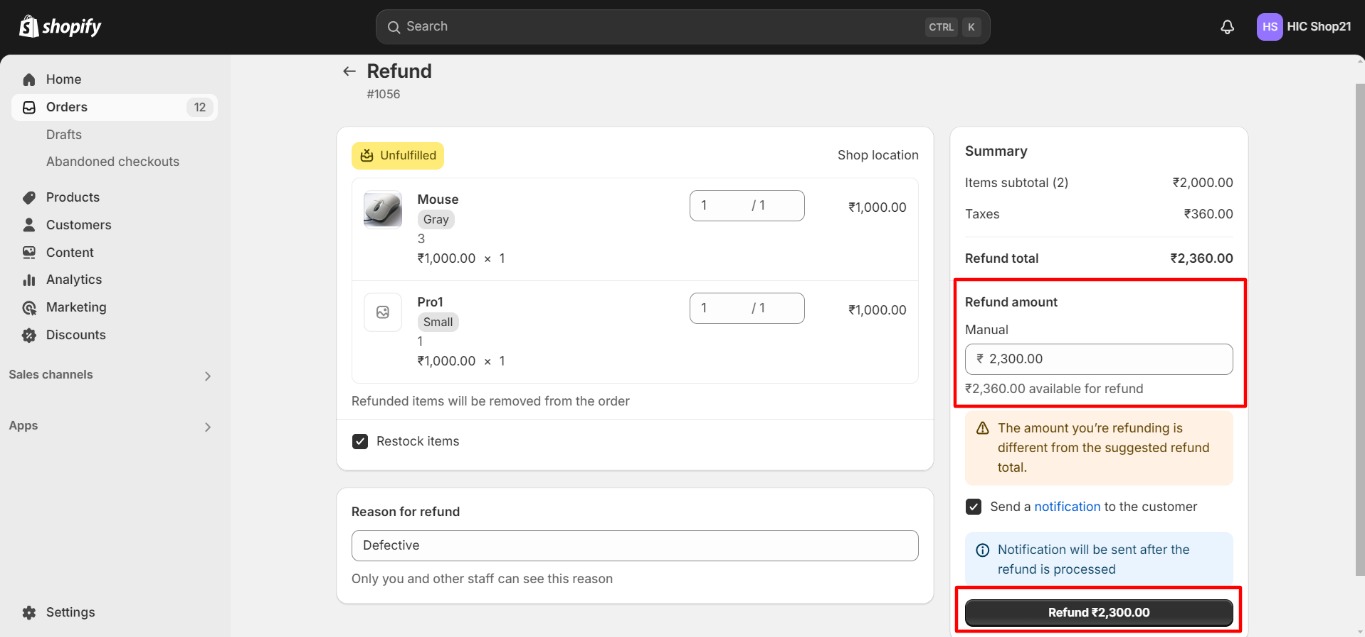
Step 6:Refund the product and adjust the amount by deducting a portion of it. For instance, deduct 60 and click on “Refund“.
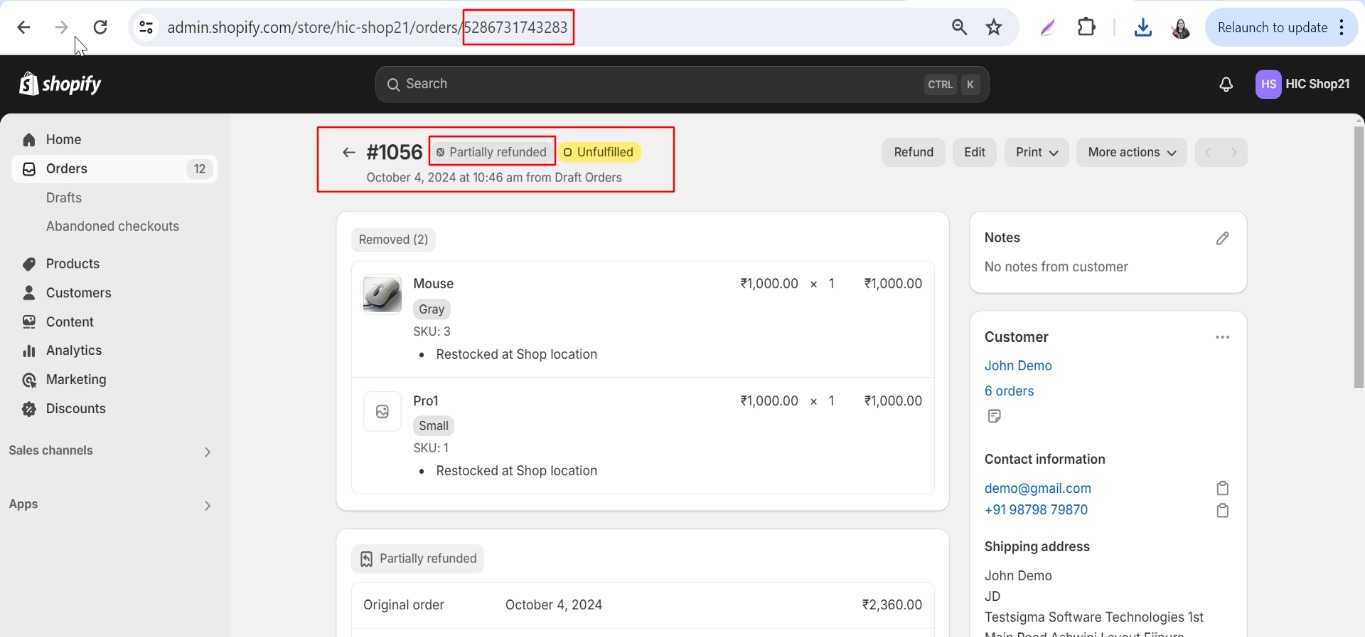
Step 7:Copy the “Shopify ID” of the order.
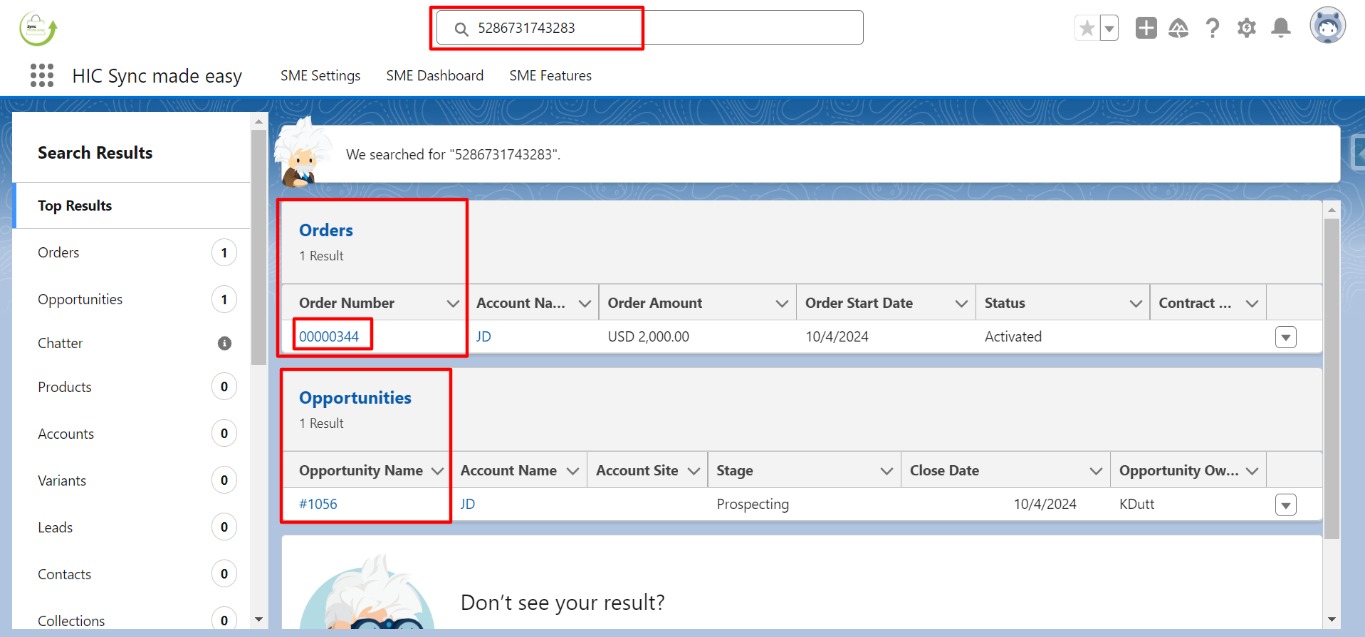
Step 8:Search for the order ID in Salesforce to verify if it has been synced from Shopify.
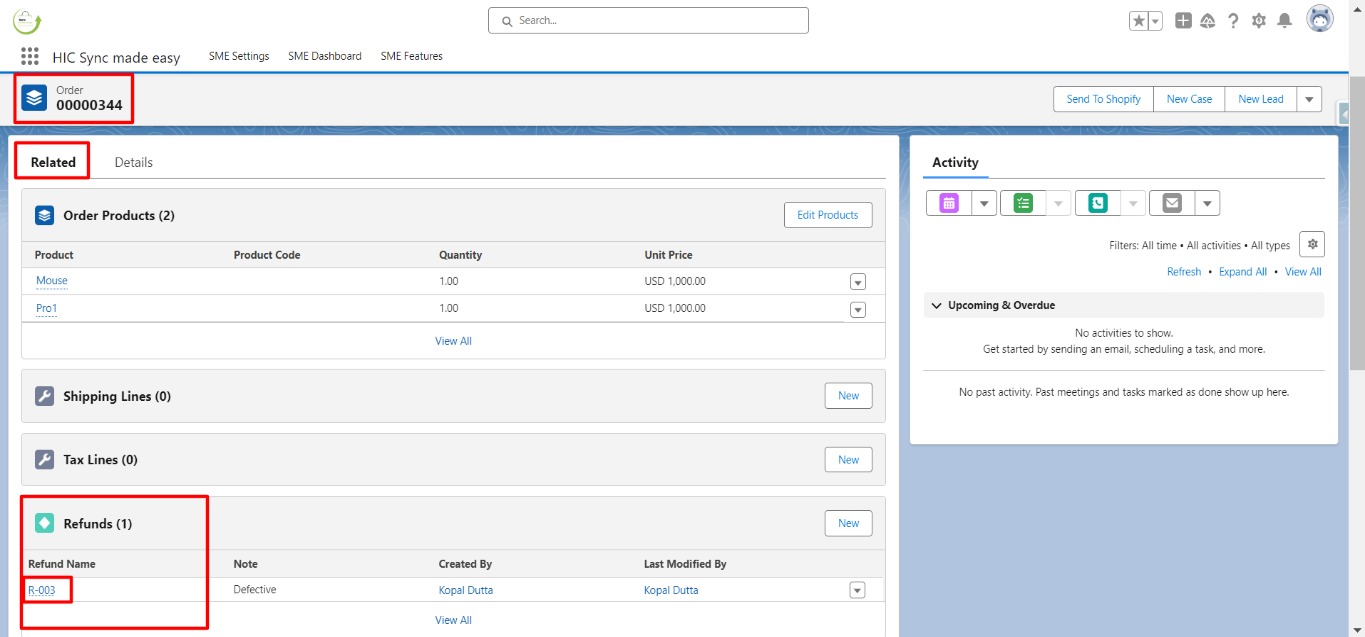
Step 9:Navigate to the “Related” section of the order, and you will find that the refund has been created along with the order product.
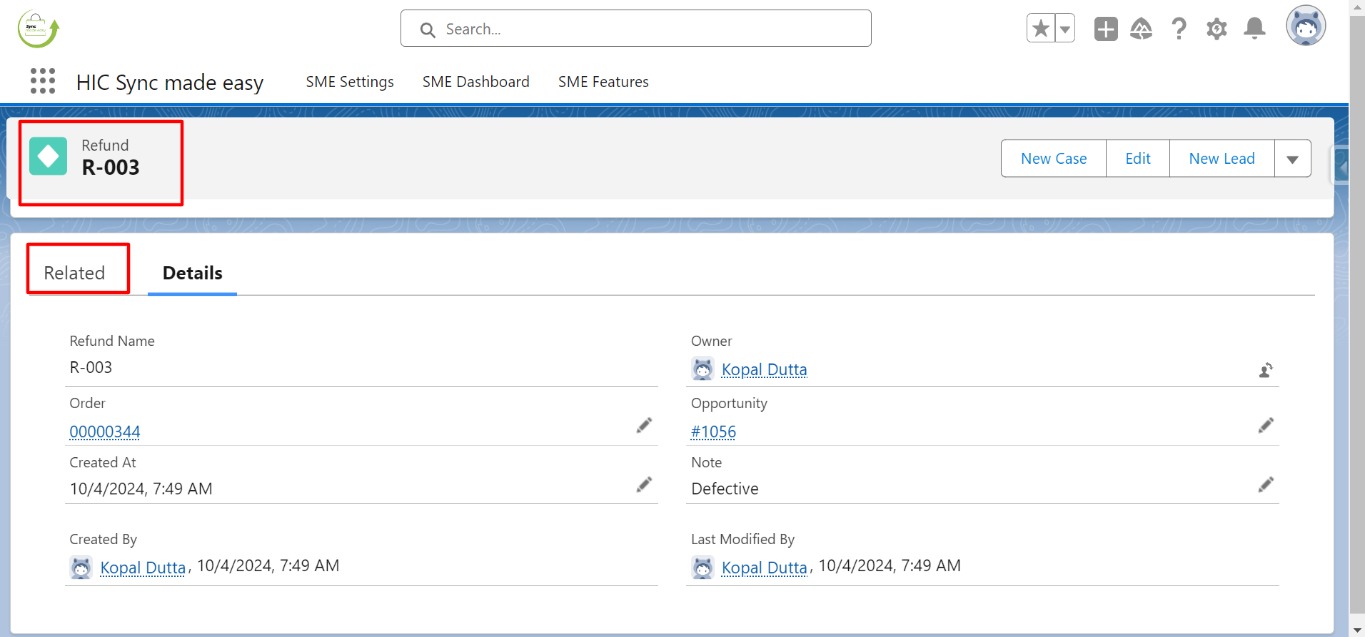
Step 10:Open the refund record and go to its ‘Related’ section to view additional details.
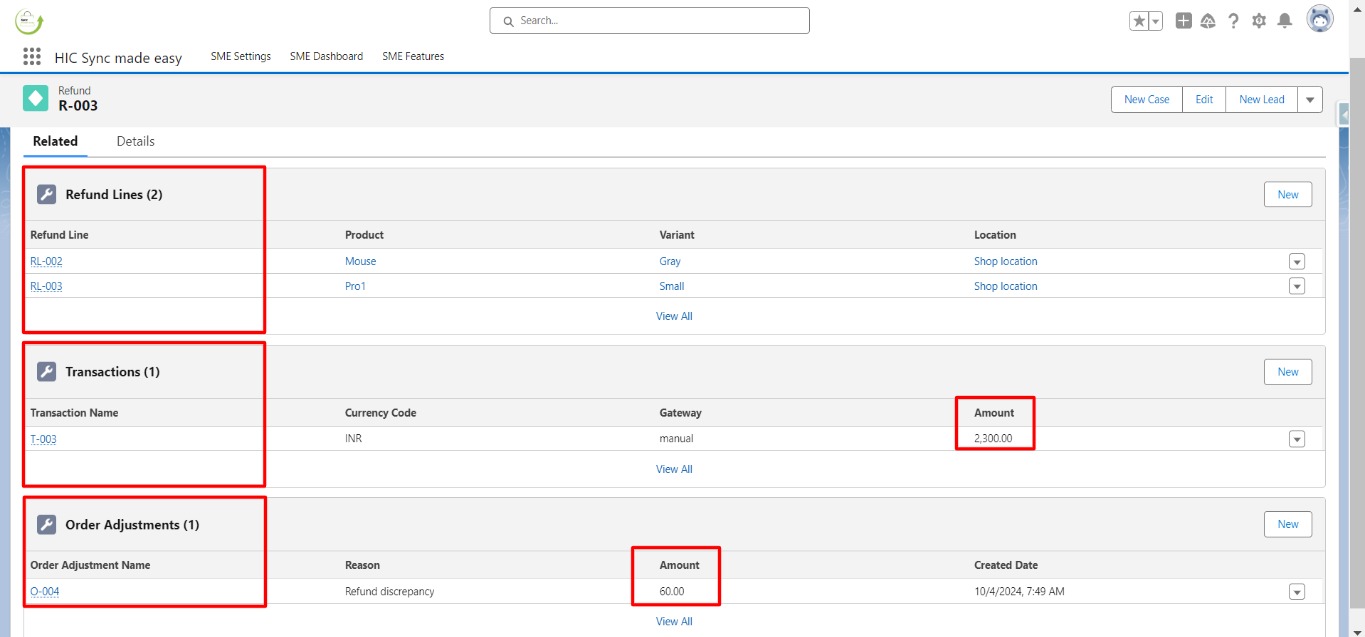
Step 11:Verify that refund lines, transaction details, and order adjustments are correctly synced.
This completes the functionality of refunds on orders. Thanks!