Note: Pre-Requisites For Installation
Active Salesforce.org ⟶ Sync Made Easy Main App ⟶ Enabled Order Object
Installation:
- Visit Salesforce AppExchange
- Search for Sync Made Easy Pro
- Click on Get It Now
Note:
For testing, configuration, or exploration purposes, it is recommended to install the application in a Salesforce Sandbox environment rather than in Production.

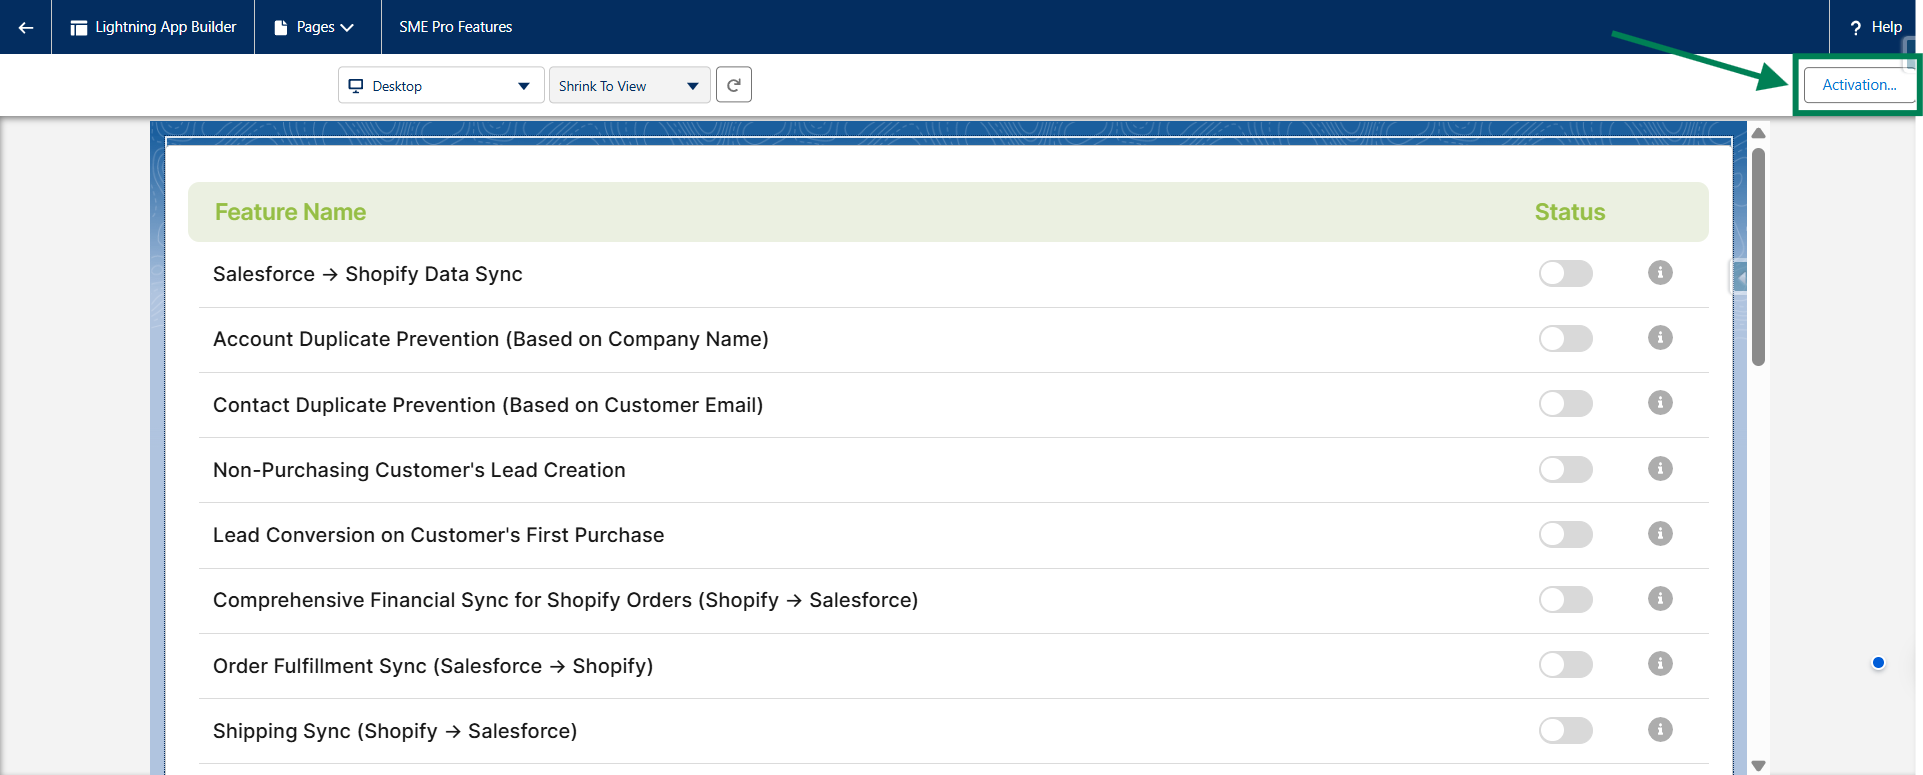
Note: Before adding the Lightning Page (SME Pro Features), please activate it using the steps below.
Step-by-step: Add a Lightning Page to the Sync Made Easy app layout
1. Login to the Salesforce Account.
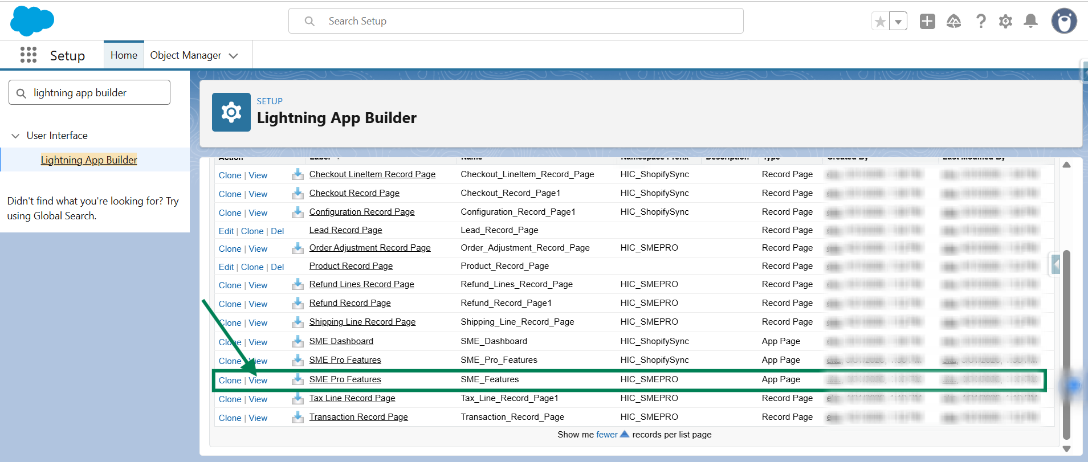
2. Go to Setup and Search “Lightning App Builder” in the Quick Find box.

3. Now Search for “SME Pro Features” and Click on View.
4. Click on “Activation” in the top corner of the right side.
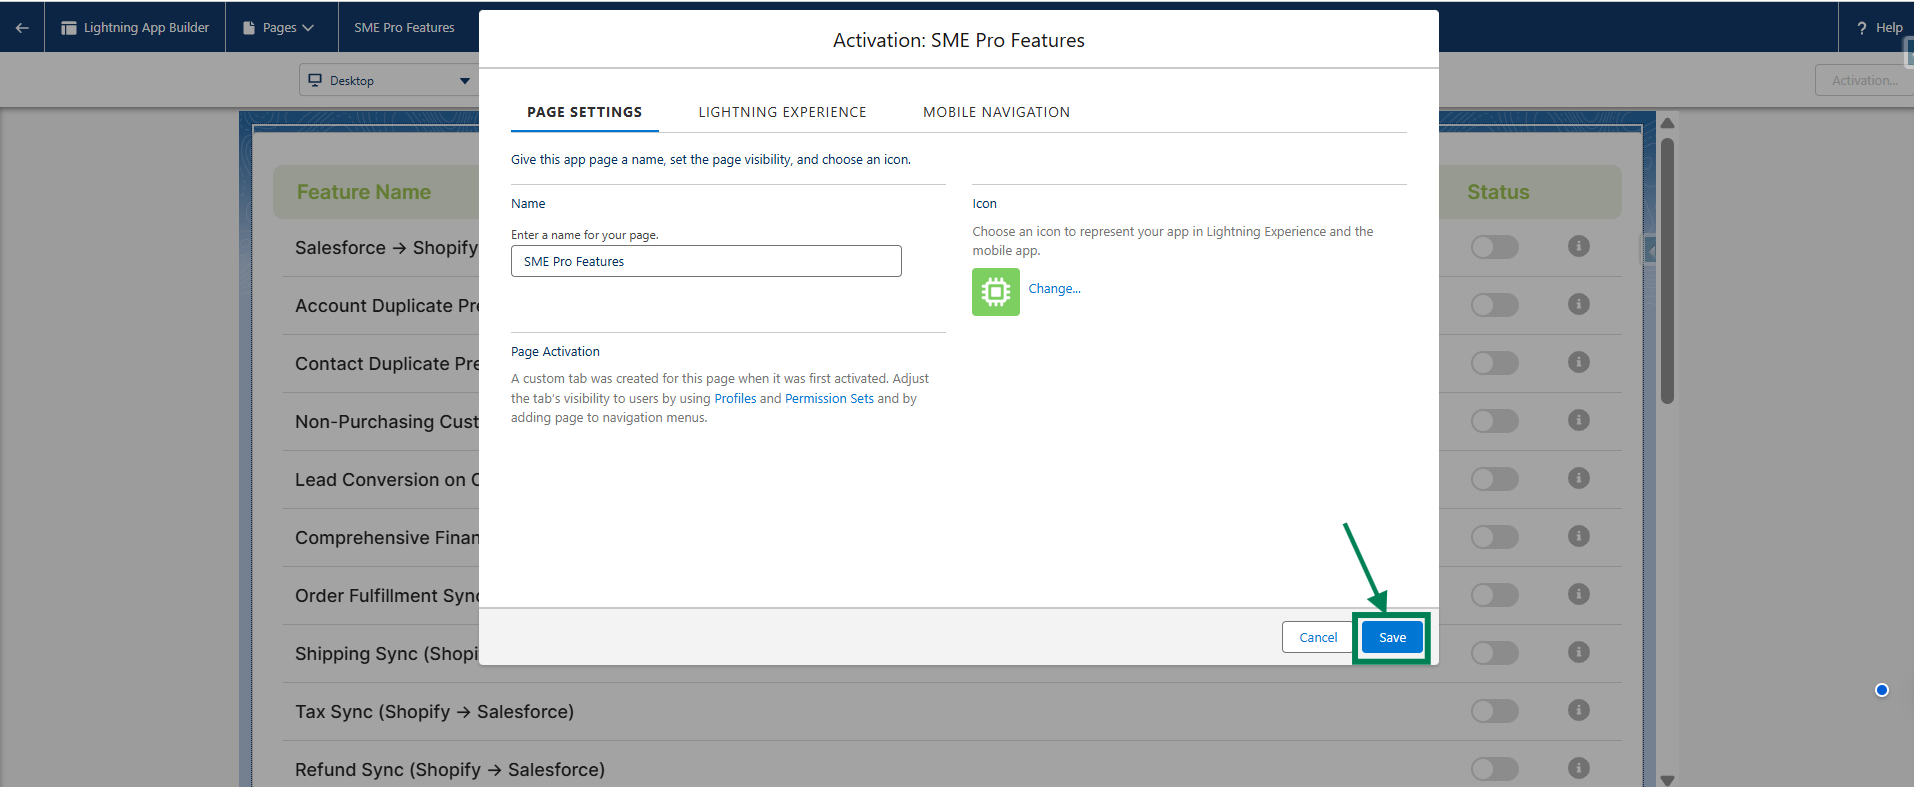
4.1. Click on “Save”.
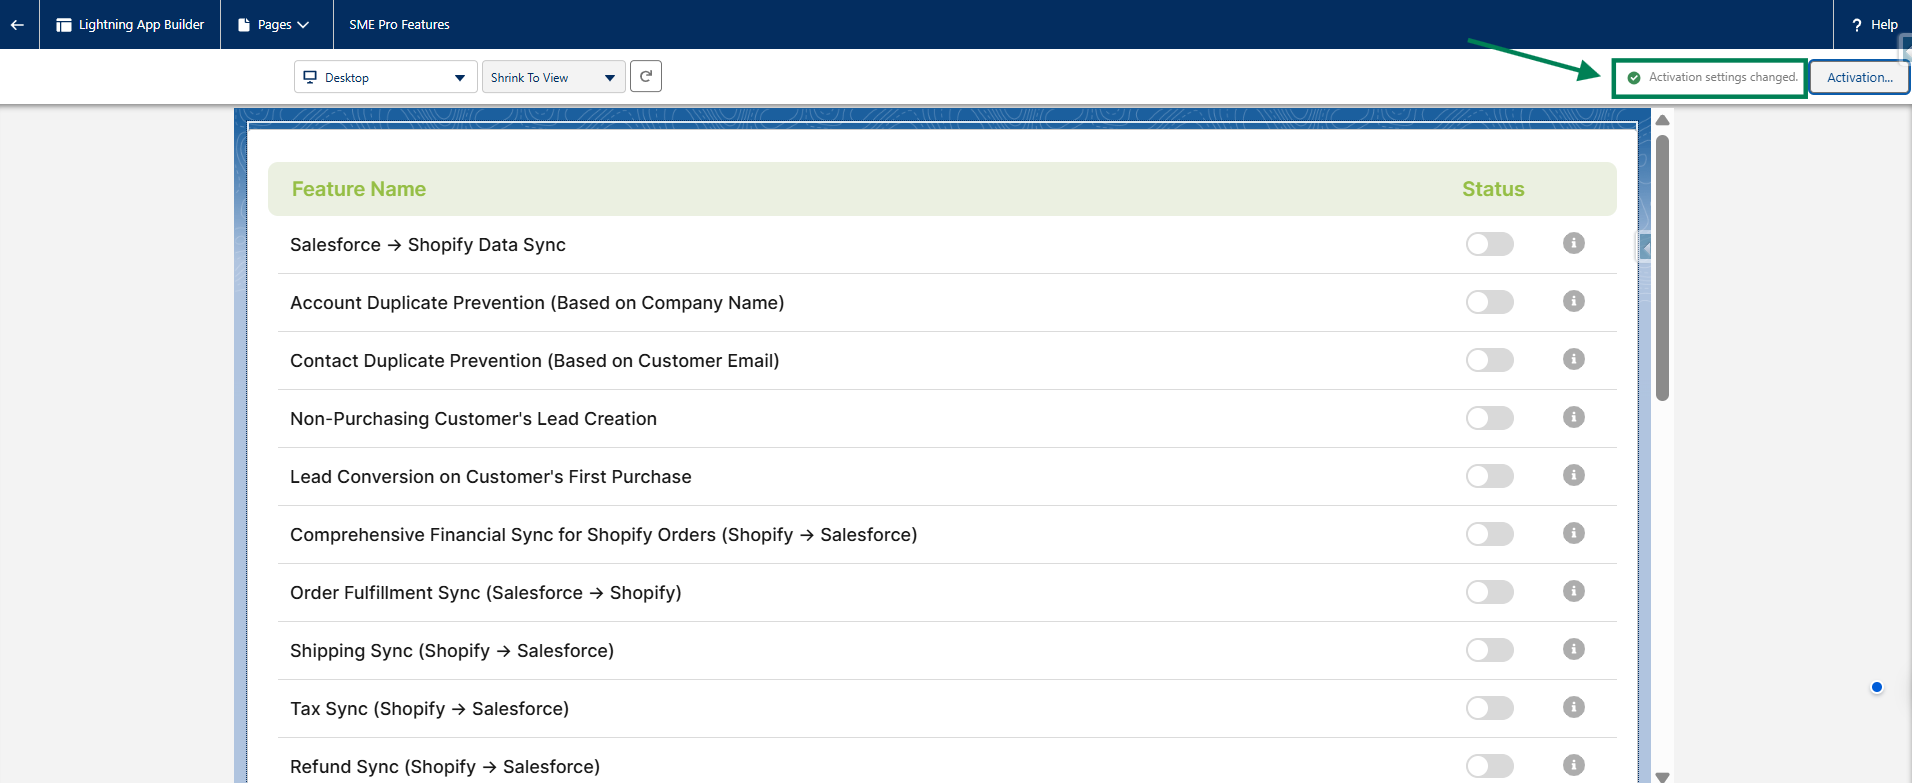
5. Now you can see the Message: ”Activation settings changed” in the top corner of the right side as below.
Steps to add the lightning page (SME Pro Features) on the Main app layout
1. Log in to the Salesforce Account.
2. Go to Setup and Search “App Manager” in the Quick Find box.

3. Click “App Manager” and search for App Name: “HIC Sync made easy”.

4. Now, click on Menu on the right side of App Name: “HIC Sync made easy” and click on “Edit” as below.

5. Go to “Navigation Items” under the “App Settings” option and click on it.
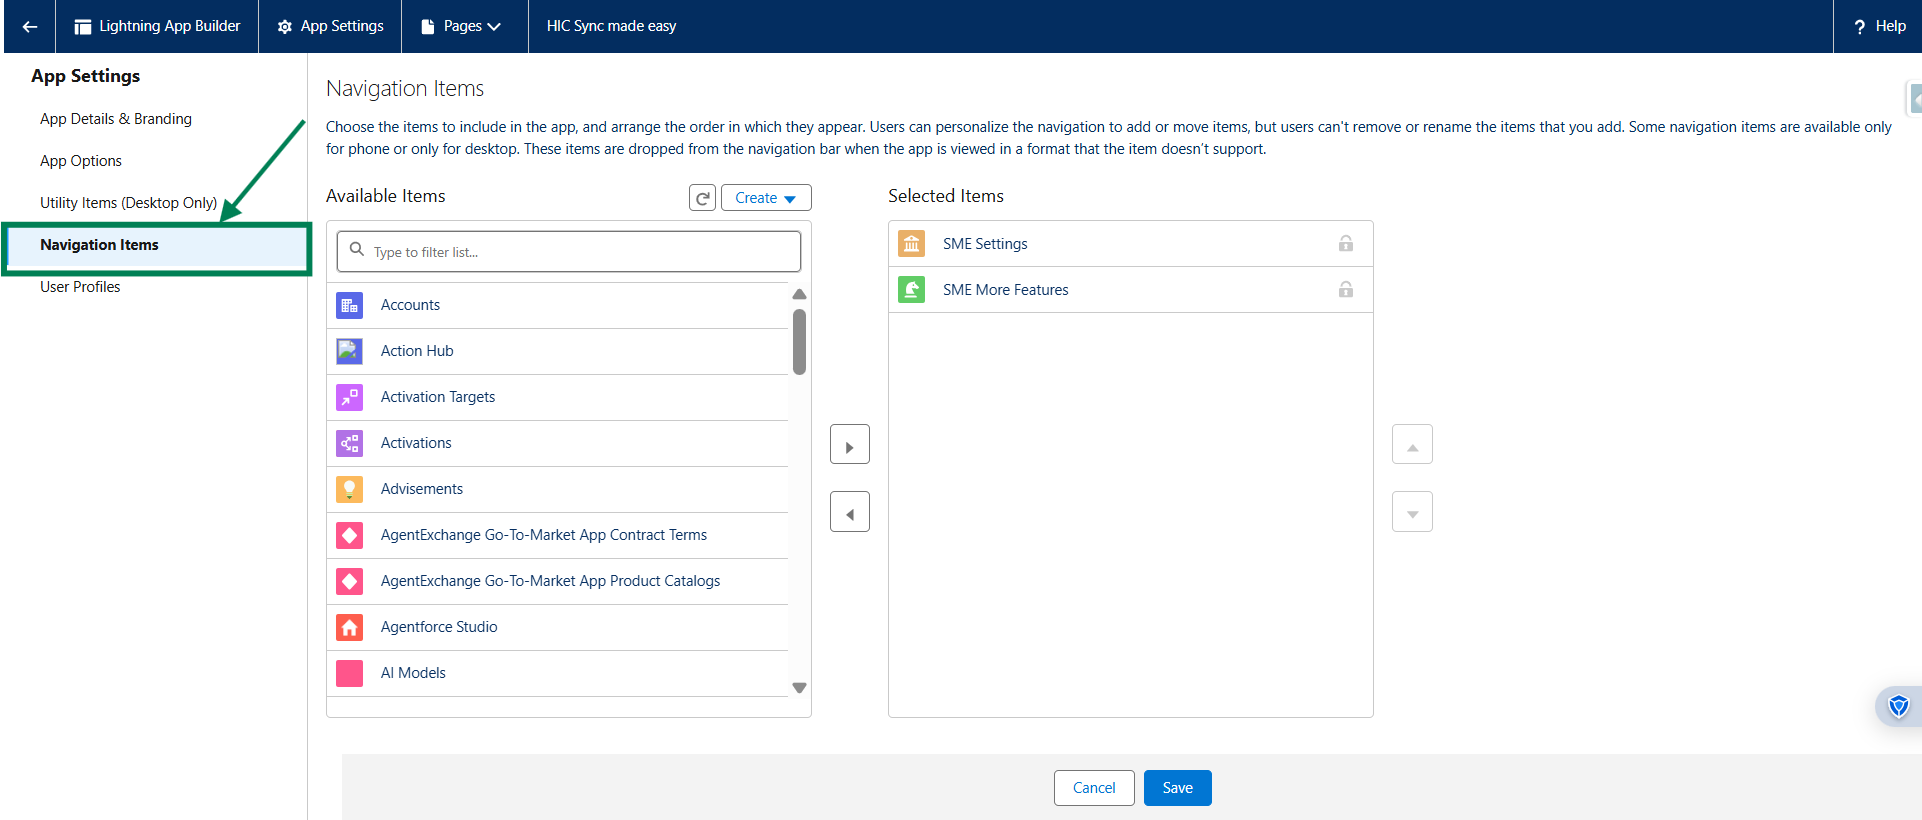
6. Now search for “SME Pro Features” options in the “Available Items” of Navigation Items as below.
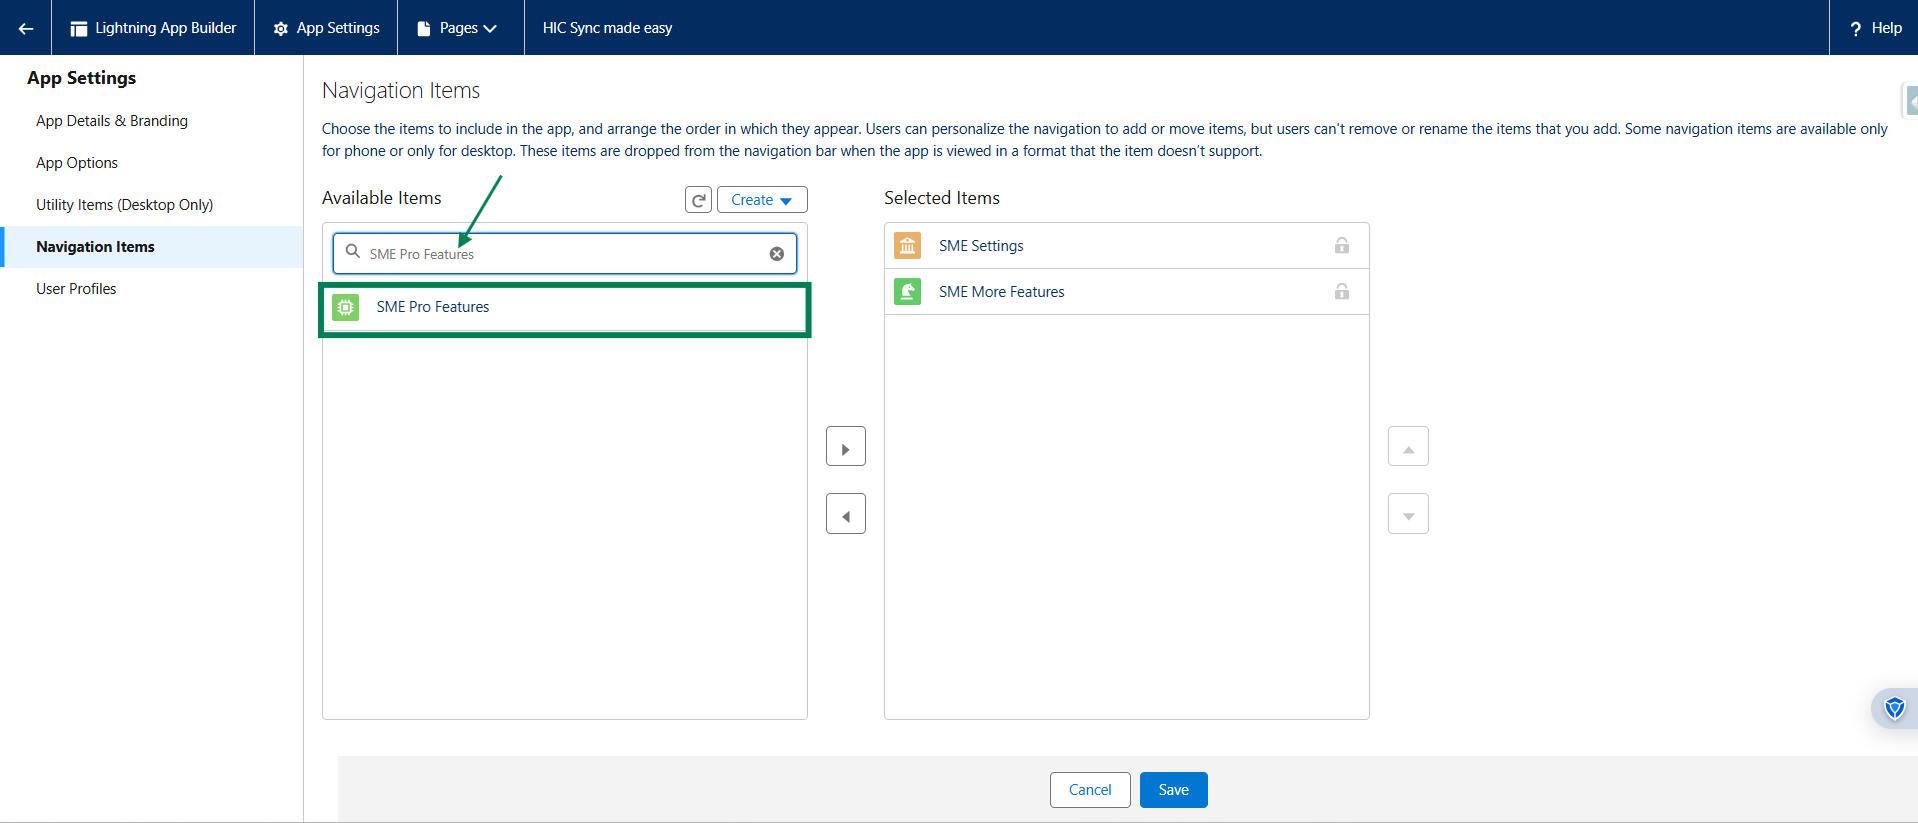
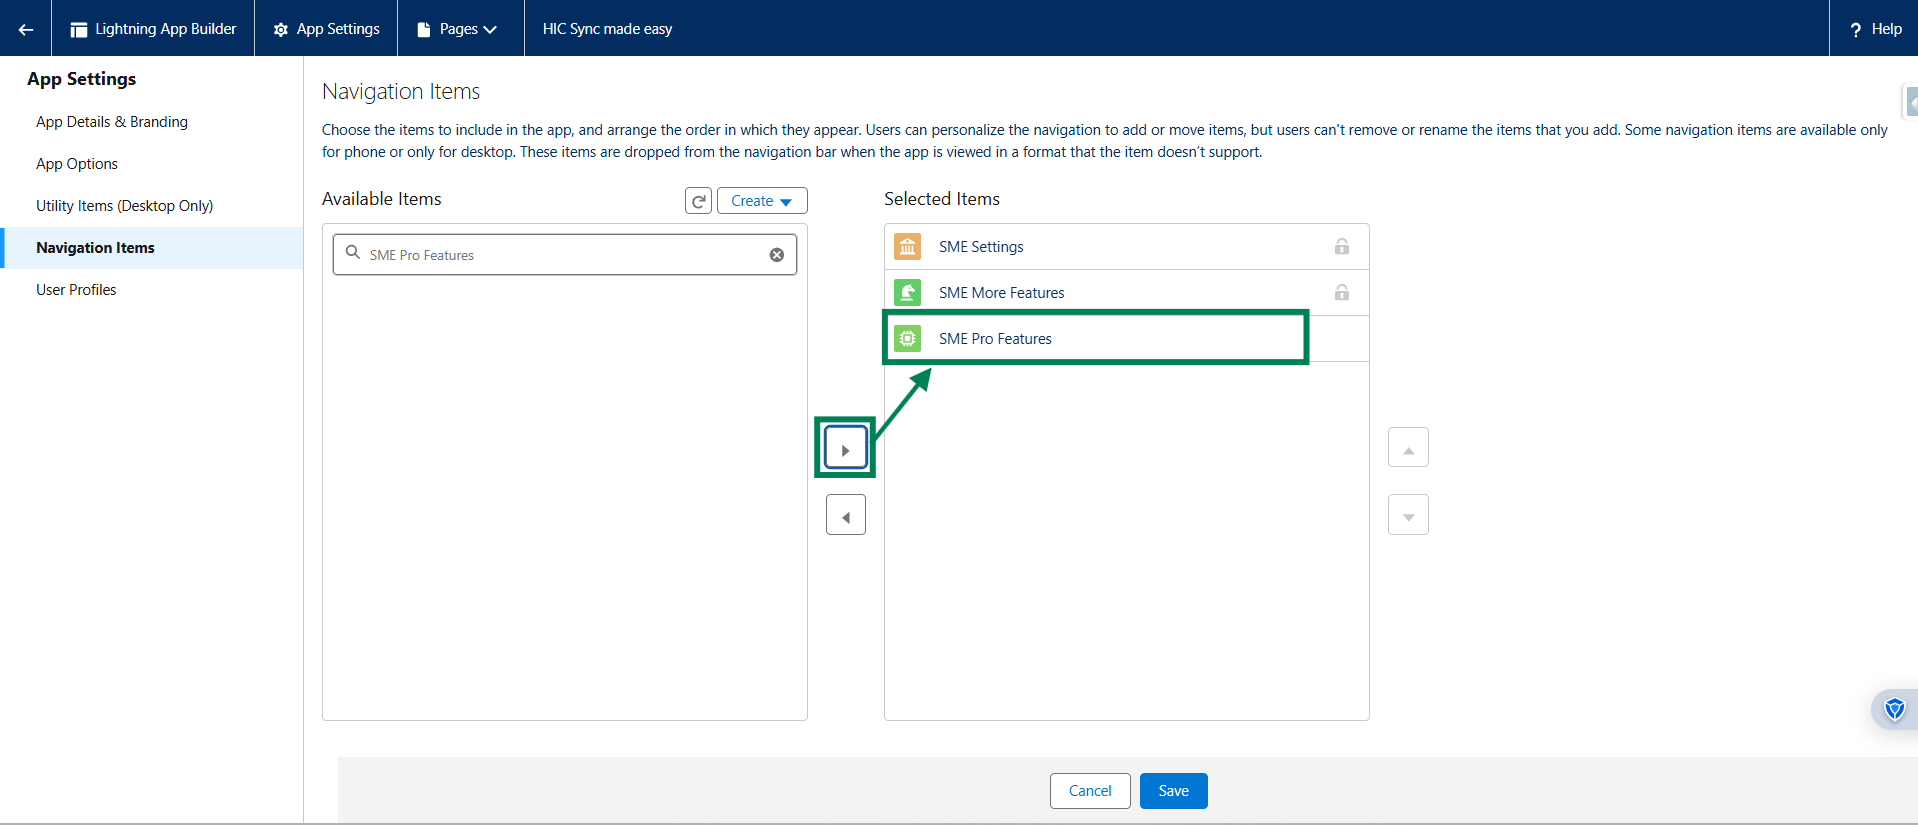
7. Now, click on “SME Pro Features” and Then Click on “Add” to send it to the “Selected Items” options (right side) as below.
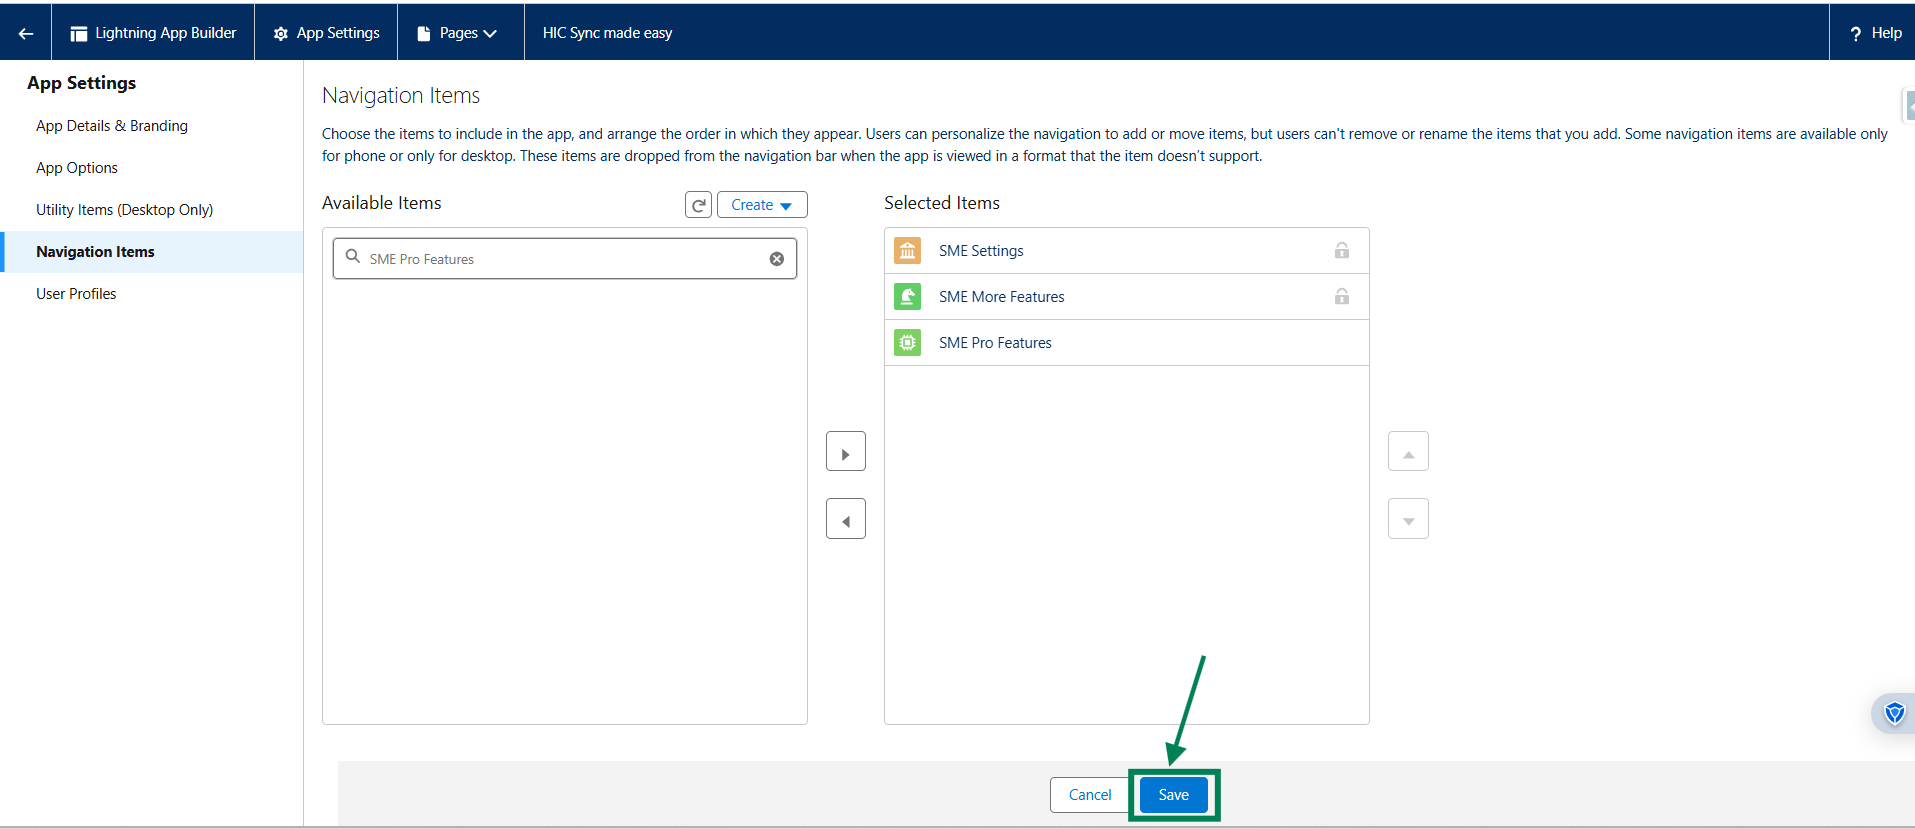
8. Now, click on “Save”.
9. Now go to “App Launcher” (9 Dots) and search for App: ”HIC Sync Made Easy” and “Click” on it as below.

10. Now, click on the “SME Pro Features” tab, and you can see the lightning page (SME Pro Features) on the Main app (HIC Sync made easy) layout as below.
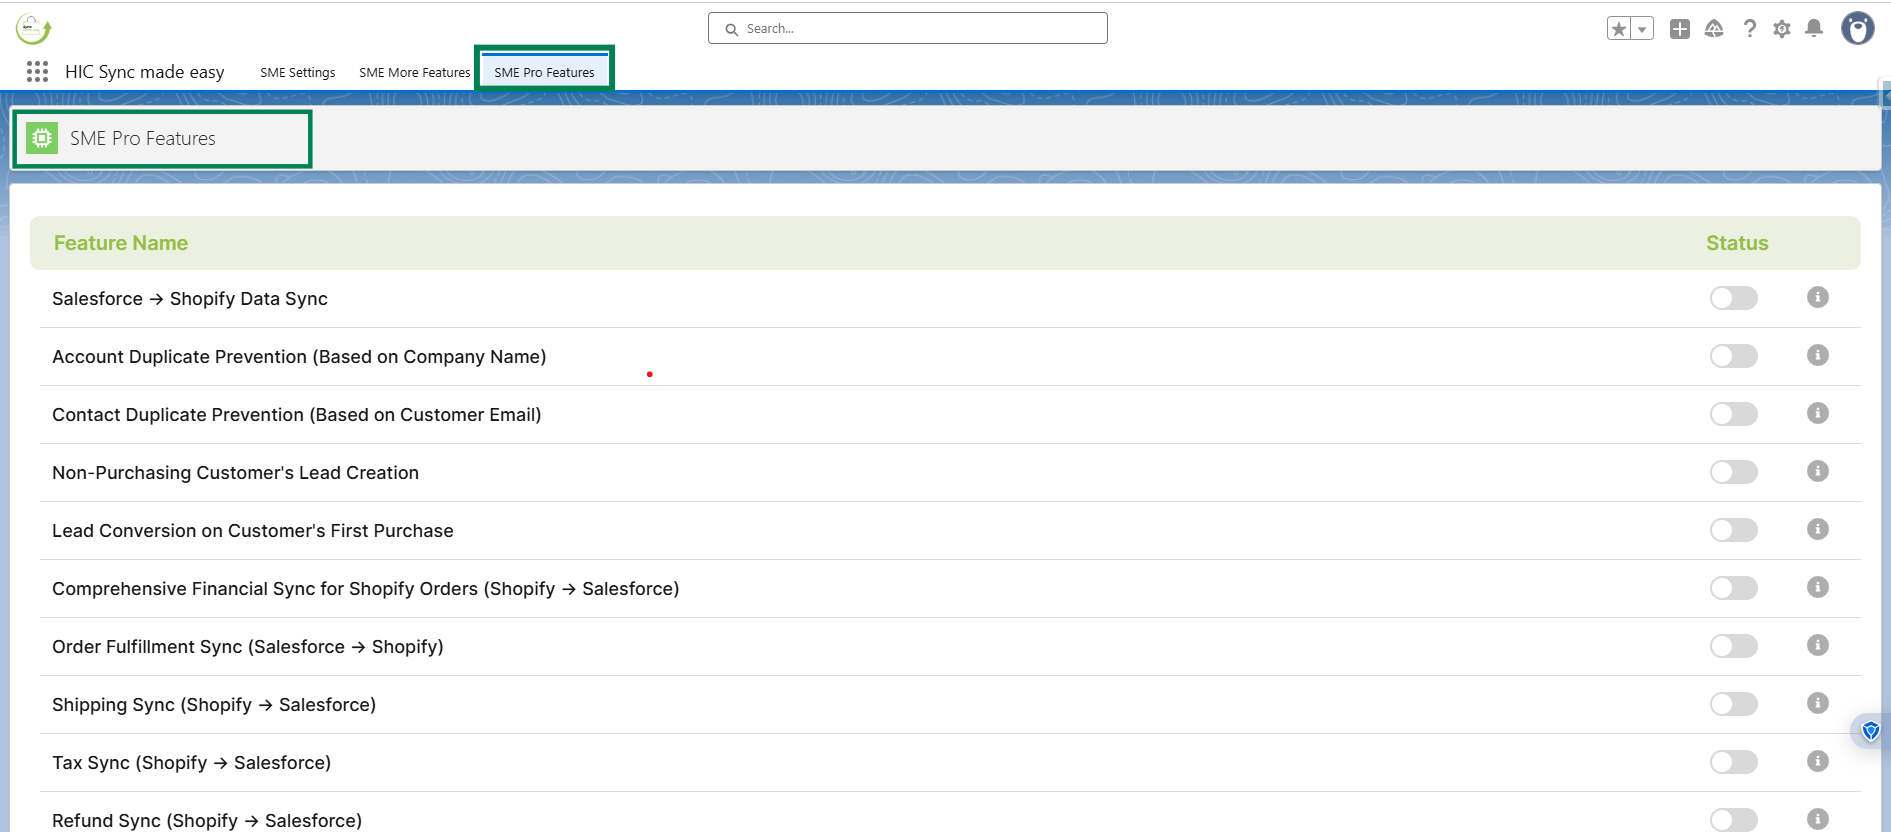
Note: All features are inactive by default. Please activate the status toggle to enable these functionalities.
For any further assistance or installation-related inquiries, kindly reach out to us at support@syncmadeasy.com.
Was this article helpful?
That’s Great!
Thank you for your feedback
Sorry! We couldn't be helpful
Thank you for your feedback
Feedback sent
We appreciate your effort and will try to fix the article