This functionality only works on "Account", "Products", “Order”, “Draft Order”, and "Opportunity". Therefore, we need to add the "Send to Shopify" button on every object to utilize the "Send to Shopify" functionality.
Step 1: Log in to Salesforce and in App Launcher search "HIC Sync made easy". Click on it.

Step 2: Go to "SME Pro Features".

Step 3: Enable the “Salesforce → Shopify Data Sync” feature toggle button and confirm by clicking OK, I Understand.

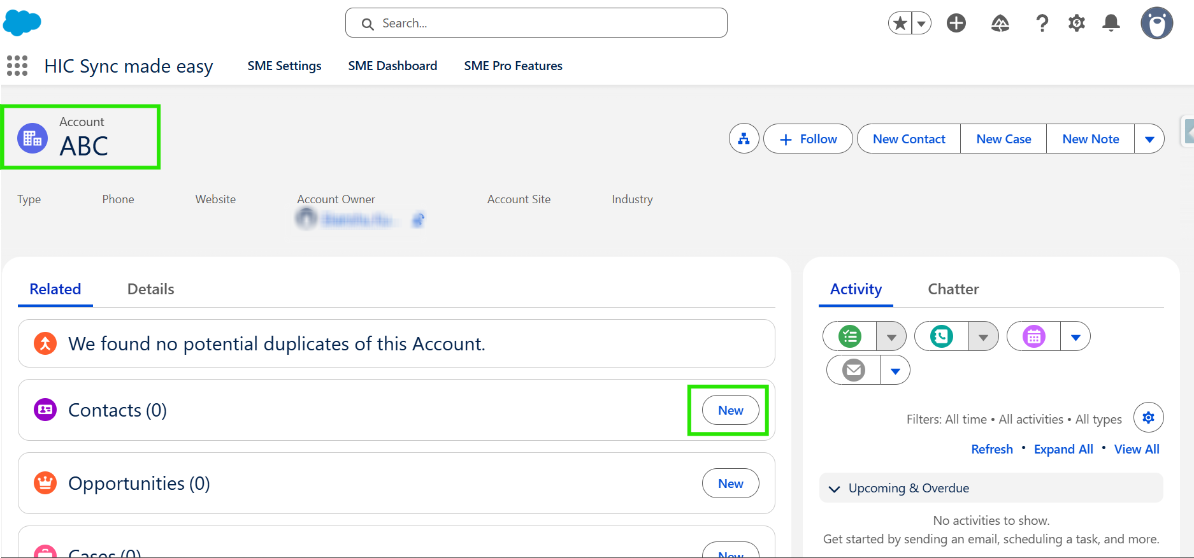
Step 4: Navigate to the Salesforce Account page and create a new account named ABC, then click Save.

Step 5: Under this account, create a new contact by clicking the New button in the Contact section.
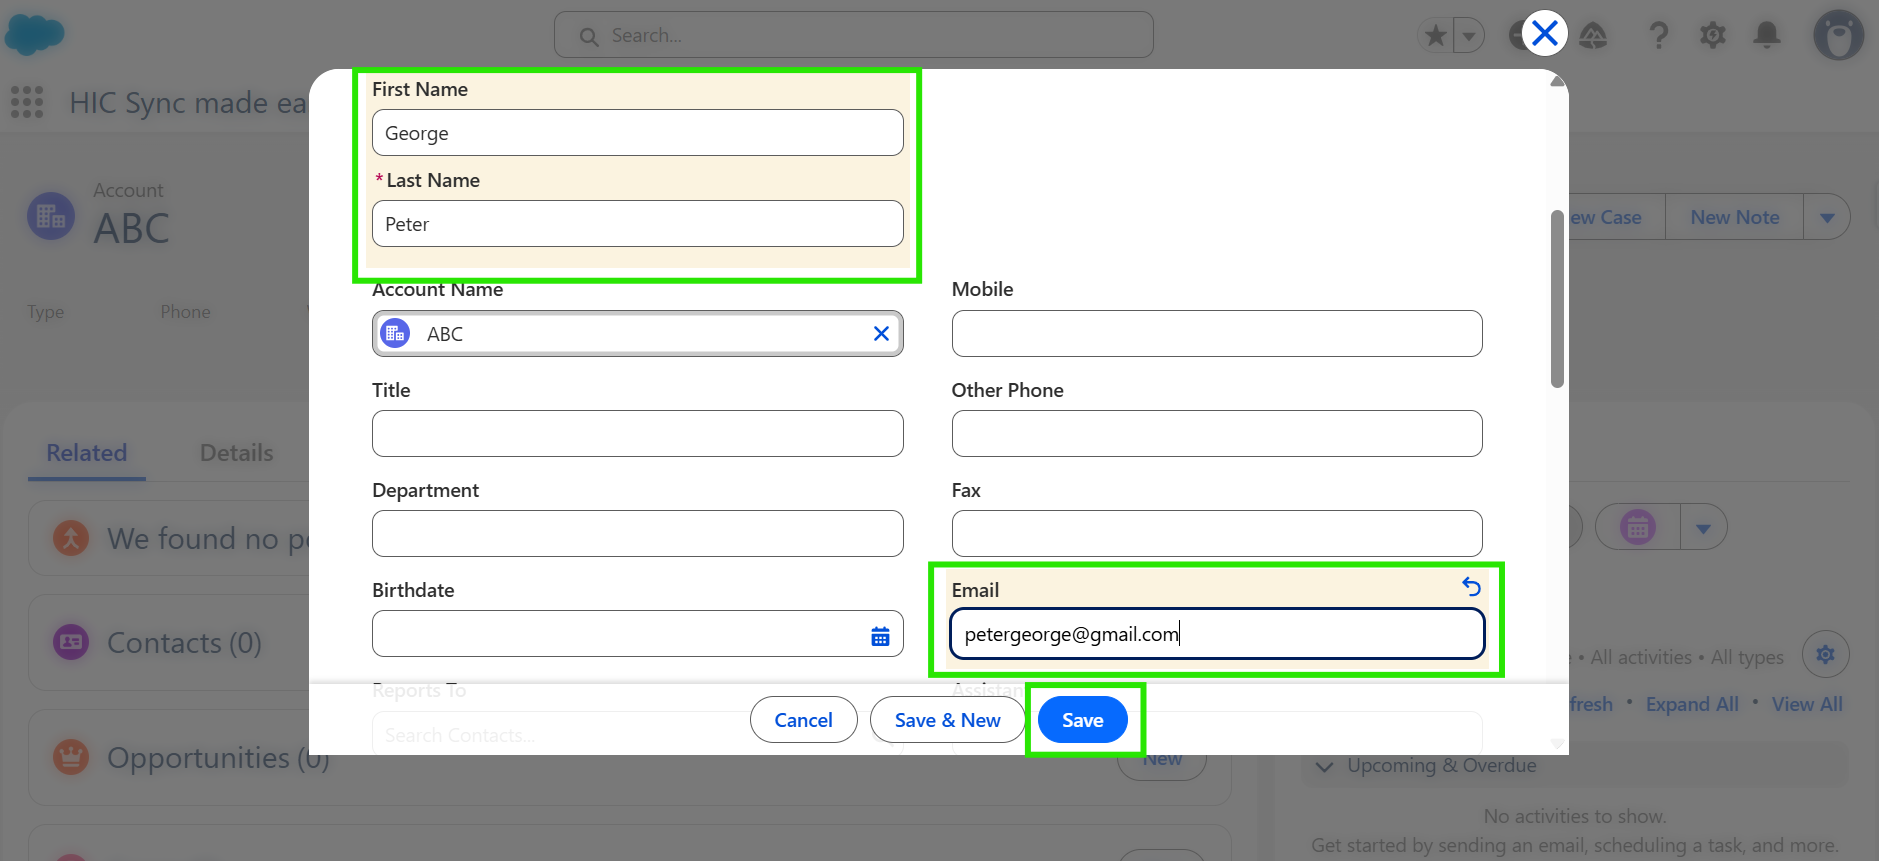
Step 6: Fill the required details for the Contact, such as “First Name”, “Last Name”, and “Email ID”, and then click “Save”.
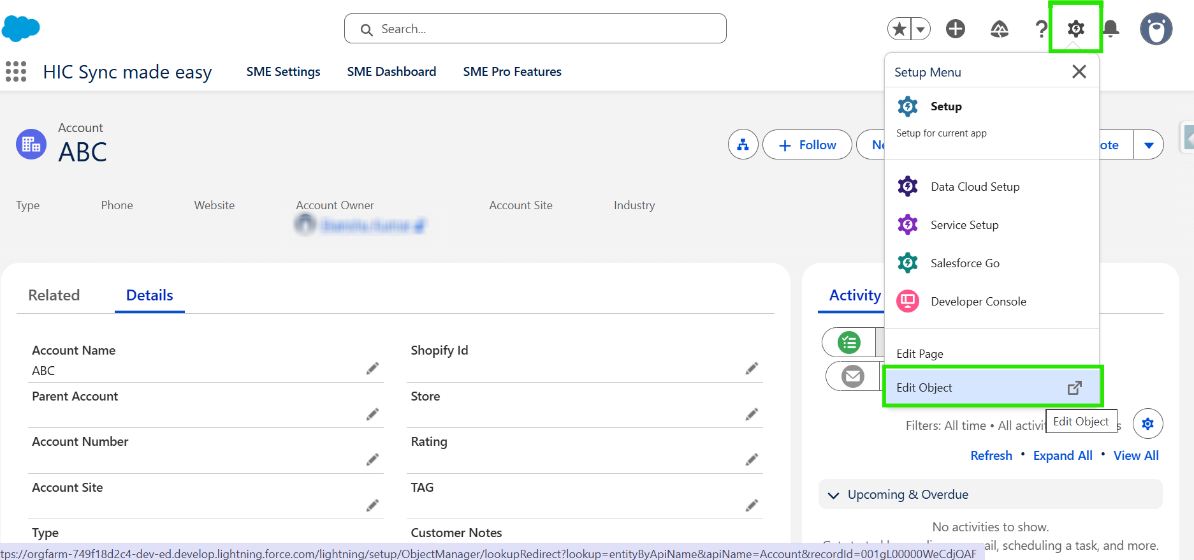
Step 7: Go to the details section of the Account.

Step 8: Click on the Gear Icon & then Click on Edit Object.
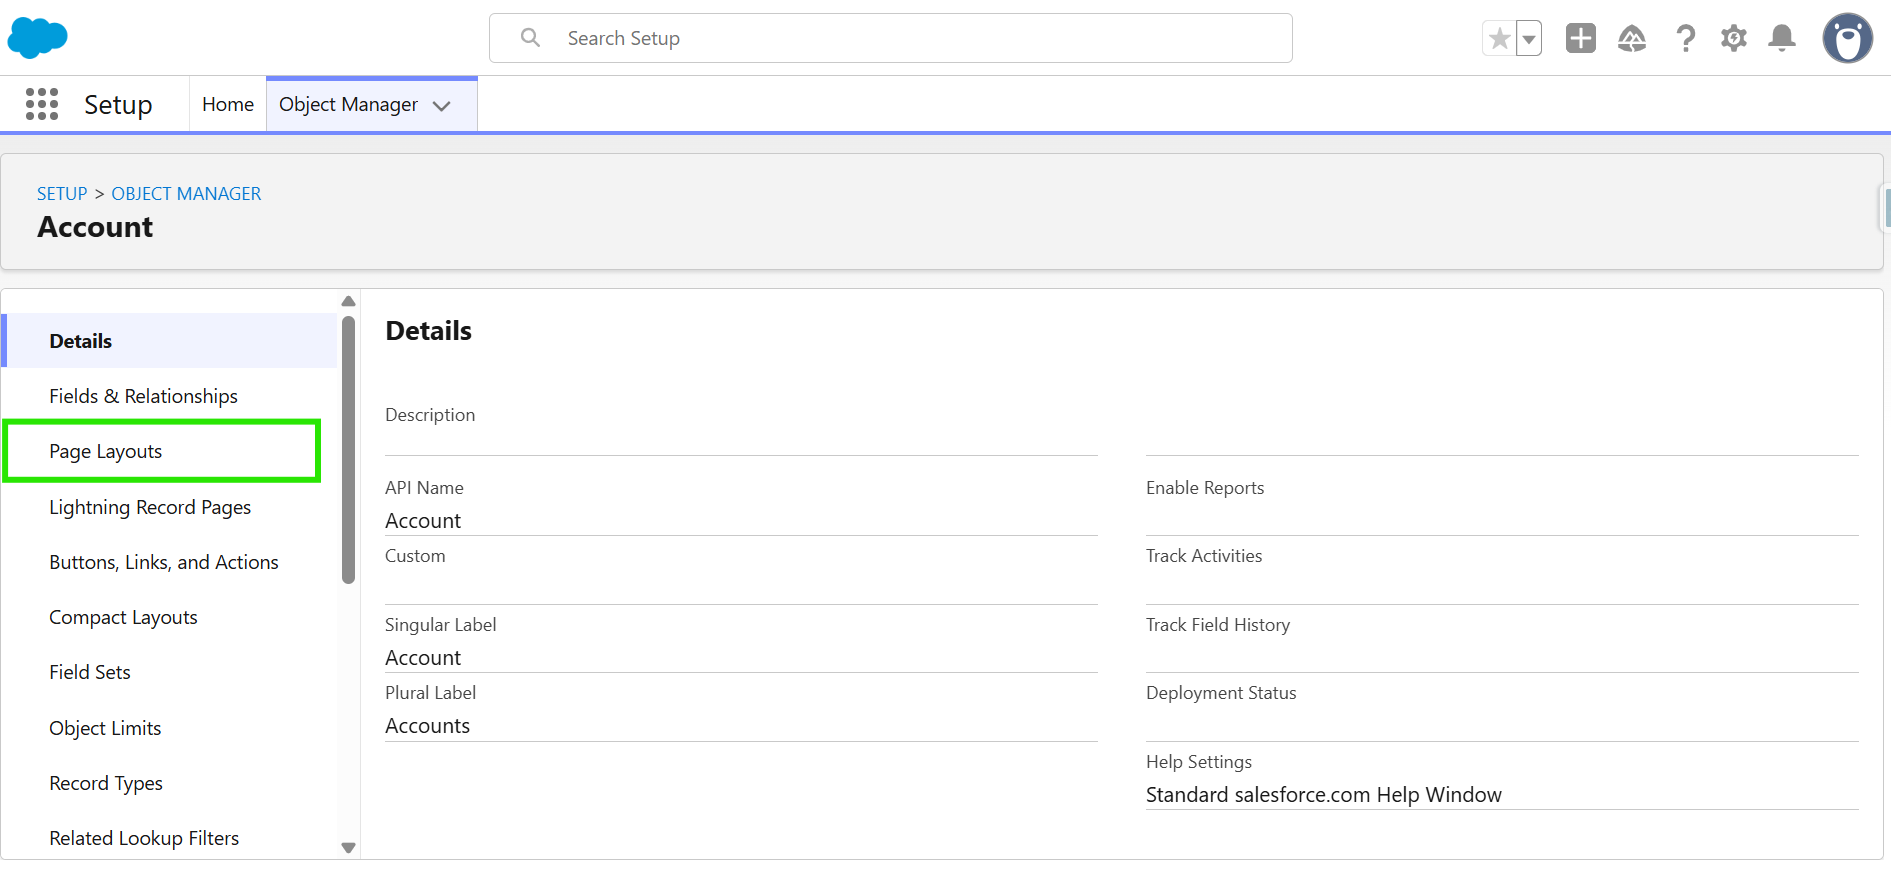
Step 9: Now, Click on Page Layouts.
Step 10: Open the Account Layout.

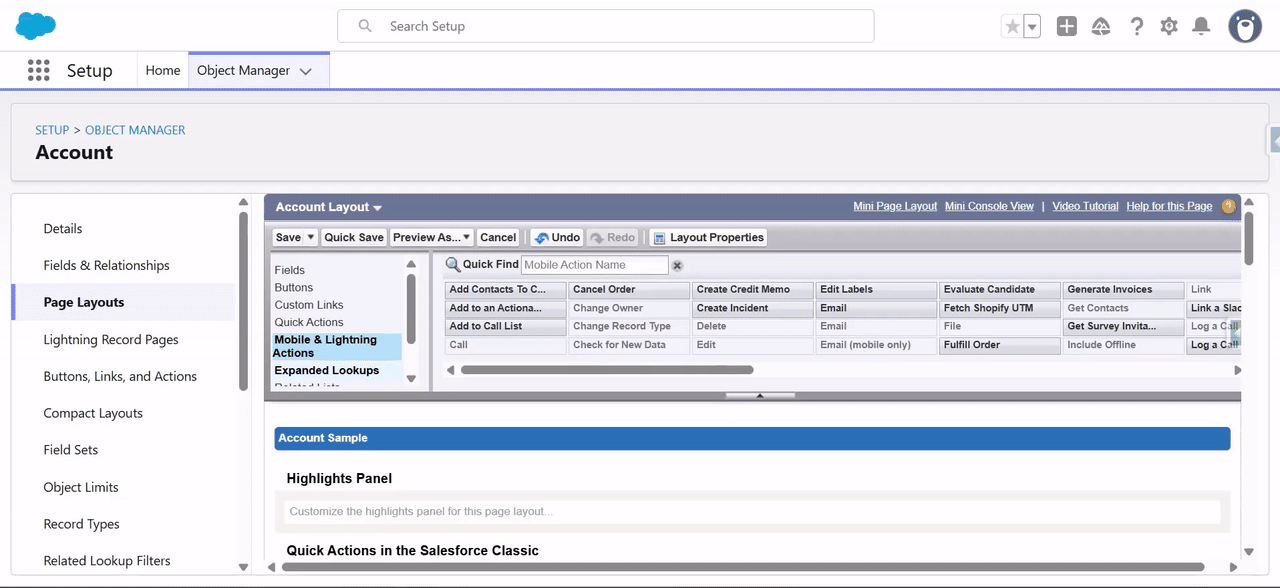
Step 11: Go to Mobile & Lightning Actions.
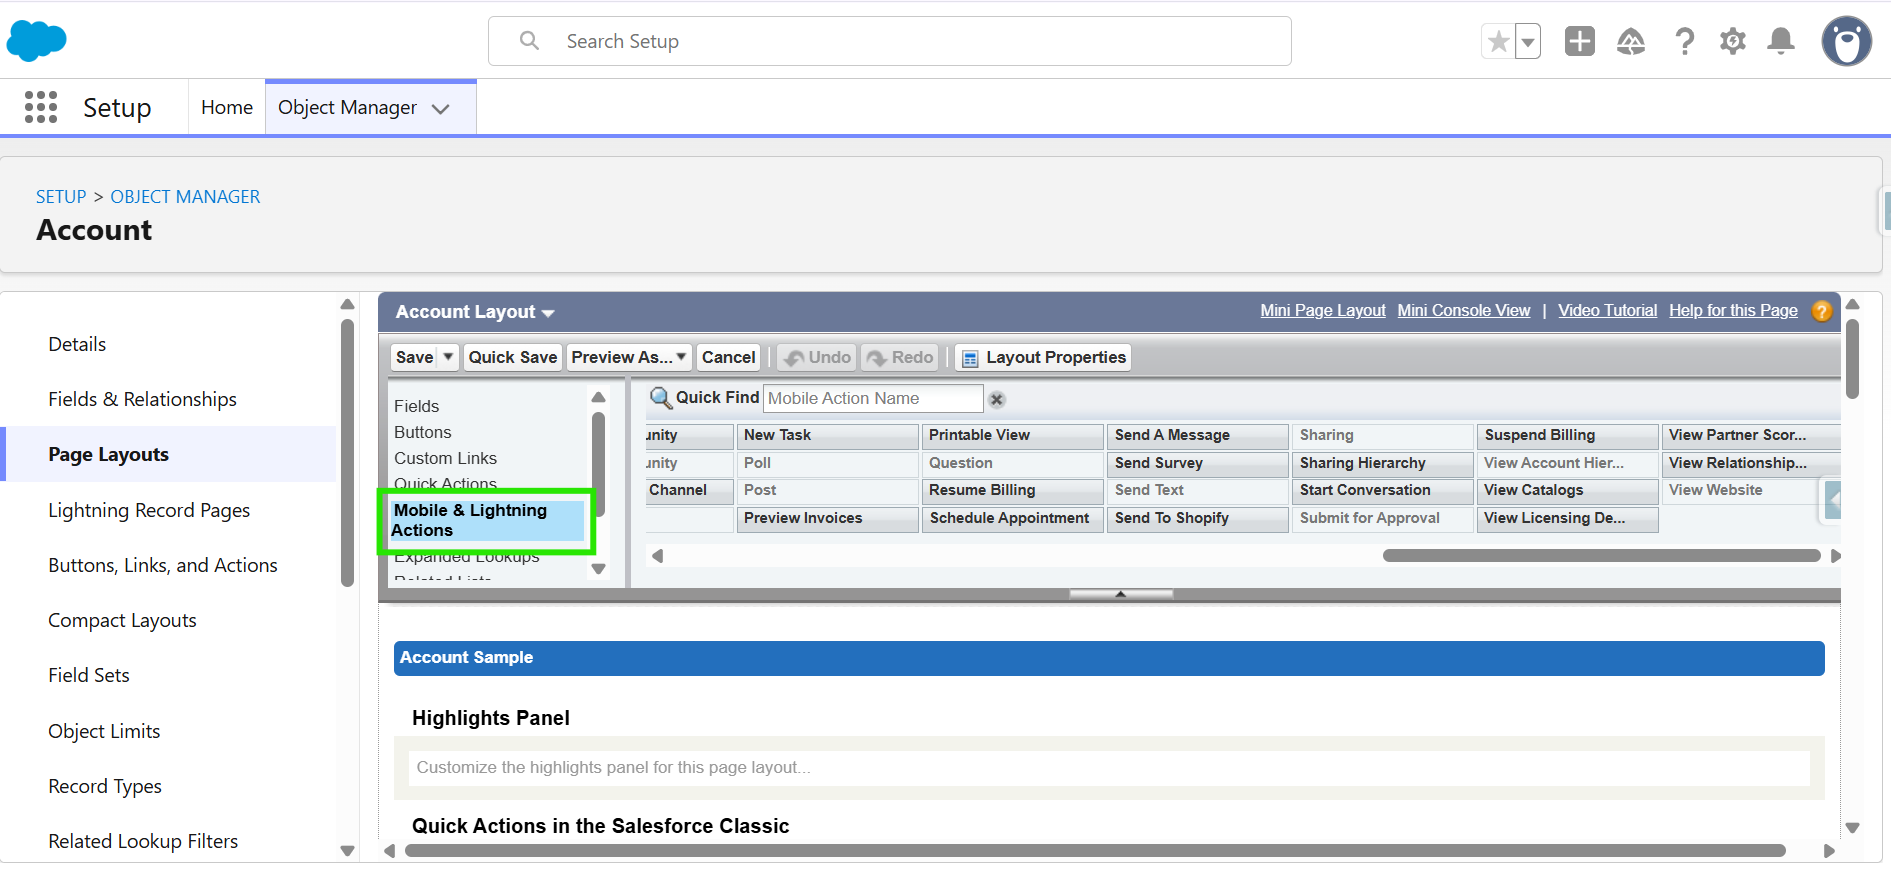
Step 12: Add the “Send to Shopify” button exactly as shown in the GIF.
Step 13: Click on "Save".

Step 14: Go back to the Order & Refresh the Page now you can see the Send to Shopify button.

Step 15: Go to the Details Page. Observe that the “Shopify ID” and “Store Name” fields are blank. Click on the “Send to Shopify” button to generate the Shopify ID and Store Name.

Step 16: Once the process is completed, the “Shopify ID” and “Store Name” will be populated.

Step 17: Verify that the “Shopify ID” and “Store Name” fields are now populated.
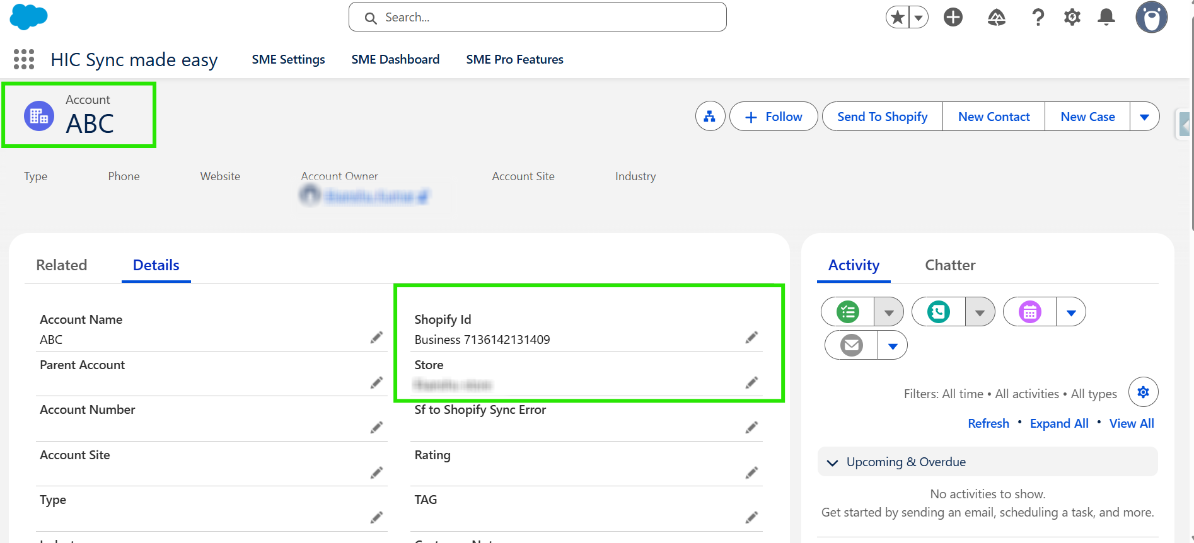
Step 18: Copy the Shopify ID and search for it in your Shopify store.
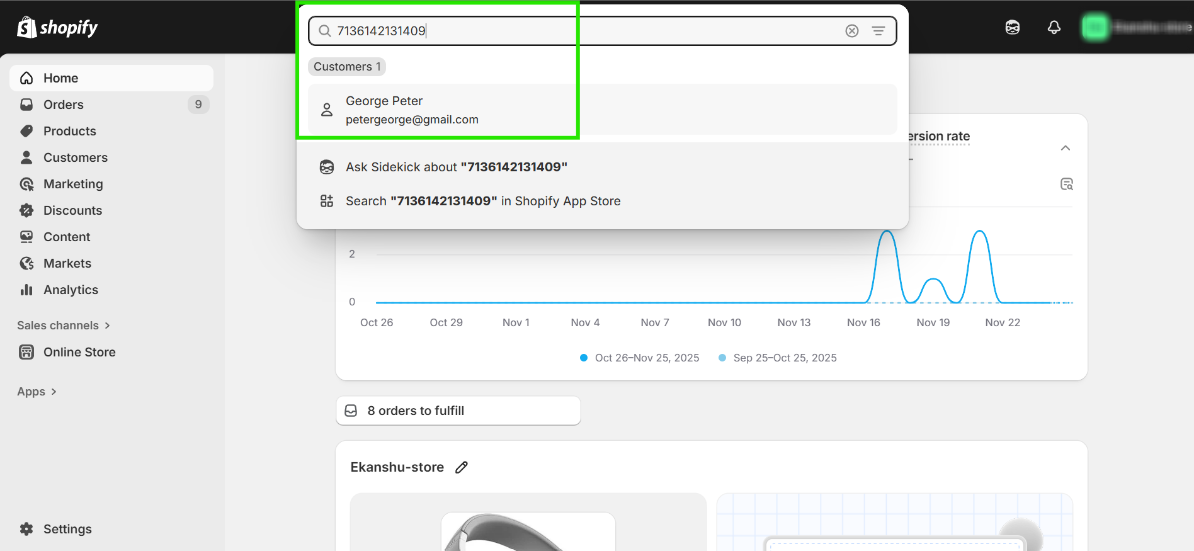
Step 19: Confirm that the account has been successfully synced to Shopify using the Send to Shopify feature.

This completes the Account “Send to Shopify” button setup. You can use the same steps to add it to Product, Order, Draft Order, and Opportunity.
Thanks!
Was this article helpful?
That’s Great!
Thank you for your feedback
Sorry! We couldn't be helpful
Thank you for your feedback
Feedback sent
We appreciate your effort and will try to fix the article
