In this guide, we will walk you through the process of syncing Shopify product images to Salesforce. When a product is created or already exists in Shopify with an image, it automatically syncs to Salesforce, and the image is stored under the Notes & Attachments section. Follow these steps to enable and use this feature seamlessly:
Step 1: Log in to Salesforce & in App Launcher search "HIC Sync made easy". Click on it.

Step 2: Go to "SME Pro Features"

Step 3: Enable the “Product Images Sync (Shopify → Salesforce)” feature toggle button.

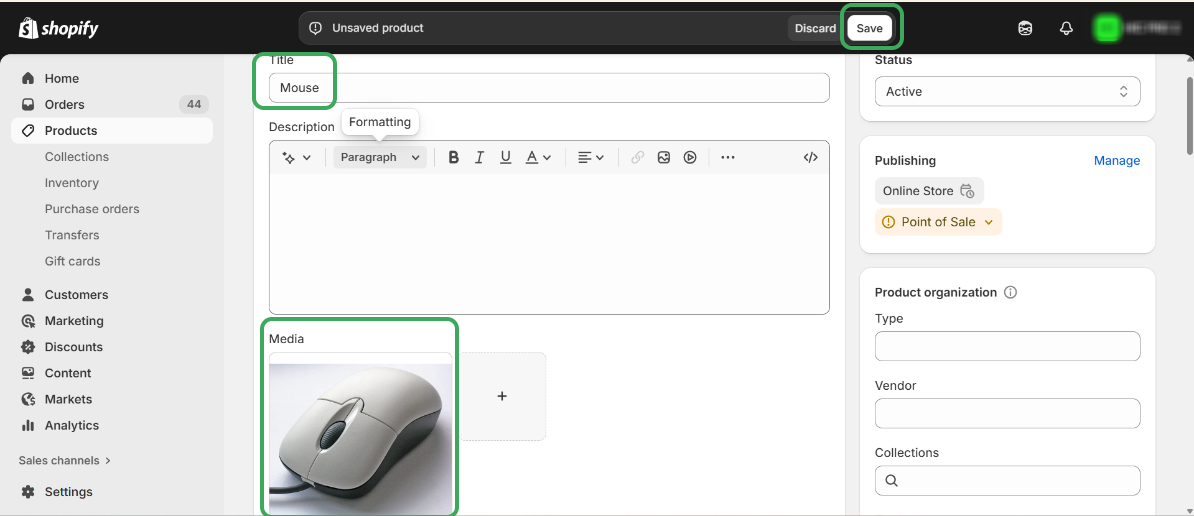
Step 4: Navigate to the Shopify store and create a new product, including an image and all required fields and then save it.
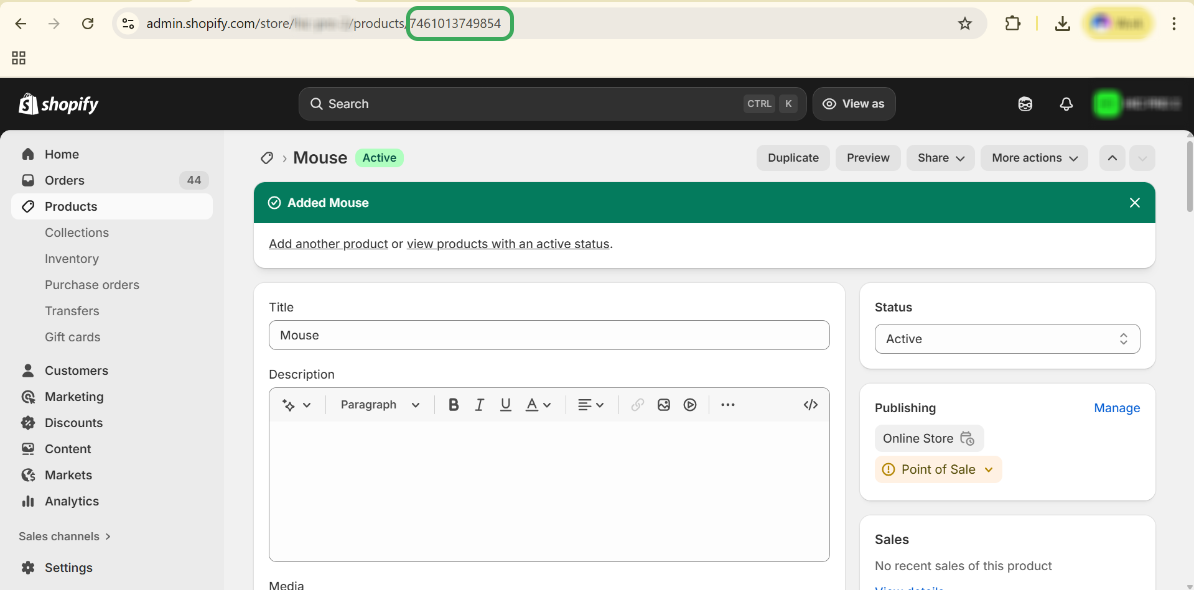
Step 5: Copy the “Shopify ID” of the product.
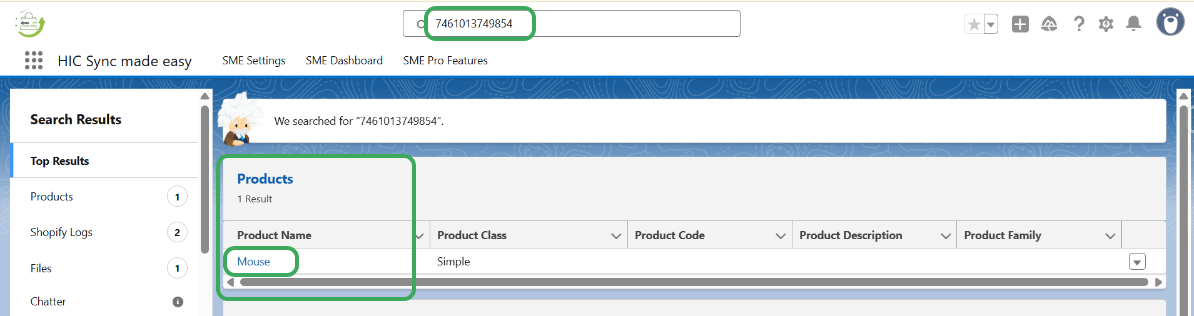
Step 6: Search for the same product in Salesforce.
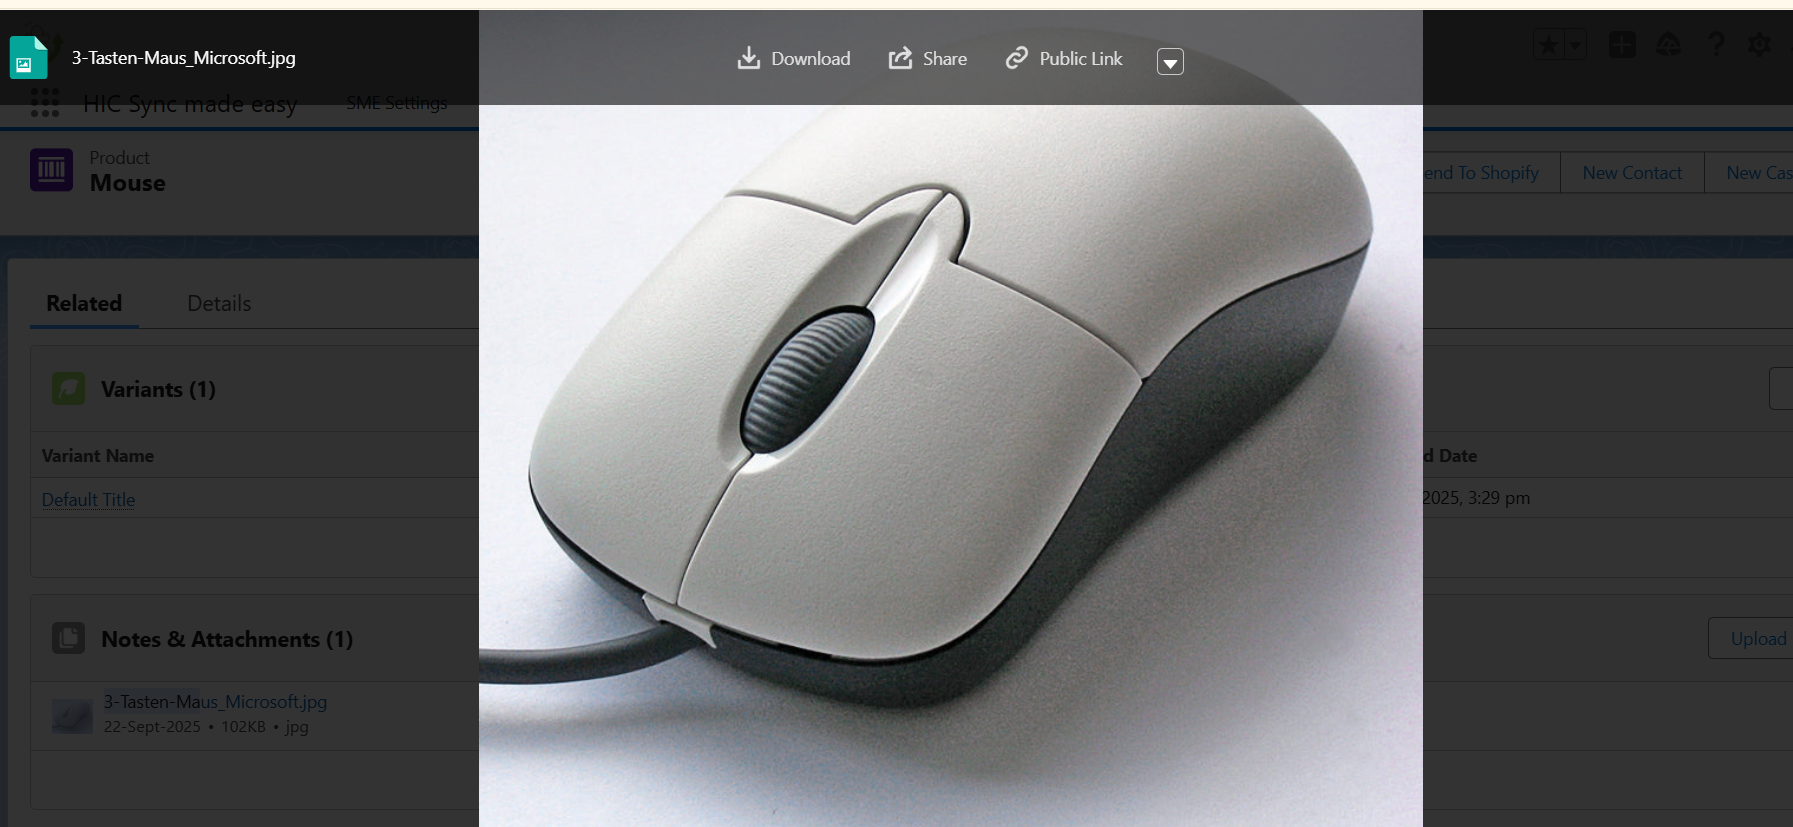
Step 7: Open the product record and navigate to the Related tab, then check the “Notes & Attachments” section.
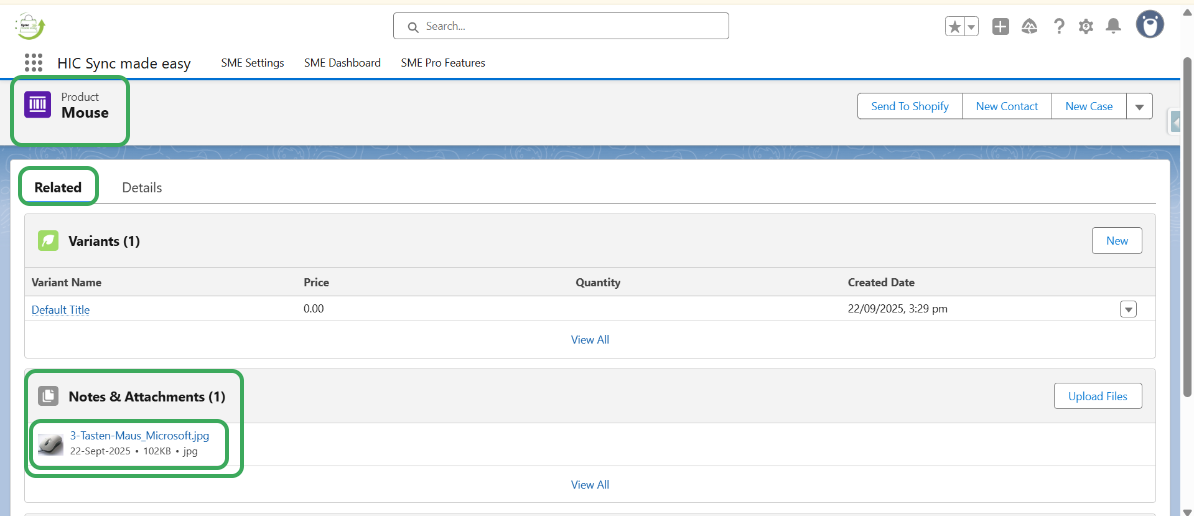
Step 8: The product image will be visible as an attachment under Notes & Attachments.
This completes the functionality of the Product Images Sync (Shopify → Salesforce) feature.
Thanks!
Was this article helpful?
That’s Great!
Thank you for your feedback
Sorry! We couldn't be helpful
Thank you for your feedback
Feedback sent
We appreciate your effort and will try to fix the article
