In this guide, we will walk you through how refund information from Salesforce orders is synced to Shopify. When a refund is updated in Salesforce, it is automatically reflected in the corresponding Shopify order, ensuring accurate and up-to-date data.
Follow the steps below to enable and use this feature easily:
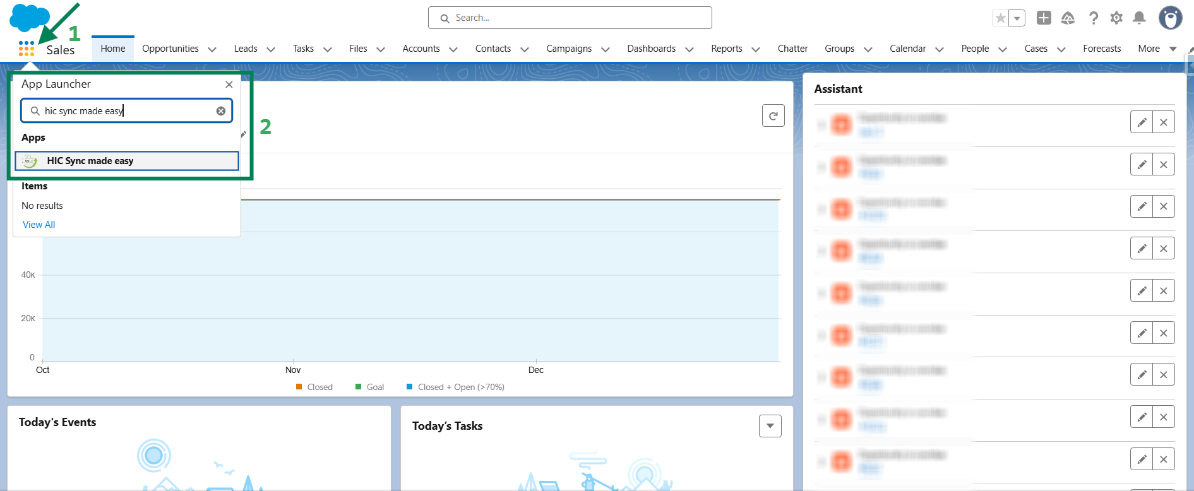
Step 1: Log in to Salesforce and in App Launcher search "HIC Sync made easy". Click on it.
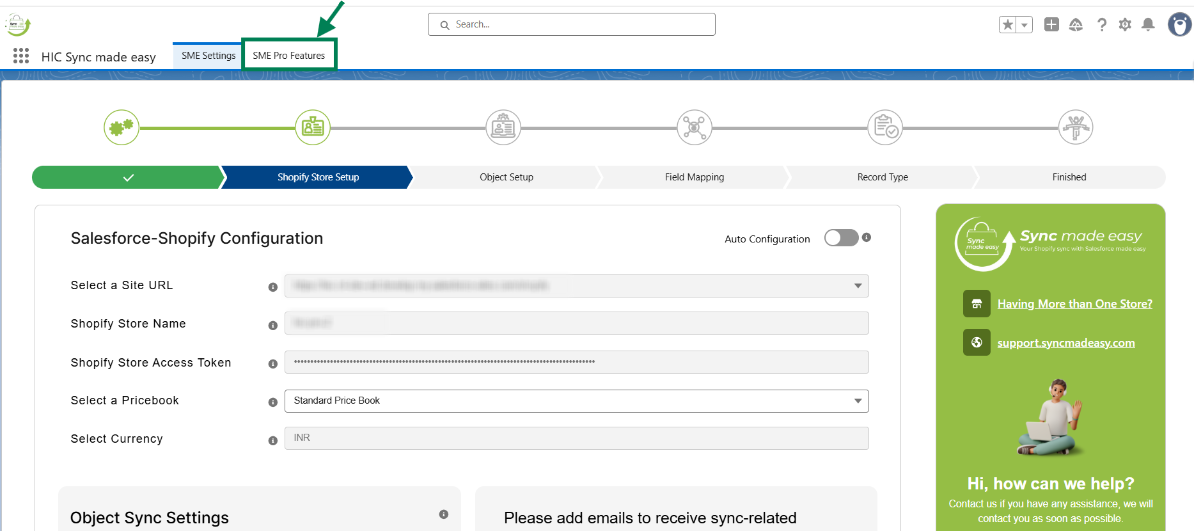
Step 2: Go to "SME Pro Features".
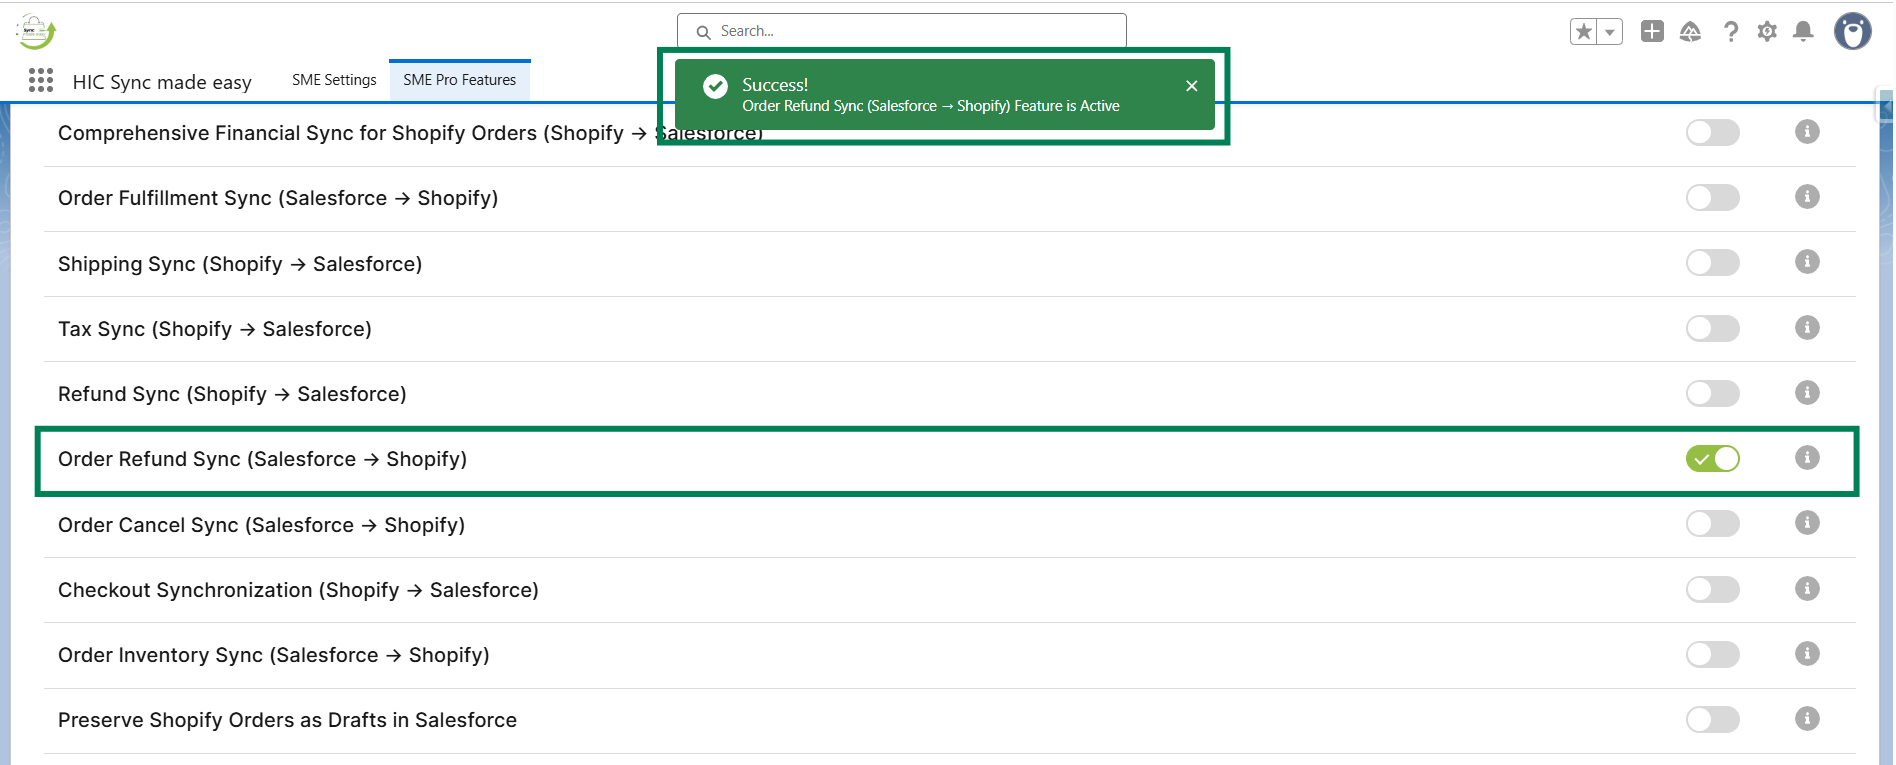
Step 3: Enable the “Order Refund Sync (Salesforce → Shopify)” feature toggle button.
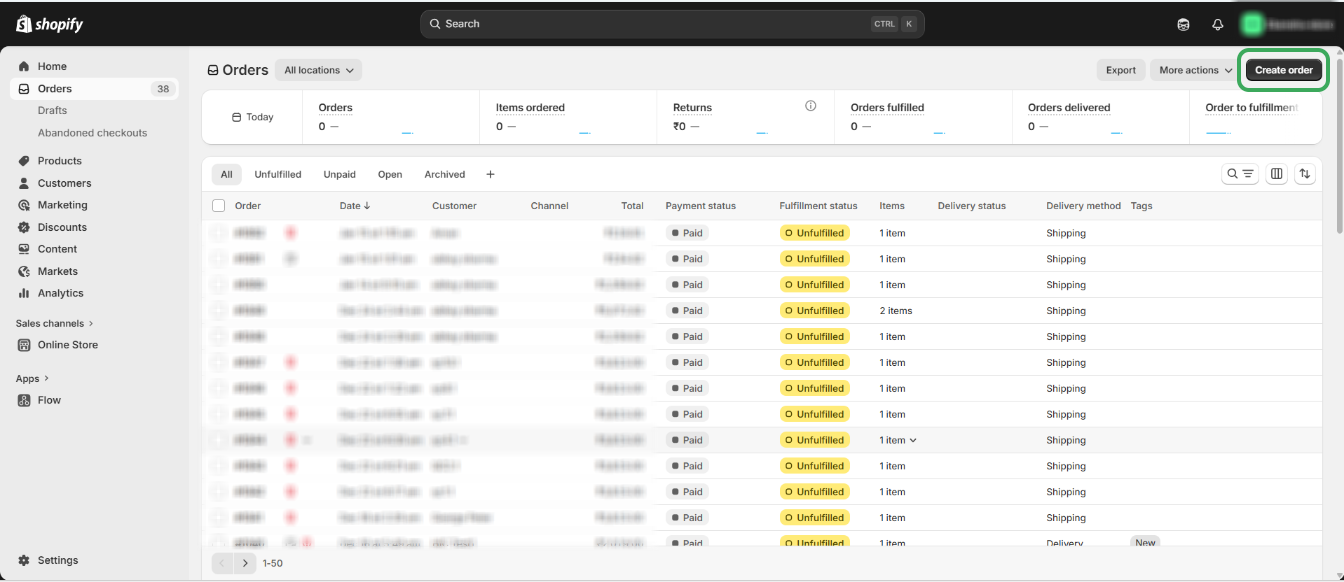
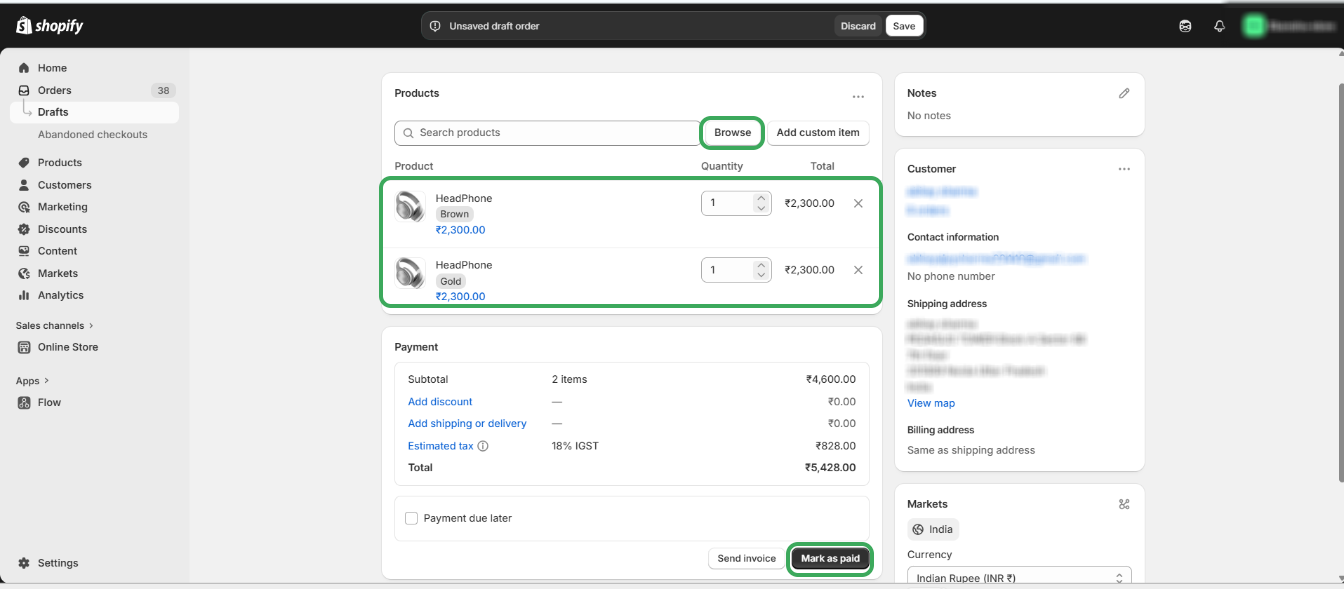
Step 4: Now, from your Shopify store, click on “Create order”.
Step 5: Create an order and click “mark it as paid”.
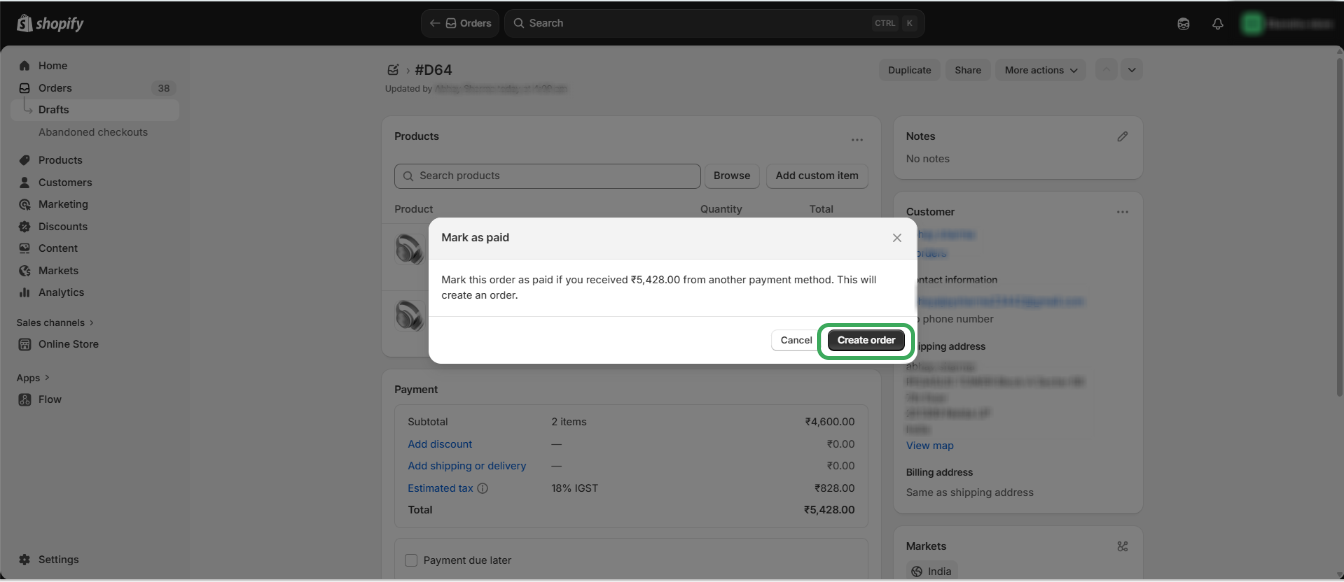
Step 6: Click on “Create order”.
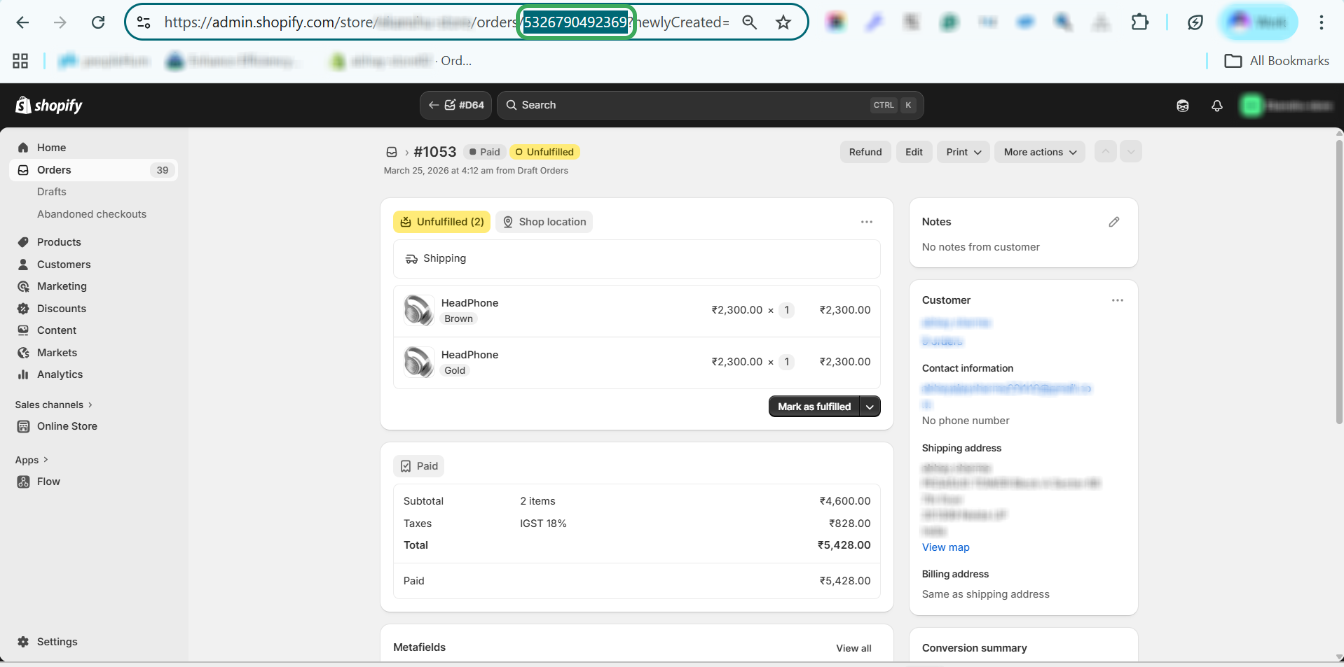
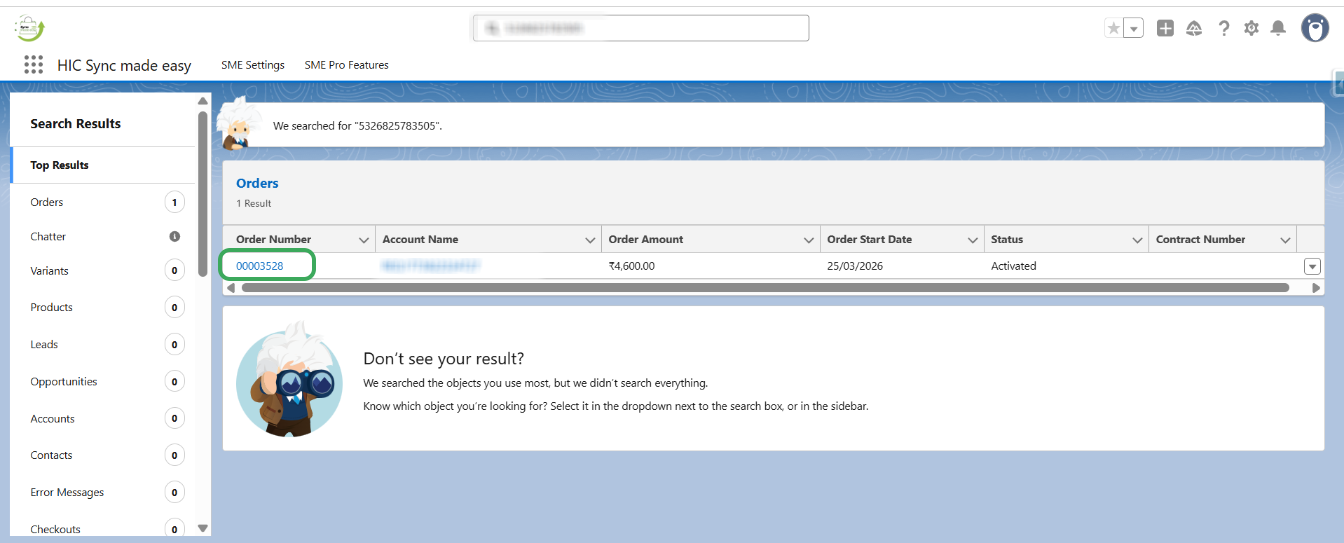
Step 7: Copy the “Shopify ID” from the above URL and search it in Salesforce.
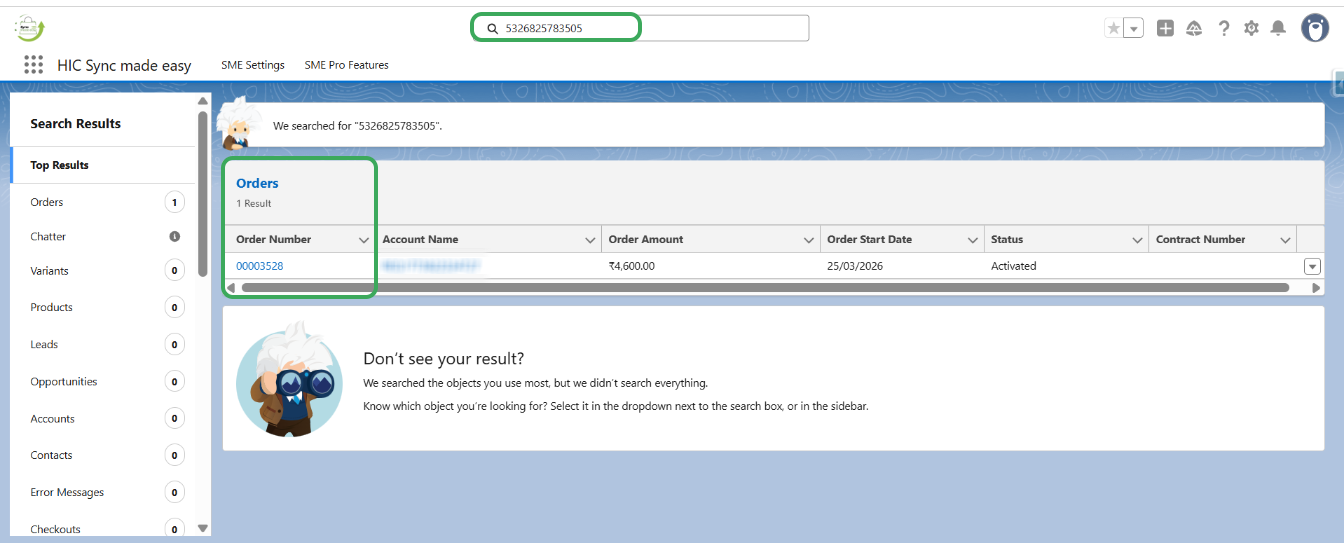
Step 8: Click on the order.
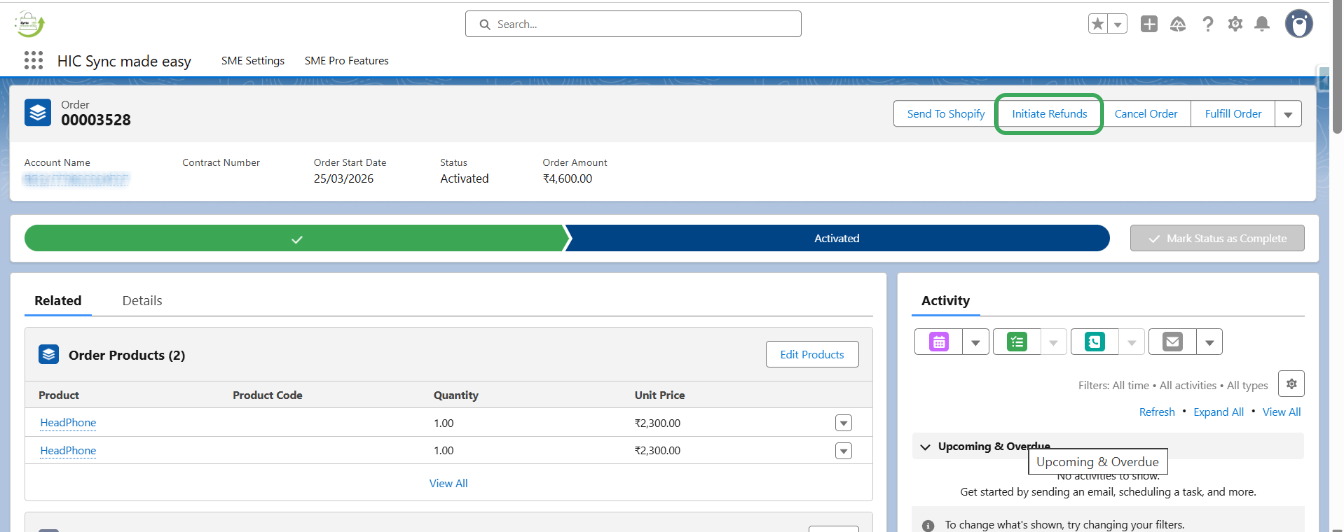
Step 9: Click on the “Initiate Refund” button.
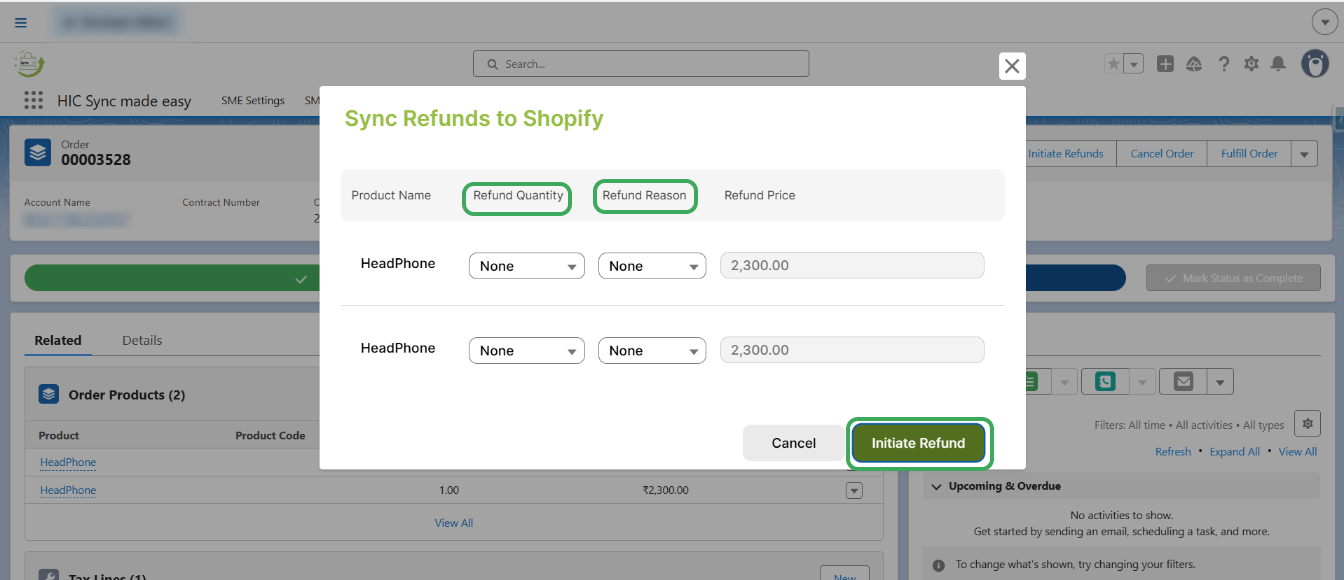
Step 10: Select the “Refund Quantity” and “Refund Reason” and then click on “Initiate Refund”.
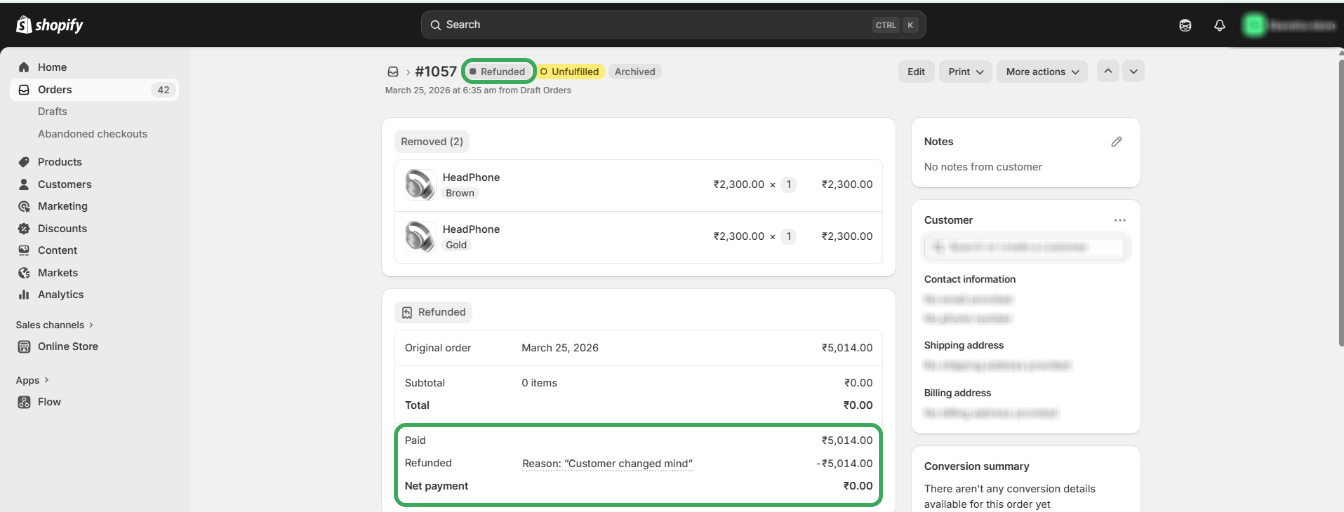
Step 11: After clicking on the “Initiate Refund” button, go back to Shopify and check that the order is refunded.
Thanks!
Was this article helpful?
That’s Great!
Thank you for your feedback
Sorry! We couldn't be helpful
Thank you for your feedback
Feedback sent
We appreciate your effort and will try to fix the article
