In this guide, we’ll walk you through how the Shopify TaxLines Sync feature works in Salesforce.
Whenever a tax is calculated during order creation in Shopify, Salesforce automatically generates a related tax record on both the Order and the Opportunity. This ensures accuracy in tax calculations and complete financial transparency.
We’ve broken this down into a clear step-by-step process so you can enable and use this feature effectively.
Step 1: Log in to Salesforce and in App Launcher, search "HIC Sync made easy". Click on it.

Step 2: Go to "SME Pro Features".

Step 3: Enable the "Tax Sync (Shopify → Salesforce)" feature.

Ensure that from Paid Order → Order or Opportunity is enabled on the Object Setup page in SME Settings

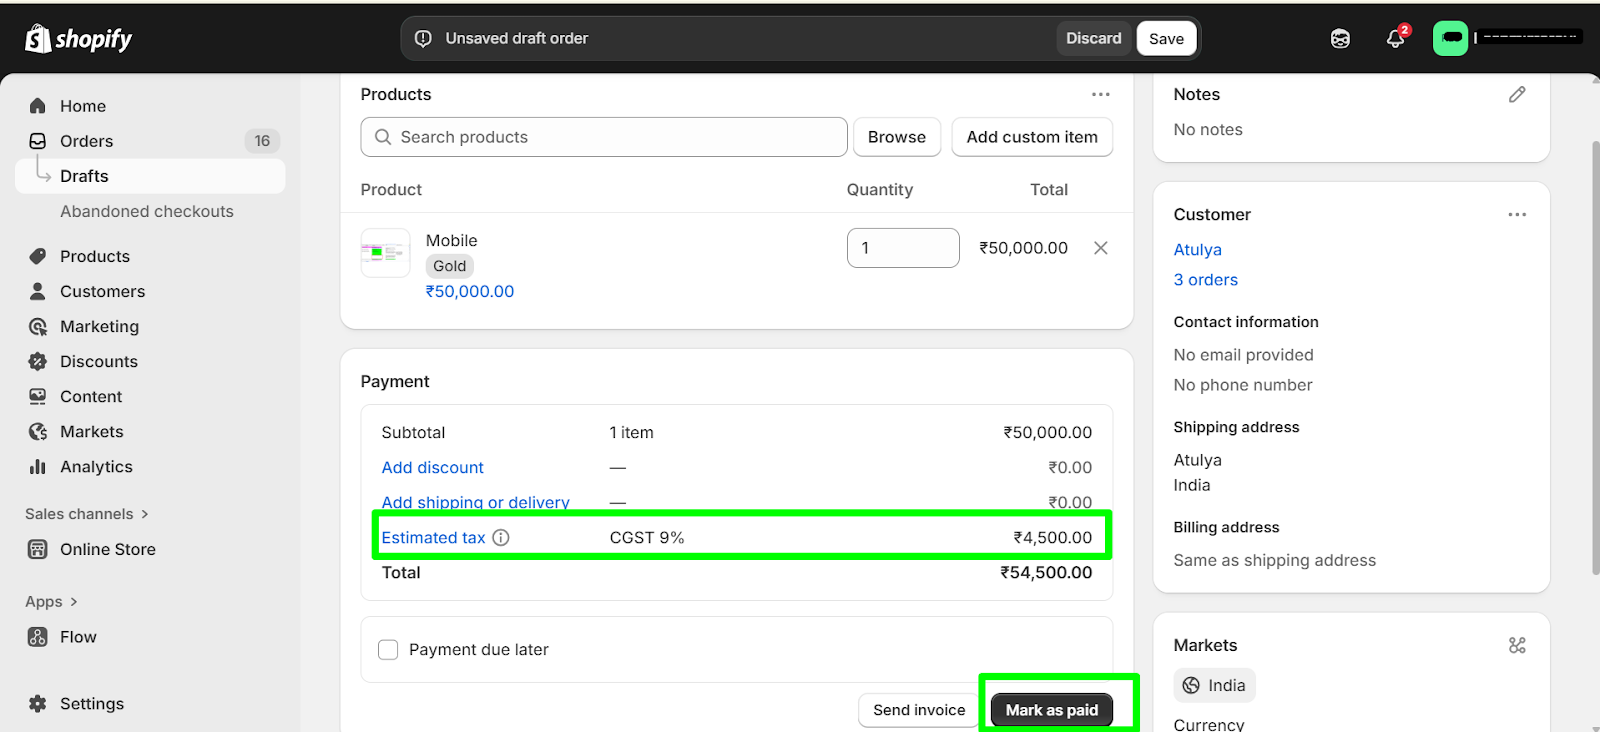
Step 4: Go to the Shopify store and create a new order by clicking Create order. Add a product and ensure that Tax is applied on the order And Click Mark as paid.
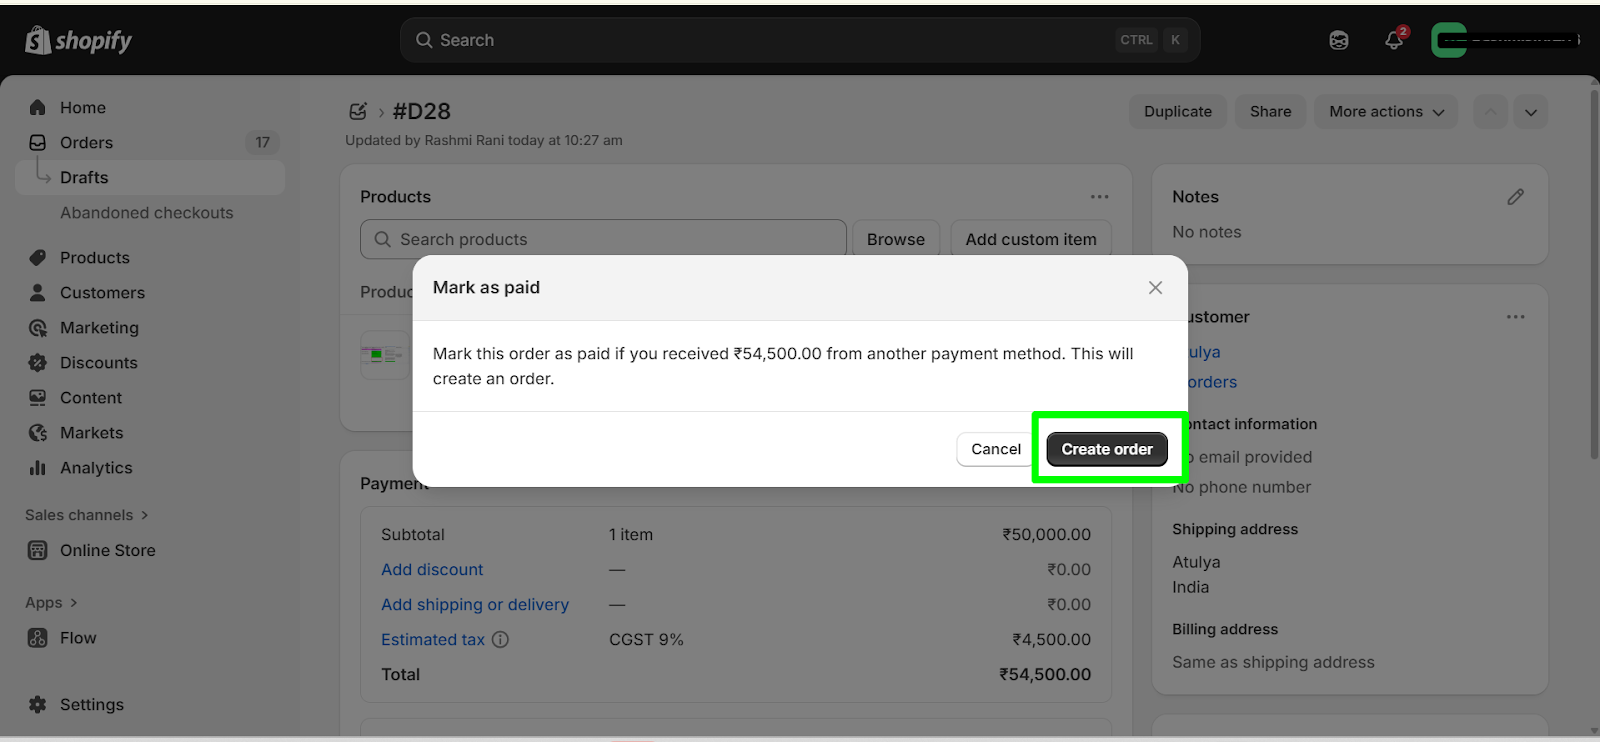
Step 5: Click on the Create order button.
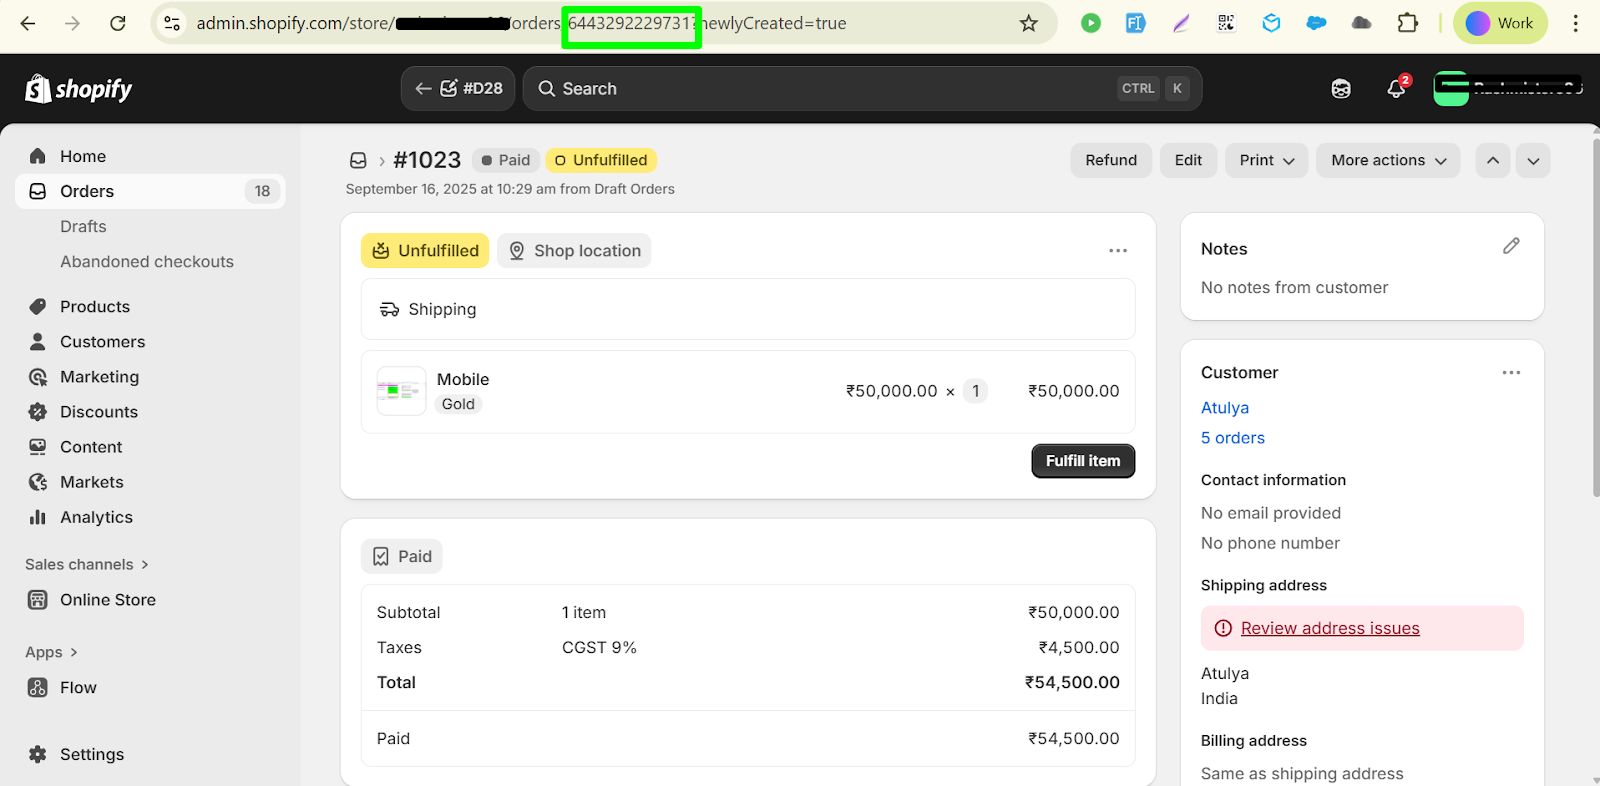
Step 6: Copy the Shopify ID of the order.
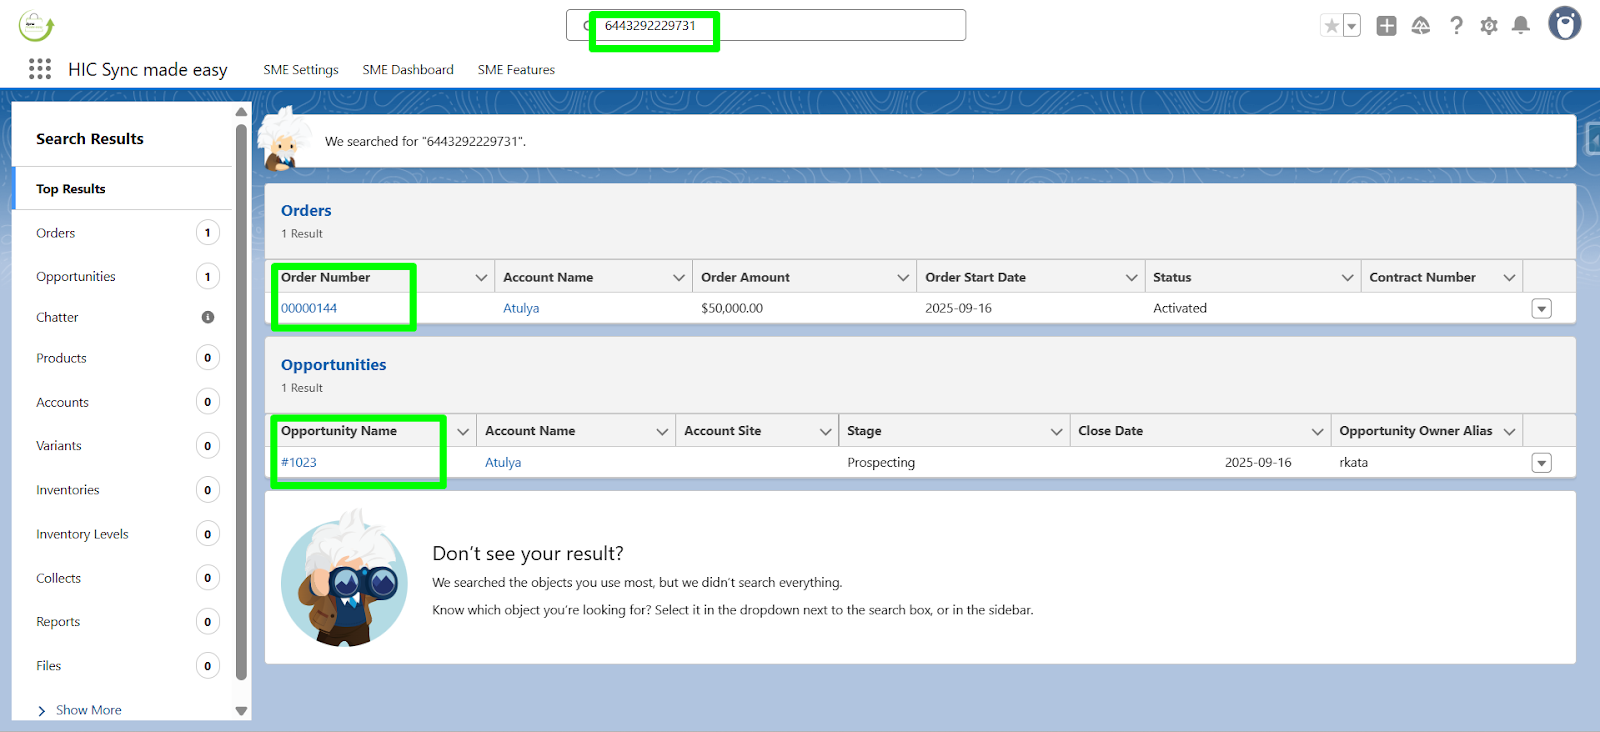
Step 7: In Salesforce, search for the order ID to verify if it has synced successfully from Shopify.
Step 8: Navigate to the Related section of the Order. You will see that the Tax Line has been created.

Note:
If the related list is not already added to your object, refer to the "How to Add a Related List to an Object in Salesforce".
Step 9: Navigate to the Related section of the Opportunity. You will see that the Tax Line has been created.
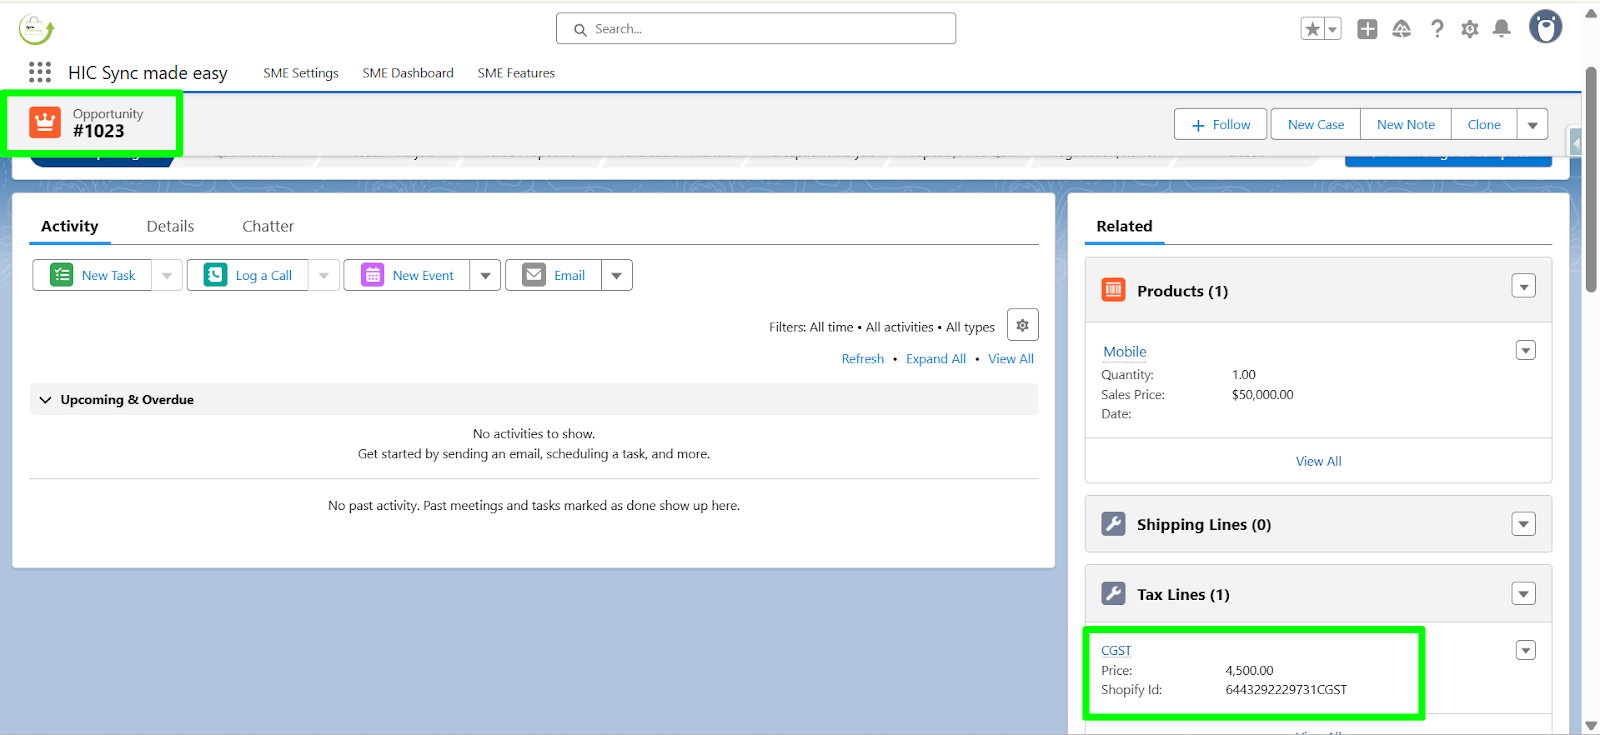
This completes the functionality of Shopify TaxLines Sync on Orders and Opportunities.
Thanks!
Was this article helpful?
That’s Great!
Thank you for your feedback
Sorry! We couldn't be helpful
Thank you for your feedback
Feedback sent
We appreciate your effort and will try to fix the article
