In this guide, we will walk you through the step-by-step process of how the Customer Email Domain feature works. This feature validates customers' email domains and creates an account based on the domain name. If multiple customers have the same email domain, they are grouped under the same account, and their related orders are displayed under the respective customer records.
Follow the instructions below to understand how this feature works.
Note:
Ensure that the Customer Email Domain feature is enabled in your org before proceeding.
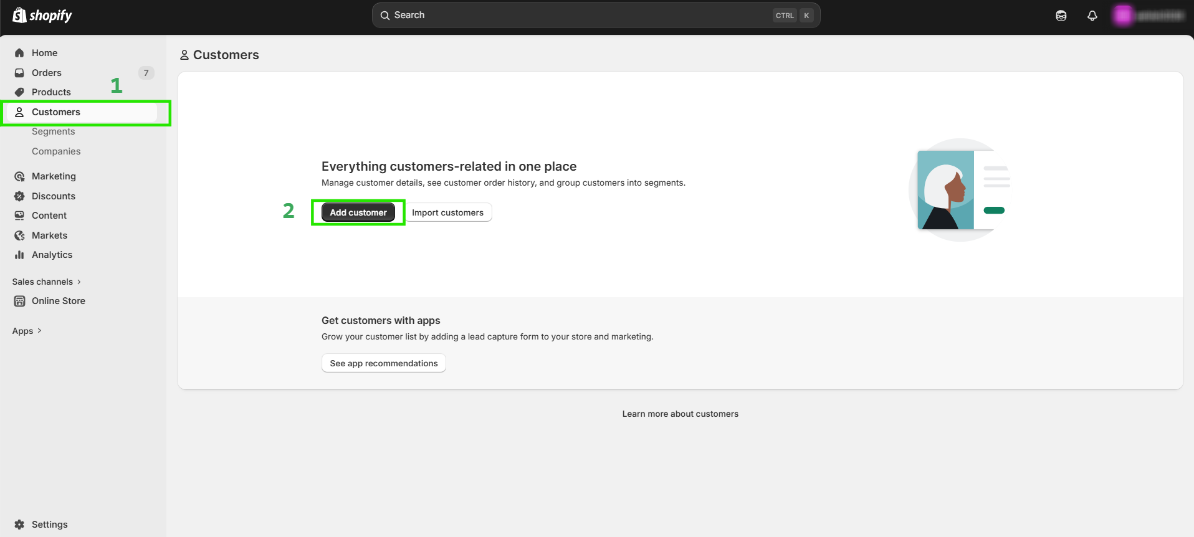
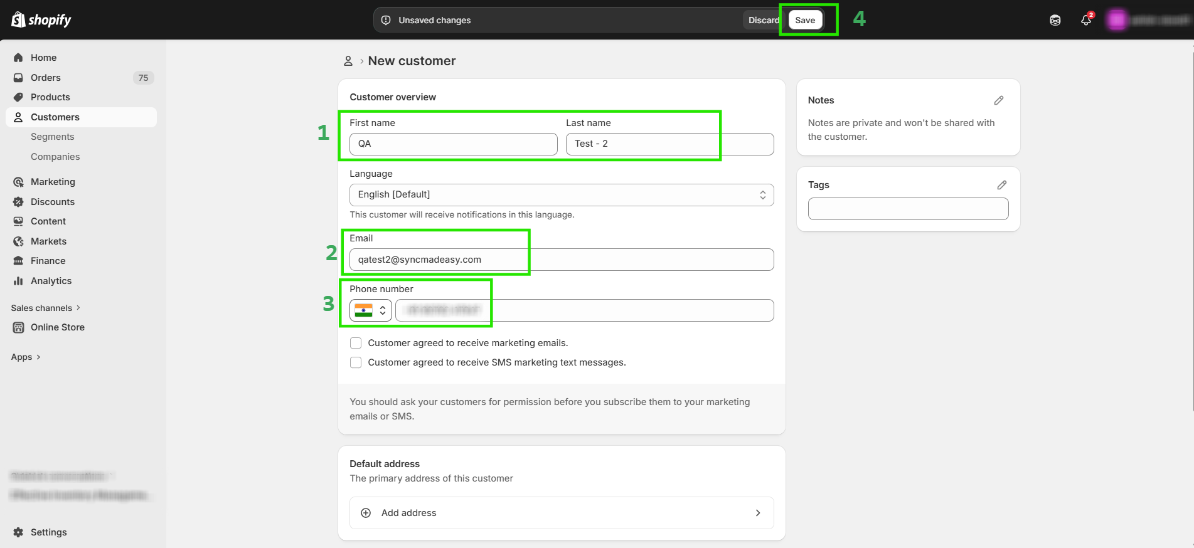
Step 1: Go to the Customers section in your Shopify store and click “Add Customer”.
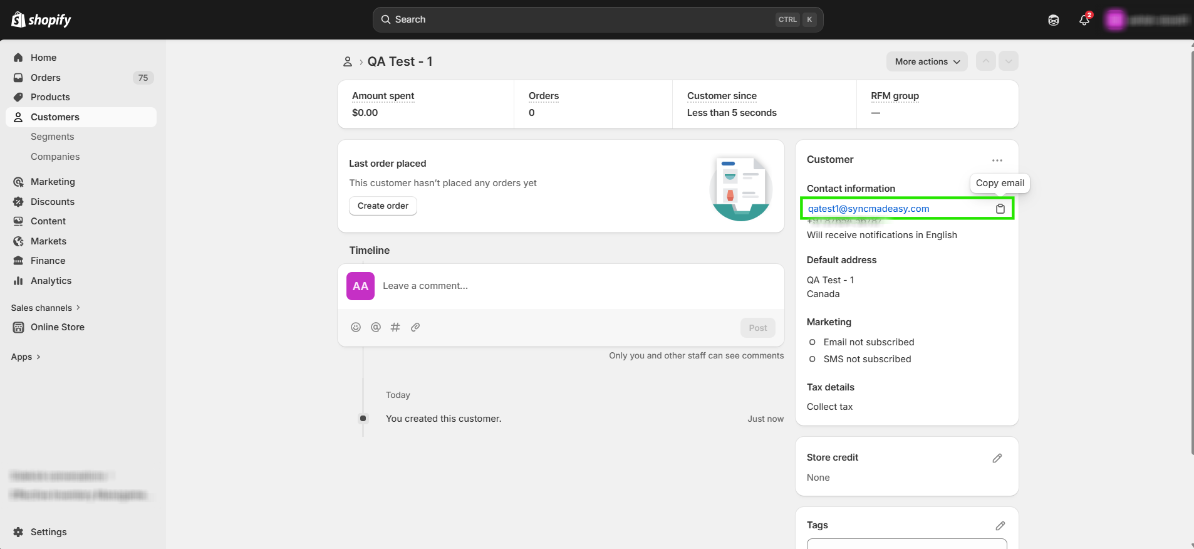
Step 2: Provide the First Name, Last Name, Email, and Phone Number, then click Save.

Step 3: Copy the customer’s email ID that you just created.
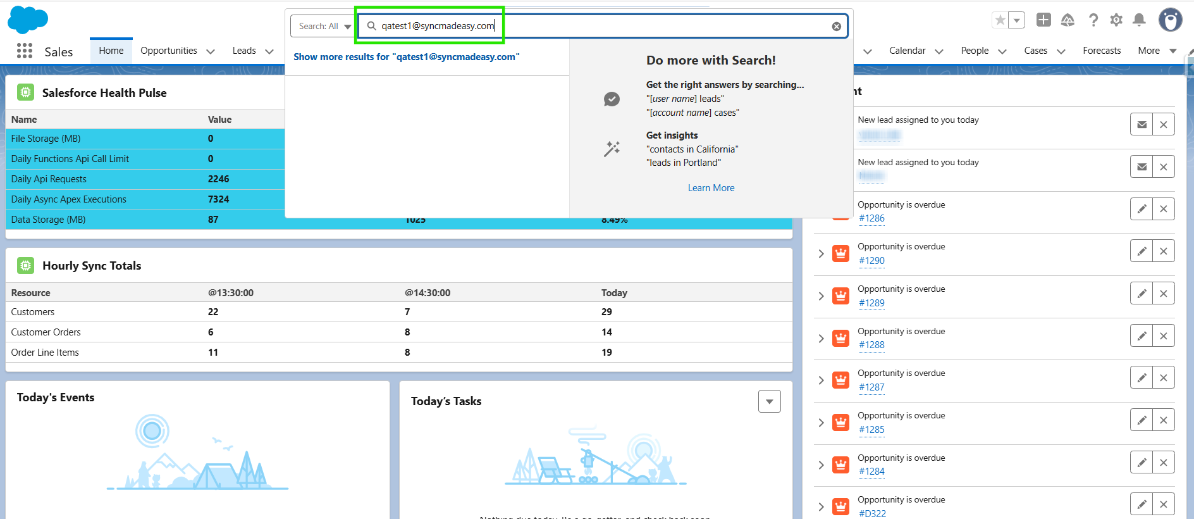
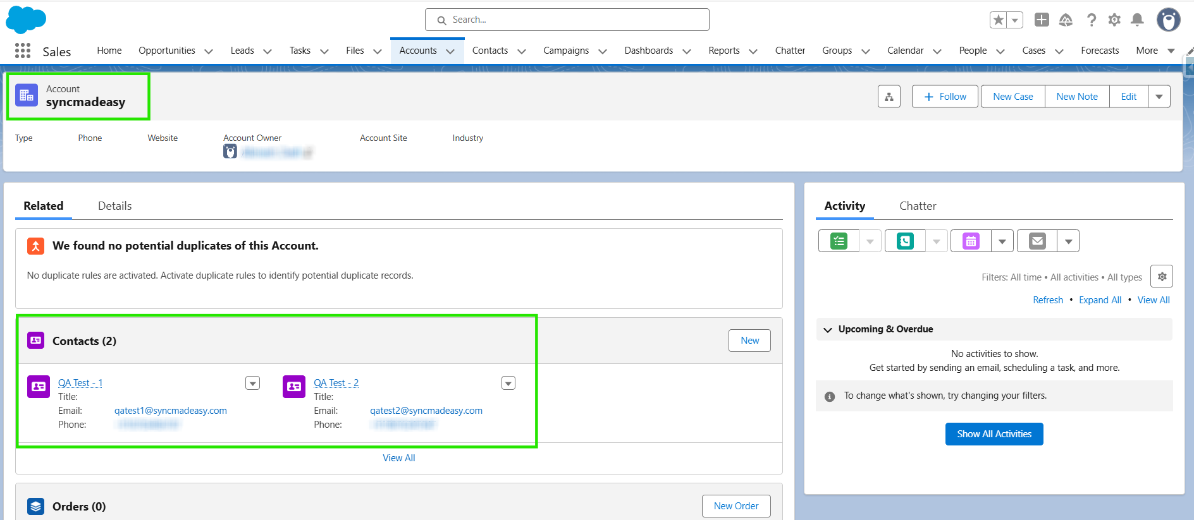
Step 4: Paste the copied email ID into the Salesforce Global Search to find the corresponding record.
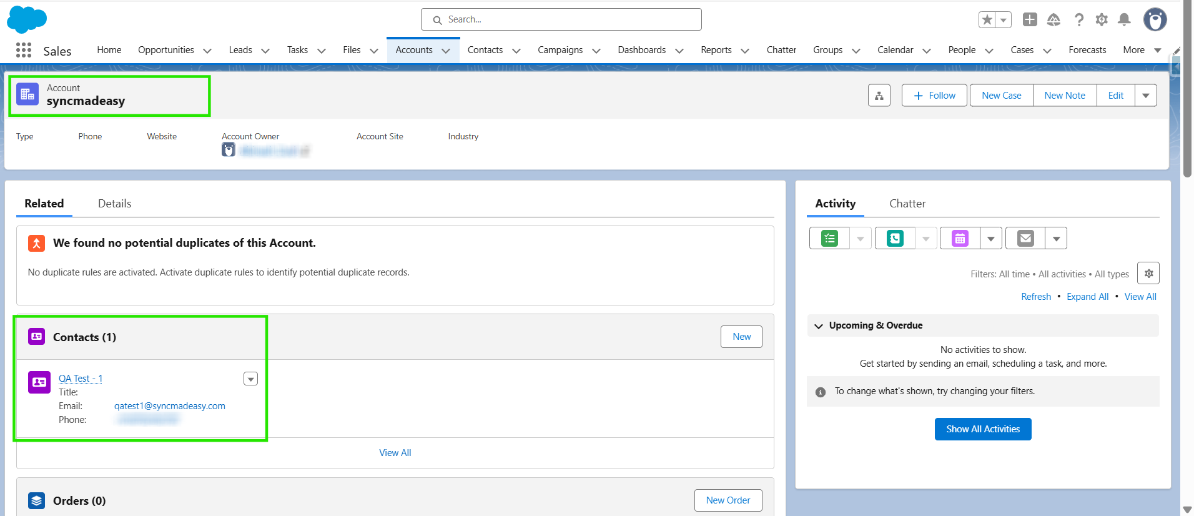
Step 5: Open the Account record and verify that the account name matches the customer’s email domain. You will also see that one Contact has been created under that account.
Step 6: Go back to Shopify and create another customer using an email with the same domain. Then check the sync in Salesforce.
Step 7: Refresh the page in Salesforce and confirm that a new contact has been added to the existing account with the same domain.
Thanks!
Was this article helpful?
That’s Great!
Thank you for your feedback
Sorry! We couldn't be helpful
Thank you for your feedback
Feedback sent
We appreciate your effort and will try to fix the article