In this guide, we will walk you through how Salesforce orders are synced to Shopify based on their status category. This helps ensure that only relevant orders are synced, making order management more accurate and organized.
Follow the steps below to enable and use this feature easily:
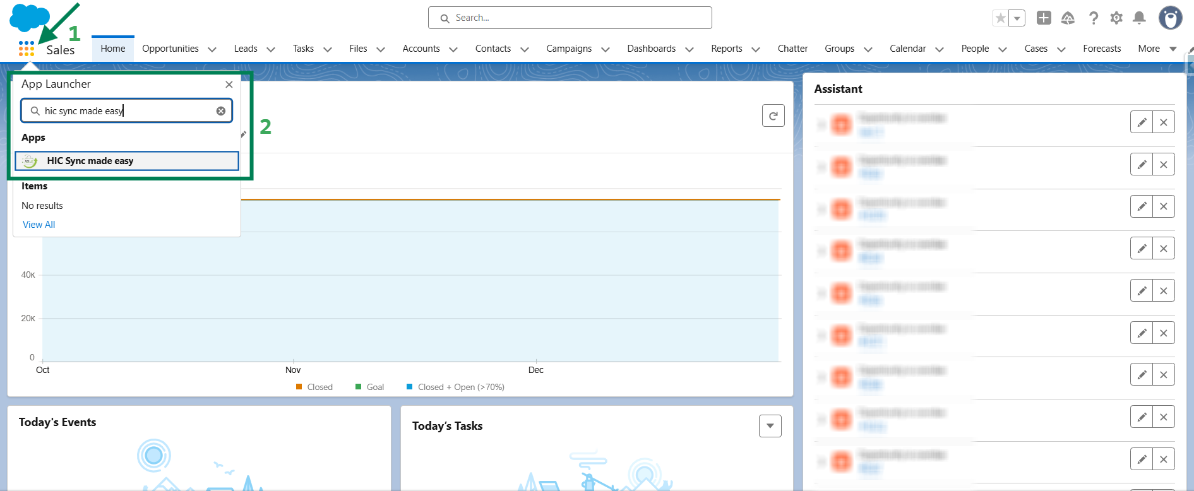
Step 1: Log in to Salesforce and in App Launcher search "HIC Sync made easy". Click on it.
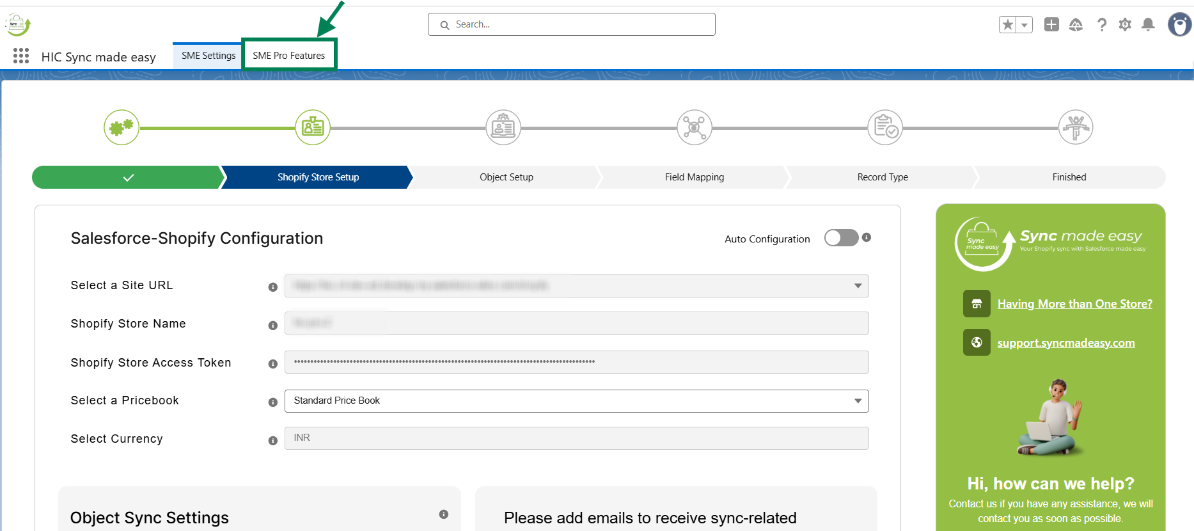
Step 2: Go to "SME Pro Features".
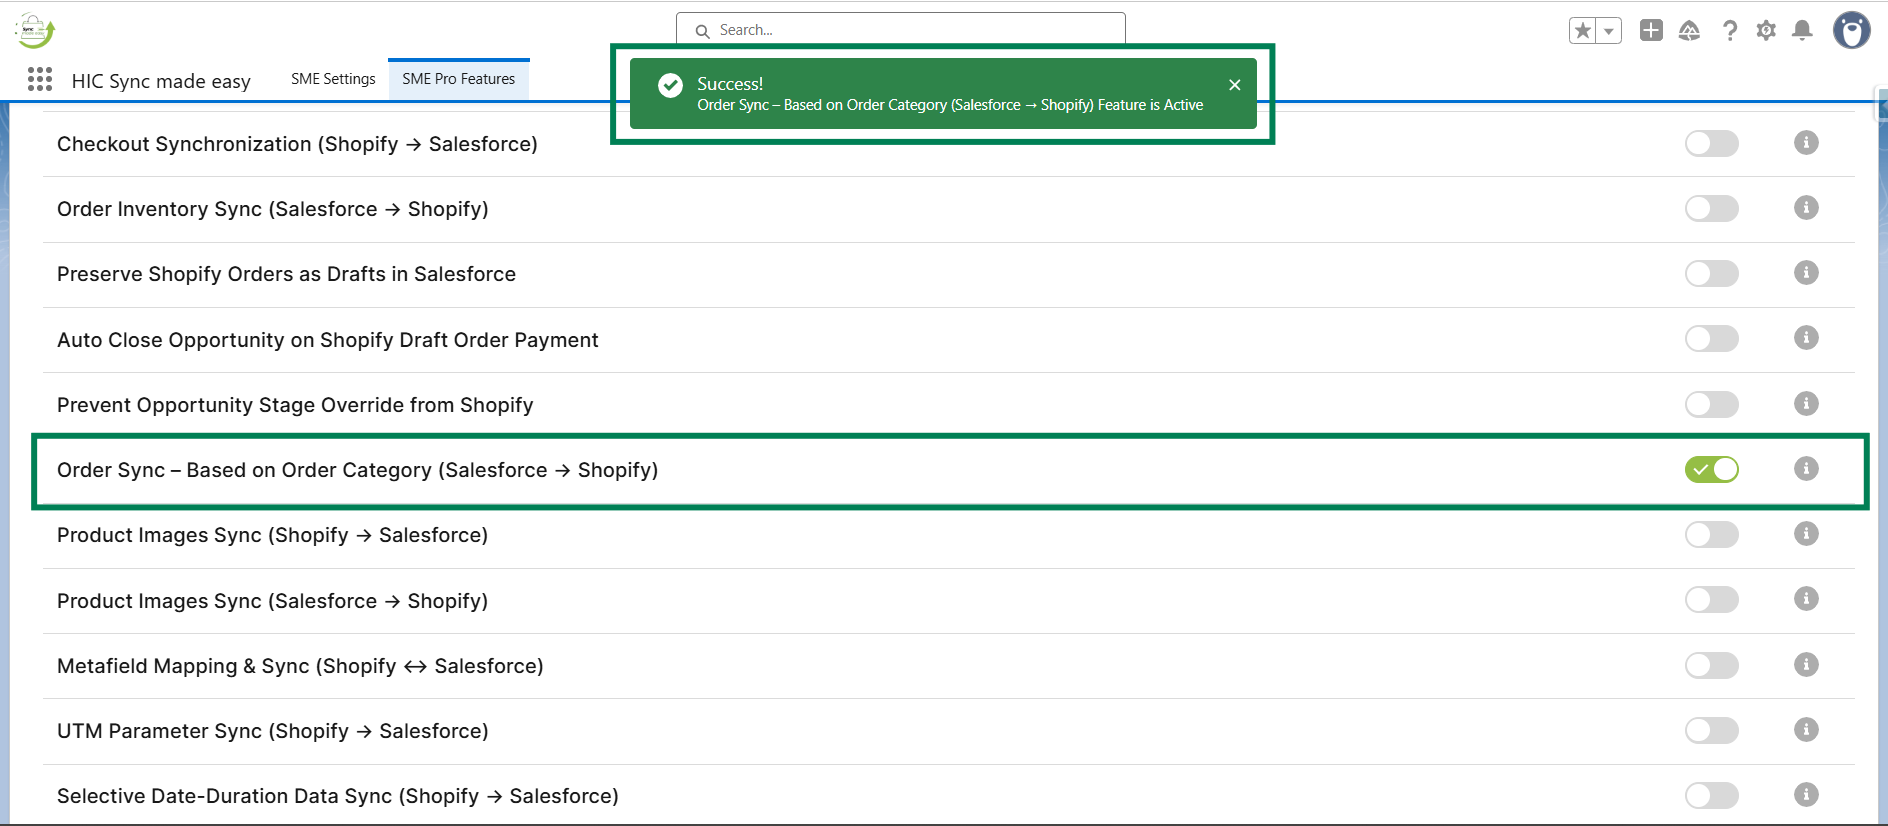
Step 3: Enable the “Order Sync – Based on Order Category (Salesforce → Shopify)” feature toggle button.
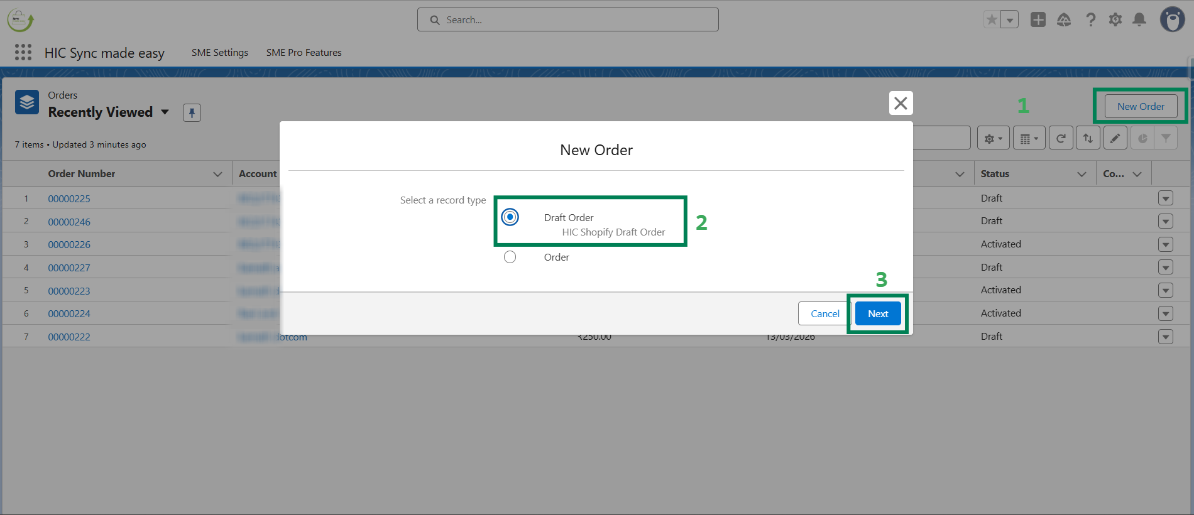
Step 4: Select the record type as Draft Order and click Next.
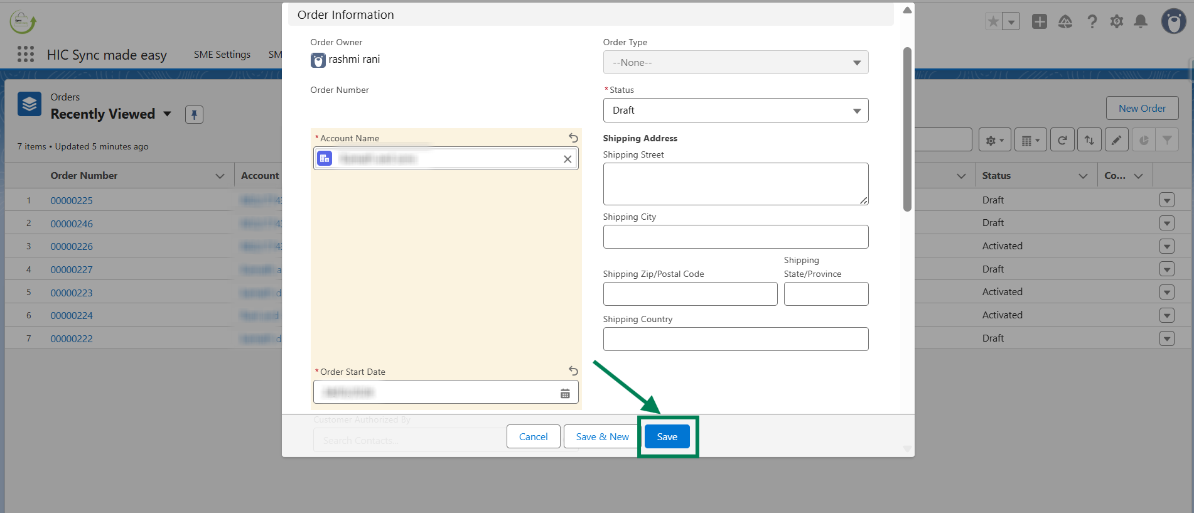
Step 5: Fill the required details and click Save.
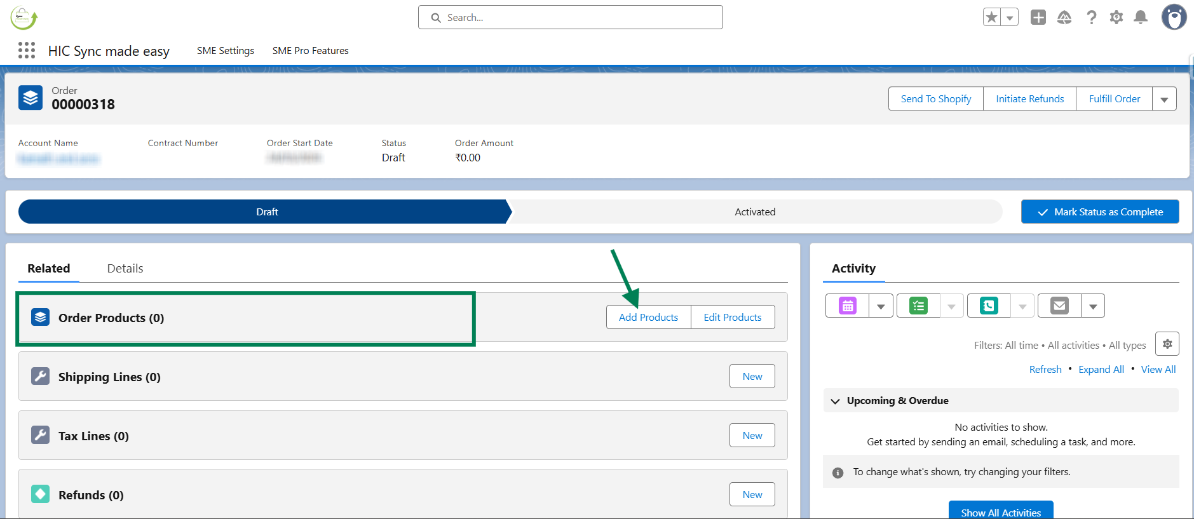
Step 6: In Order Products, click on "Add Products".
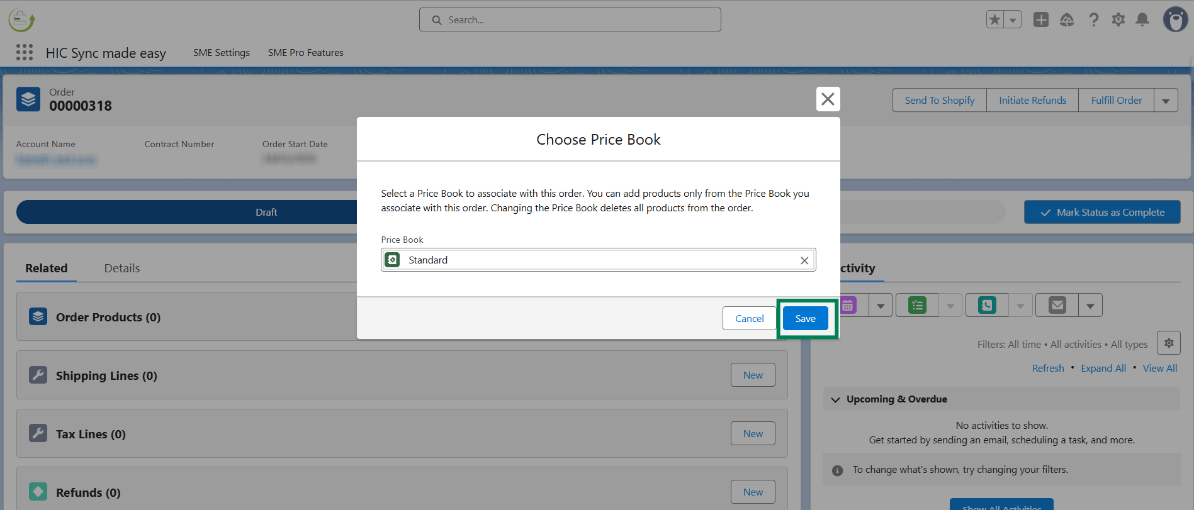
Step 7: Select the "Pricebook".
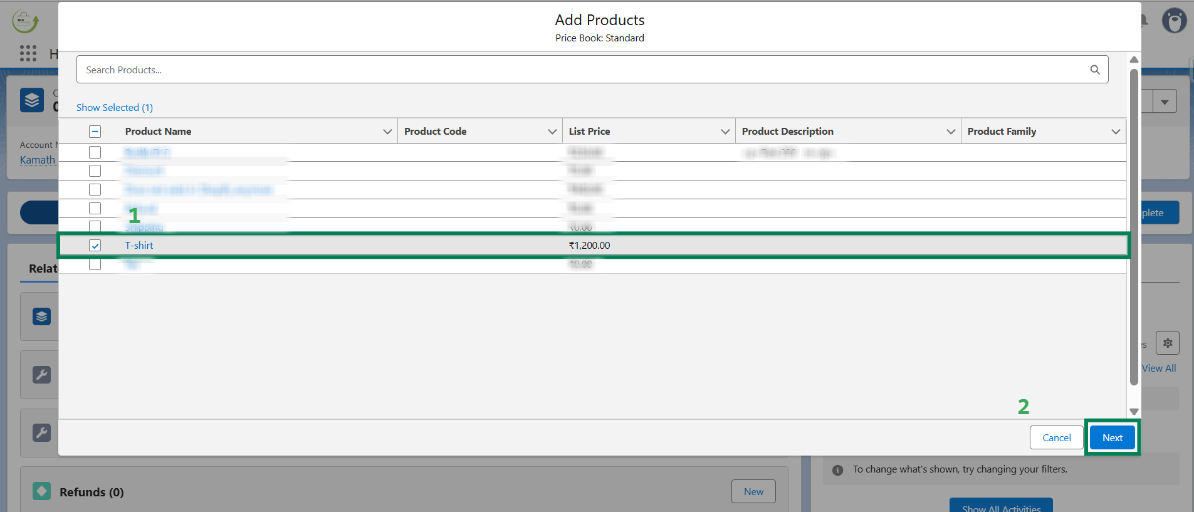
Step 8: Choose the product you want to add to the order and click Next.
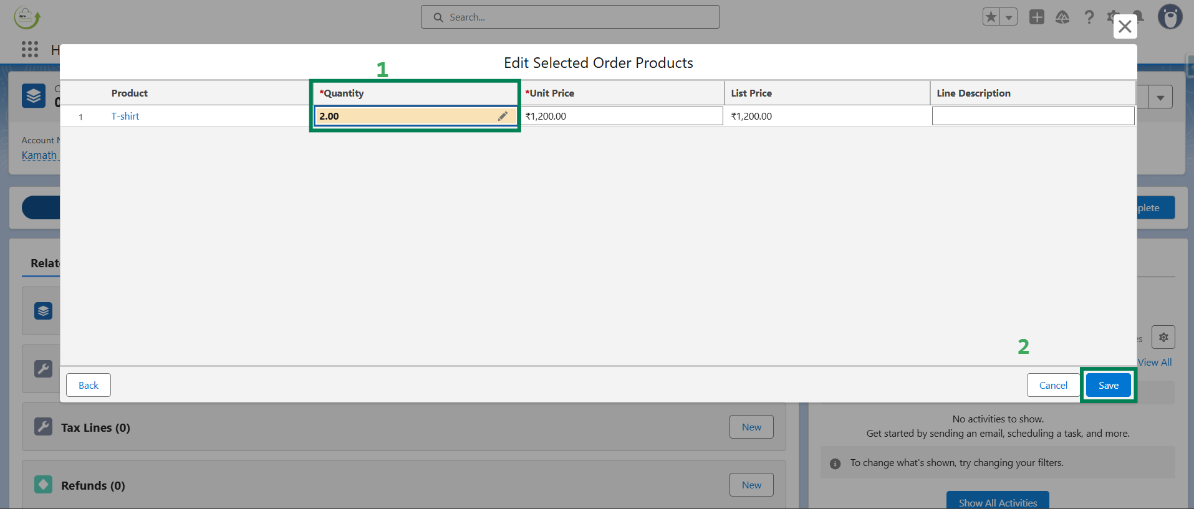
Step 9: Enter the quantity and click Save.
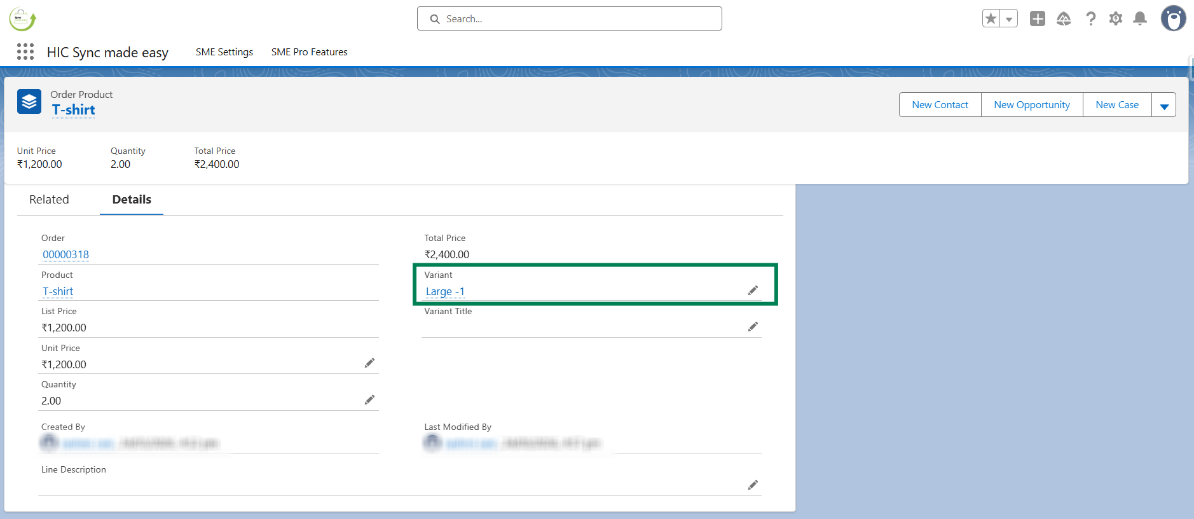
Step 10: In Order Product, add the variant as well.
Note:
If you want to add a new status category, follow these steps: Setup → Object Manager → Order → Fields & Relationships → Status → Order Status Picklist Values → New → Enter Label, API Name, and Status Category → Select Record Type → Save.
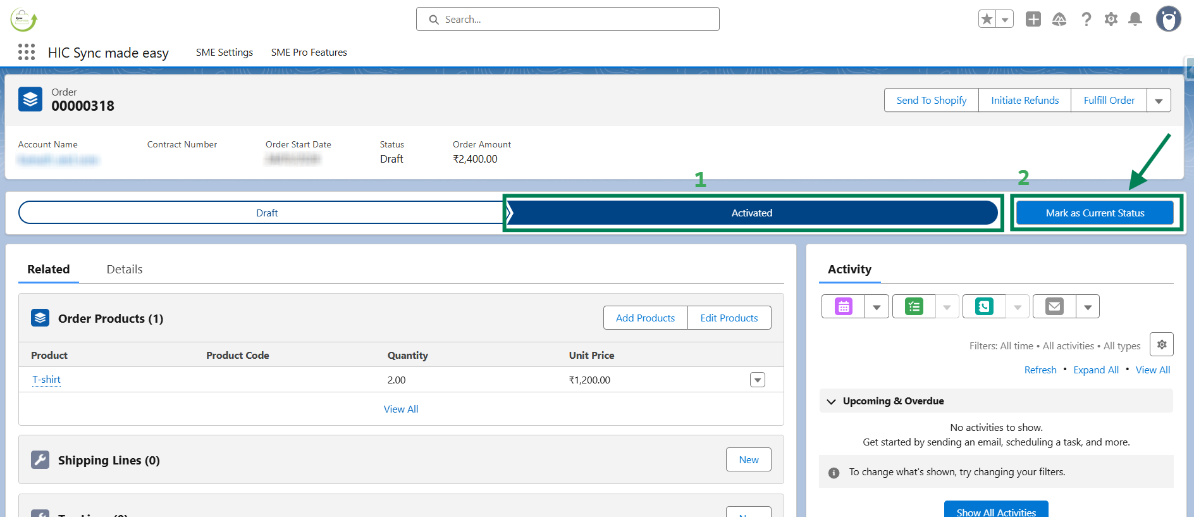
Step 11: Update the order status category from Draft to Activated and mark it as the current state.
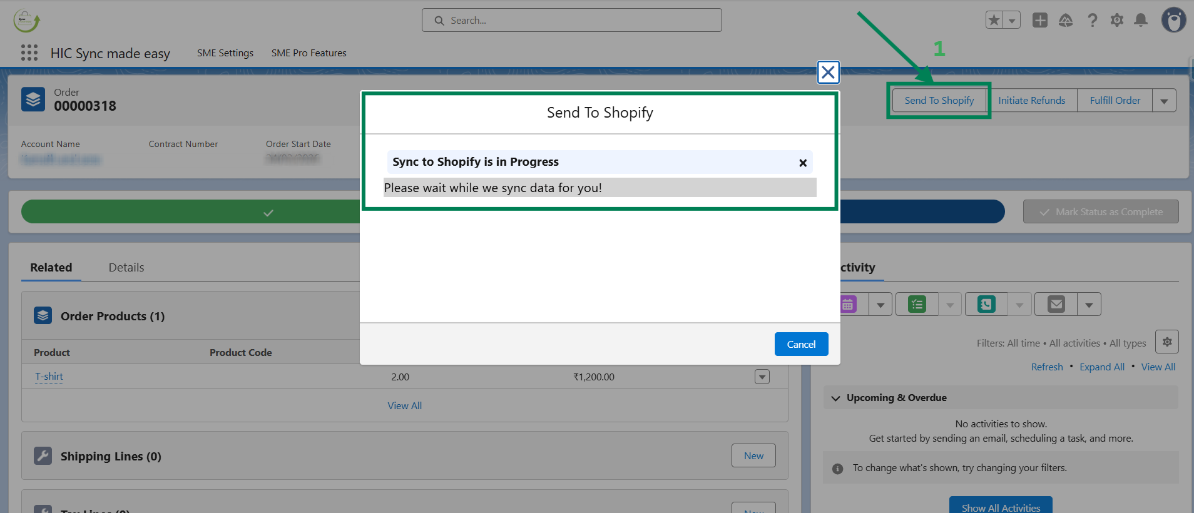
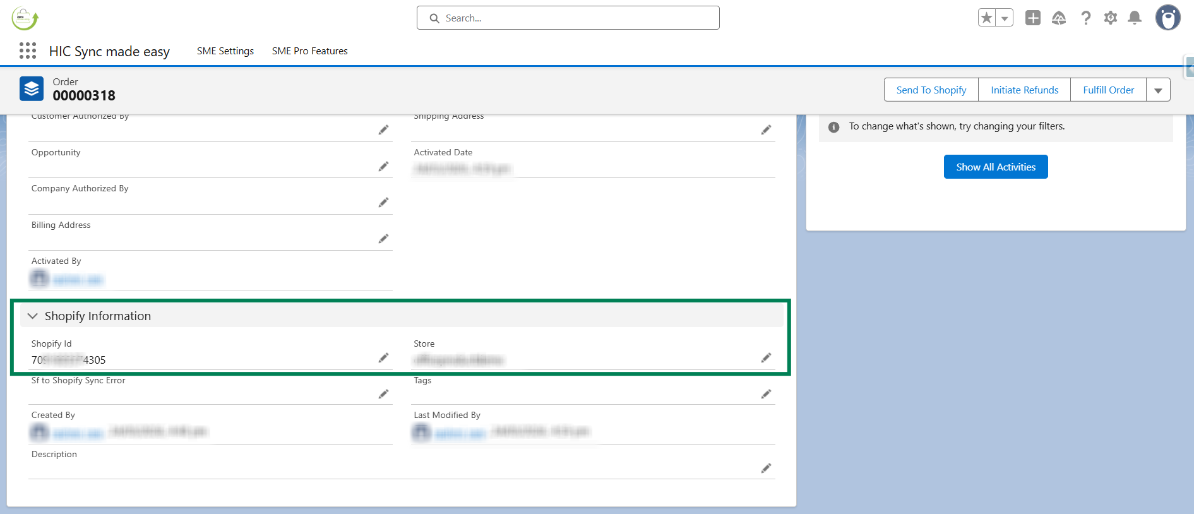
Step 12: Click on the "Send to Shopify" button.
Step 13: After syncing, the Shopify ID and Store Name will be displayed in the order. Copy the Shopify ID.
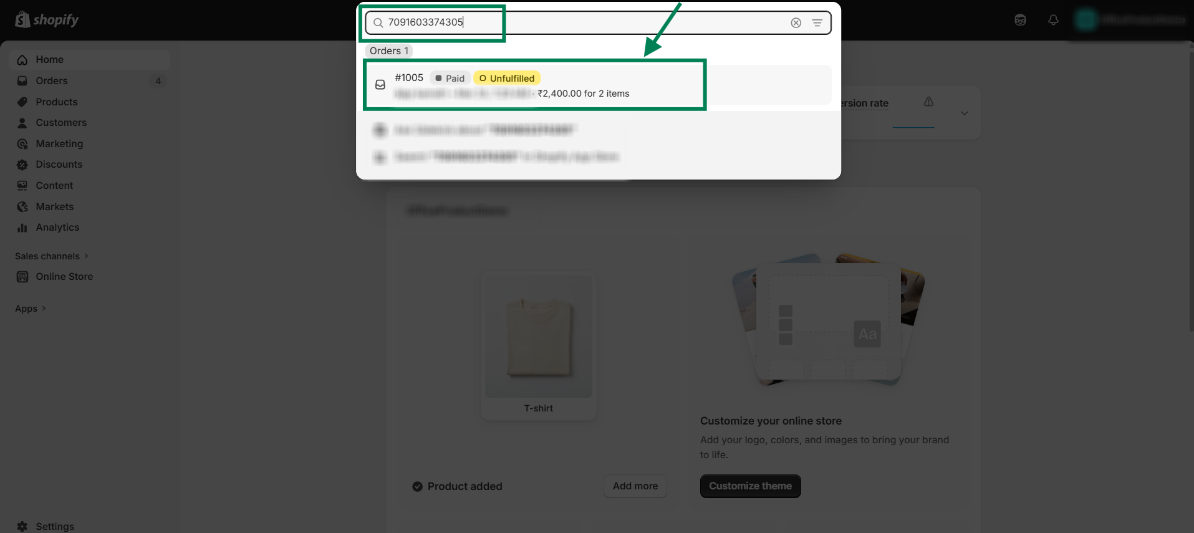
Step 14: In Shopify, paste the Shopify ID in the search bar.
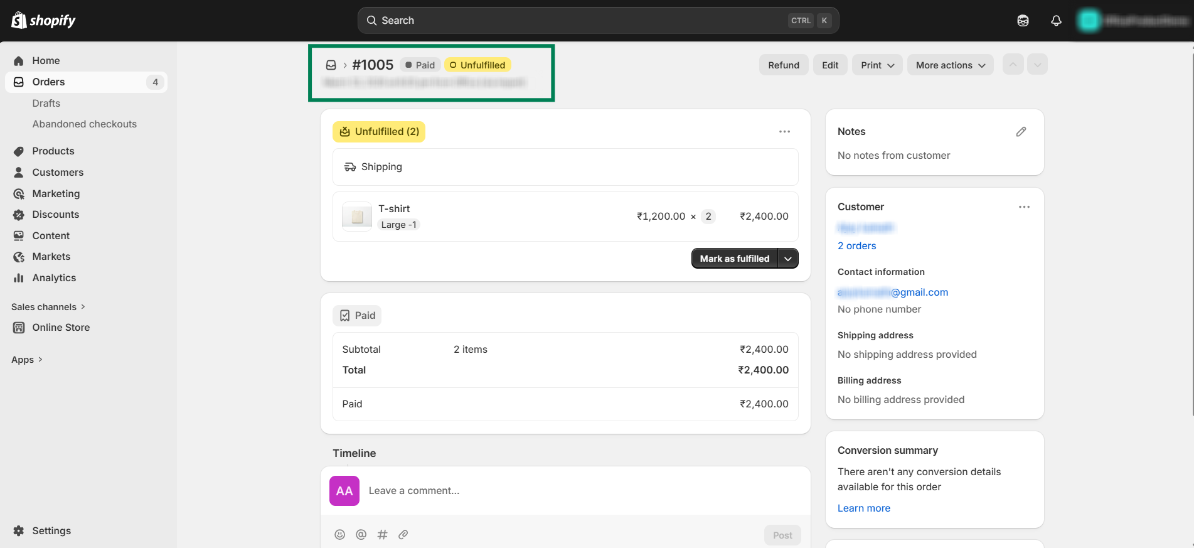
Step 15: Open the order and verify the status category.
This feature syncs orders from Salesforce to Shopify based on their status category, no matter the record type.
Thanks!
Was this article helpful?
That’s Great!
Thank you for your feedback
Sorry! We couldn't be helpful
Thank you for your feedback
Feedback sent
We appreciate your effort and will try to fix the article
